Rainbow Ice Cream Cone – Free Crochet Pattern
2. Introduction
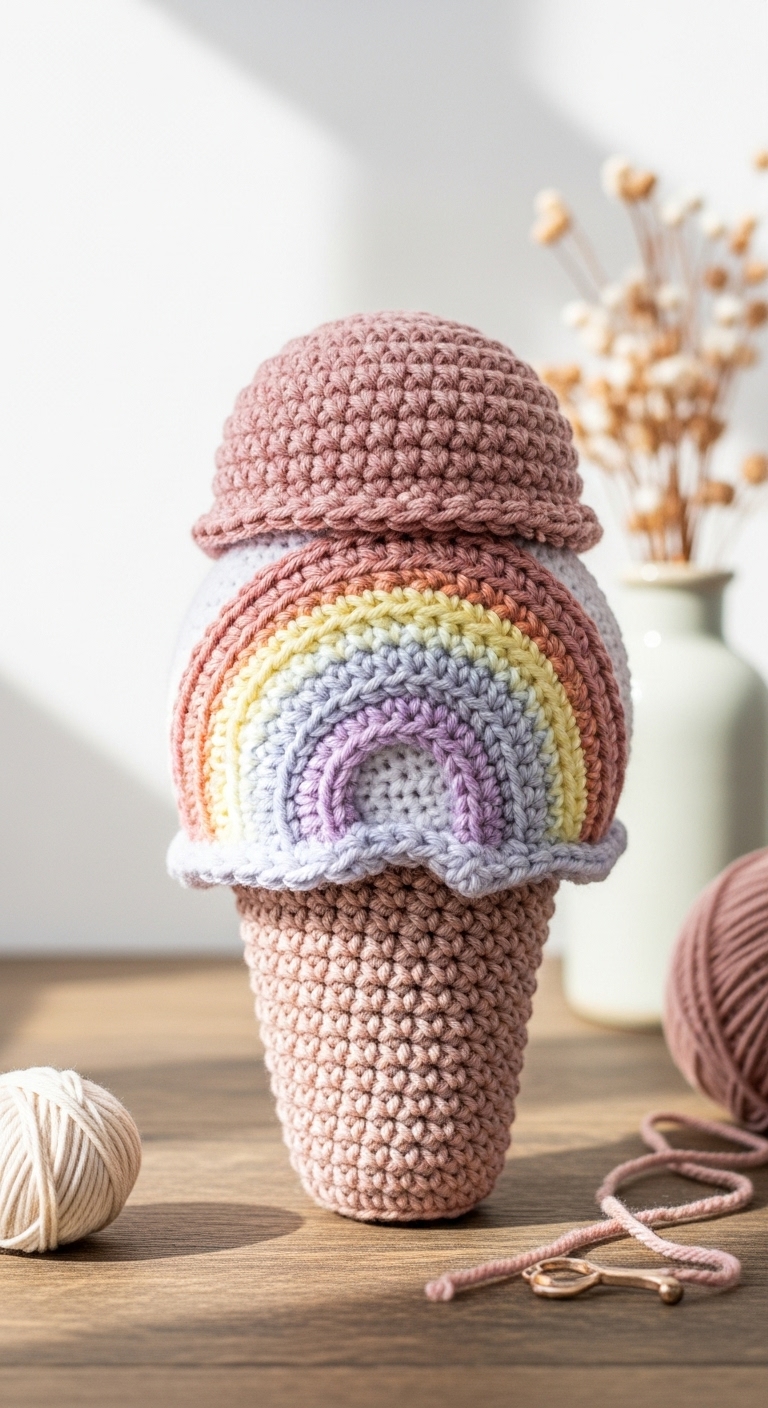
Welcome to the delightful world of crochet! Today, we’re diving into a whimsical project that is sure to bring a smile to your face: the Rainbow Ice Cream Cone! This adorable plushie measures approximately 8 inches tall, making it the perfect size for cuddles or as a decorative piece for your home. Its vibrant colors and playful design make it a fantastic gift for friends and family or a charming seasonal decoration for summer events.
For this project, you’ll need a selection of soft, vibrant yarn in complementary adult-friendly colors. I recommend using a rich cream for the cone, a playful pastel rainbow palette for the scoop, and a chocolate brown for the chocolate drizzle. Crocheting this ice cream cone is not only fast and fun, but it also allows you to explore your creativity while practicing basic crochet techniques. This pattern is beginner-friendly, making it accessible to crocheters just starting their journey. It’s perfect for gifting to loved ones, especially during summer or at ice cream-themed parties!
3. Materials Needed
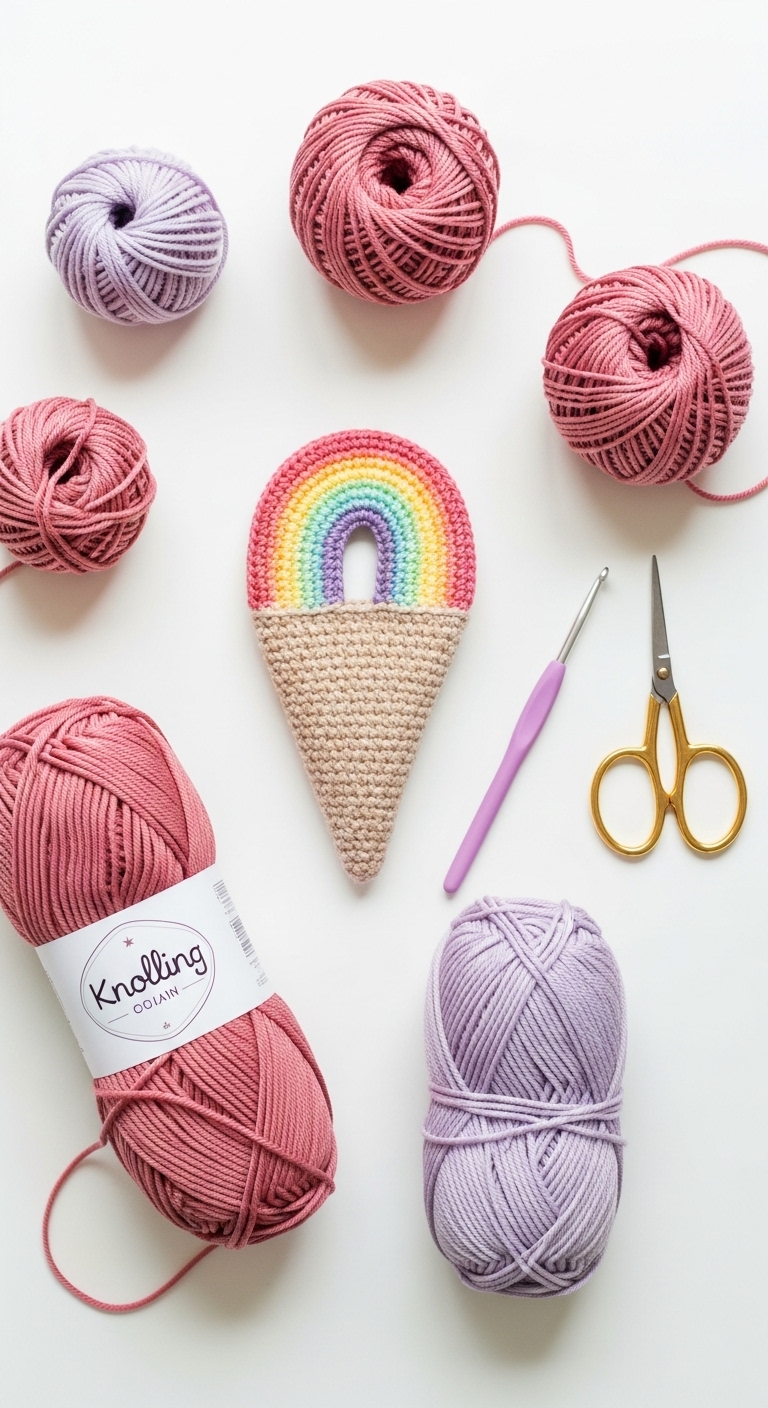
– Yarn: Worsted weight yarn in cream (approximately 100 yards), rainbow colors (red, yellow, green, blue, purple – approximately 20 yards each), and chocolate brown (approximately 20 yards)
– Hook: 3.5mm or 4.0mm crochet hook
– Eyes: 12mm safety eyes or black embroidery thread for sewing eyes
– Stuffing: Polyester fiberfill stuffing
– Needle: Tapestry needle for sewing
– Marker: Stitch marker for marking rounds
– Optional extras: Fabric glue for securing embellishments, sprinkles if desired
4. Designer Notes / Tips
When creating the Rainbow Ice Cream Cone, you’ll primarily use single crochet (sc) stitches. For added texture, consider using the half double crochet (hdc) stitch for the drizzle. It’s a great way to add depth and visual interest to your project.
Regarding stuffing, I recommend a medium density for the ice cream scoop to ensure it holds its shape while remaining fluffy. For the cone, a lighter stuffing will help maintain its cone shape without being too rigid. When assembling the pieces, use a tapestry needle to securely sew the ice cream scoop onto the cone, and don’t forget to add your safety eyes before fully stuffing the scoop!
If you’re looking for yarn substitutions, any soft worsted weight yarn will do, but I suggest using a cotton blend for a lovely summer touch. Be mindful of your gauge; if your crochet is too tight, your finished piece may end up smaller than expected. A relaxed tension will yield a lovely, plump ice cream cone. Lastly, if you’re crafting for children, consider using securely sewn eyes or embroidery thread instead of safety eyes for safety.
5. Pattern Instructions
For Plushies:
Cone:
Ice Cream Scoop:
Chocolate Drizzle (optional):
Assembly:
1. Position the ice cream scoop on top of the cone and pin it in place with your stitch marker.
2. Using a tapestry needle, sew around the base of the scoop, attaching it securely to the cone.
3. Optionally, you can add sprinkles or embellishments for an extra touch!
6. Closing & Social Engagement
Congratulations on completing your very own Rainbow Ice Cream Cone! This cheerful plushie is sure to brighten up any space or make a delightful gift. I’d love to see your version! Leave a comment below sharing your experience or any color combinations you tried. Remember, the possibilities are endless with crochet—what unique twist will you add to your ice cream cone? Don’t forget to share your finished creations on social media!