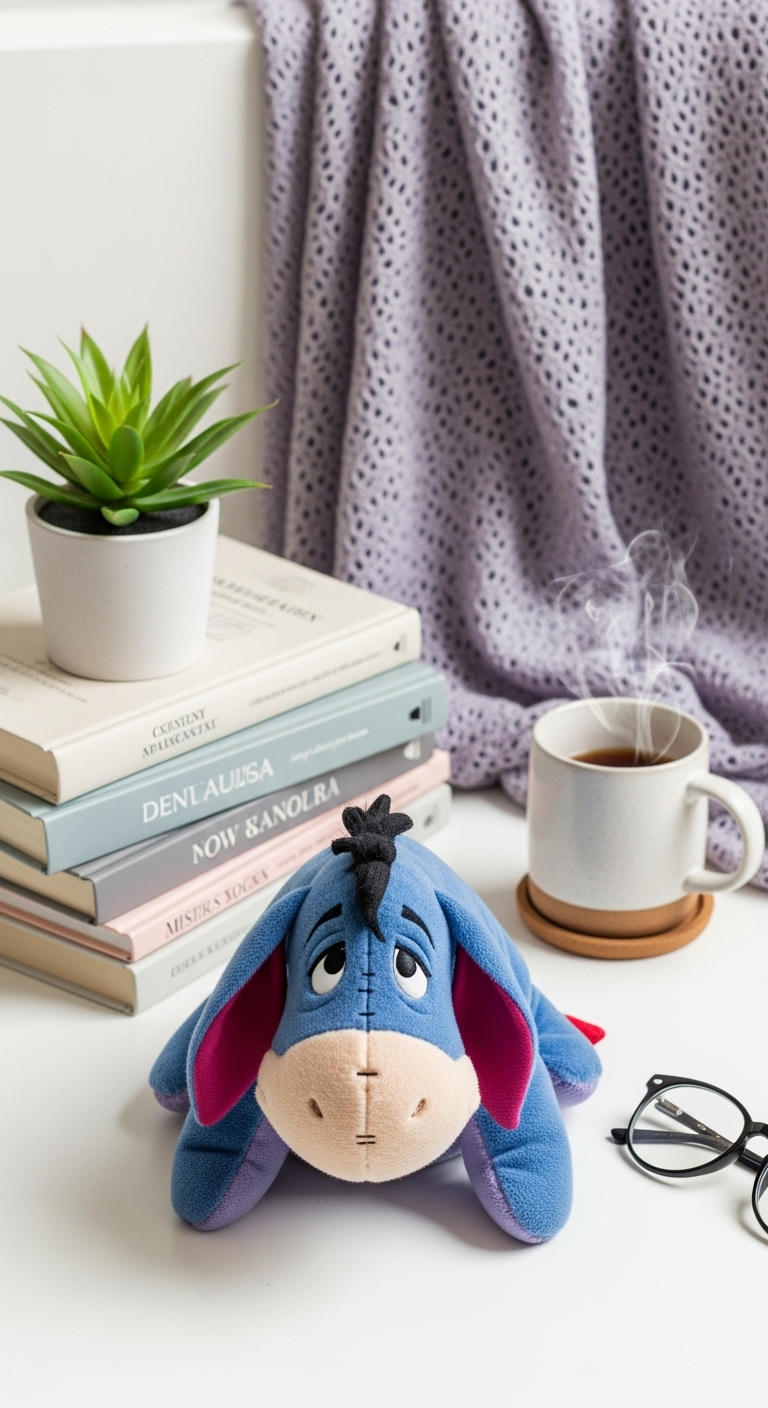
Eeyore – Free Crochet Pattern
2. Introduction
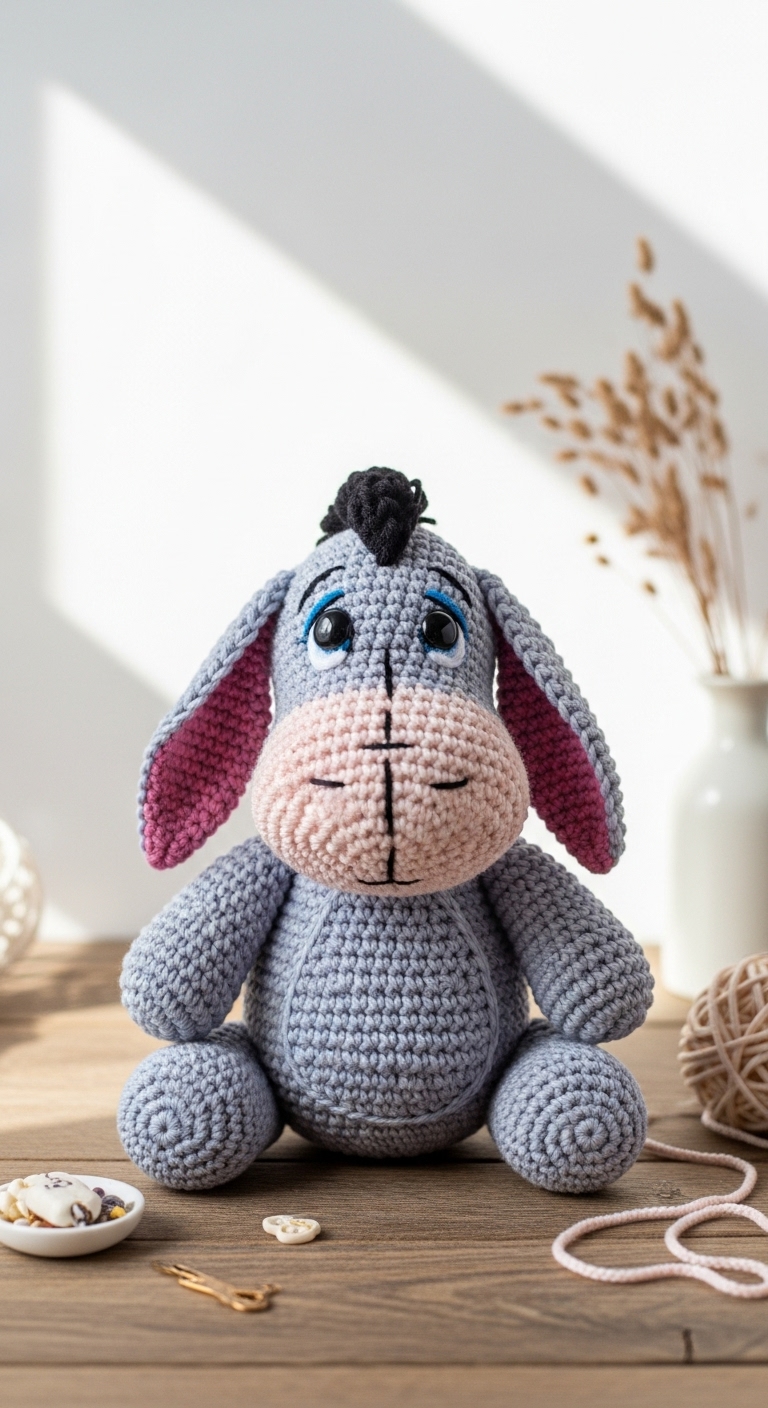
Welcome to the wonderful world of crochet where today, we will create a delightful Eeyore plushie! Measuring approximately 10 inches from head to toe, this charming little character captures the essence of everyone’s favorite gloomy yet lovable donkey. With soft, muted shades of gray, lavender, and a touch of pale pink, Eeyore is not only adorable but also perfect for an adult aesthetic. Imagine adding this whimsical plushie to your home décor or gifting it to a friend who cherishes Winnie-the-Pooh memories!
This project is not only quick to complete—taking around 4 to 6 hours—but it’s also incredibly satisfying to watch Eeyore come to life stitch by stitch. Ideal for crocheters at a beginner level, this pattern guides you through simple yet effective techniques that will build your confidence as you create. Whether you’re making it as a thoughtful gift for a loved one or as a charming addition to your collection, this Eeyore plushie is sure to bring joy.

3. Materials Needed
– Yarn: Worsted weight (4) yarn in:
– Gray (about 200 yards)
– Lavender (about 50 yards)
– Pale pink (about 30 yards)
– Hook: 3.5mm or 4.0mm crochet hook
– Eyes: 12mm safety eyes
– Stuffing: Polyester fiberfill stuffing
– Needle: Tapestry needle for sewing
– Marker: Stitch marker
– Optional extras: Pipe cleaners for tail support
4. Designer Notes / Tips
When crocheting Eeyore, you’ll be using a basic single crochet (sc) stitch throughout, making it accessible for beginners. If you’re looking to add some texture, consider using front post double crochet (fpdc) for the tail, which will create a cute, bouncy effect.
For stuffing, I recommend a light filling for the head to maintain its shape, while the body can be slightly firmer for stability. Remember to stuff the pieces as you go along; this will make it easier to shape Eeyore properly.
When assembling, use a tapestry needle to sew the pieces together securely, ensuring that no stuffing escapes. If you want to make Eeyore child-safe, you can embroider the eyes instead of using safety eyes.
As for yarn substitutions, any worsted weight yarn in complementary colors can work beautifully. Just be mindful of your gauge, as different yarns can slightly alter the final size. Aim for a tension that allows the stuffing to remain hidden but still gives Eeyore a plush feel.
5. Pattern Instructions
For Plushies:
Head:
Body:
Arms (Make 2):
Legs (Make 2):
Ears (Make 2):
Tail:
Assembly:
– Attach the head to the body using the long tail from the body.
– Sew the arms on either side of the body, placing them just below the head.
– Position the legs on the bottom, and sew them securely.
– Attach the ears to the top of the head, paying attention to their placement.
– Sew the tail to the back of the body.
– Insert the safety eyes between rounds 7 and 8 of the head.
6. Closing & Social Engagement
Congratulations on creating your very own Eeyore plushie! I’d love to see your version. Leave a comment below sharing your experience with the pattern. What color combination will you try? Don’t forget to share your finished Eeyore on social media—after all, handmade items deserve to be celebrated!