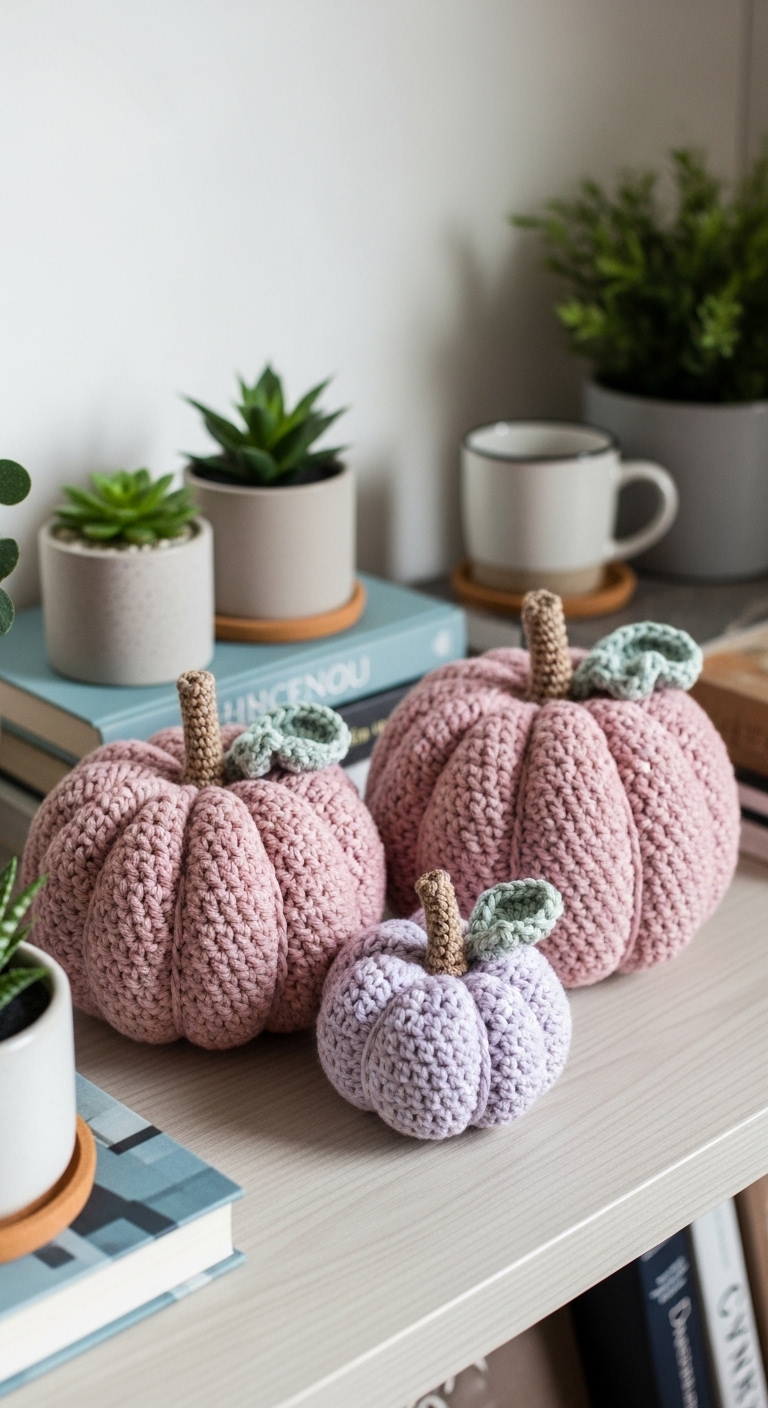
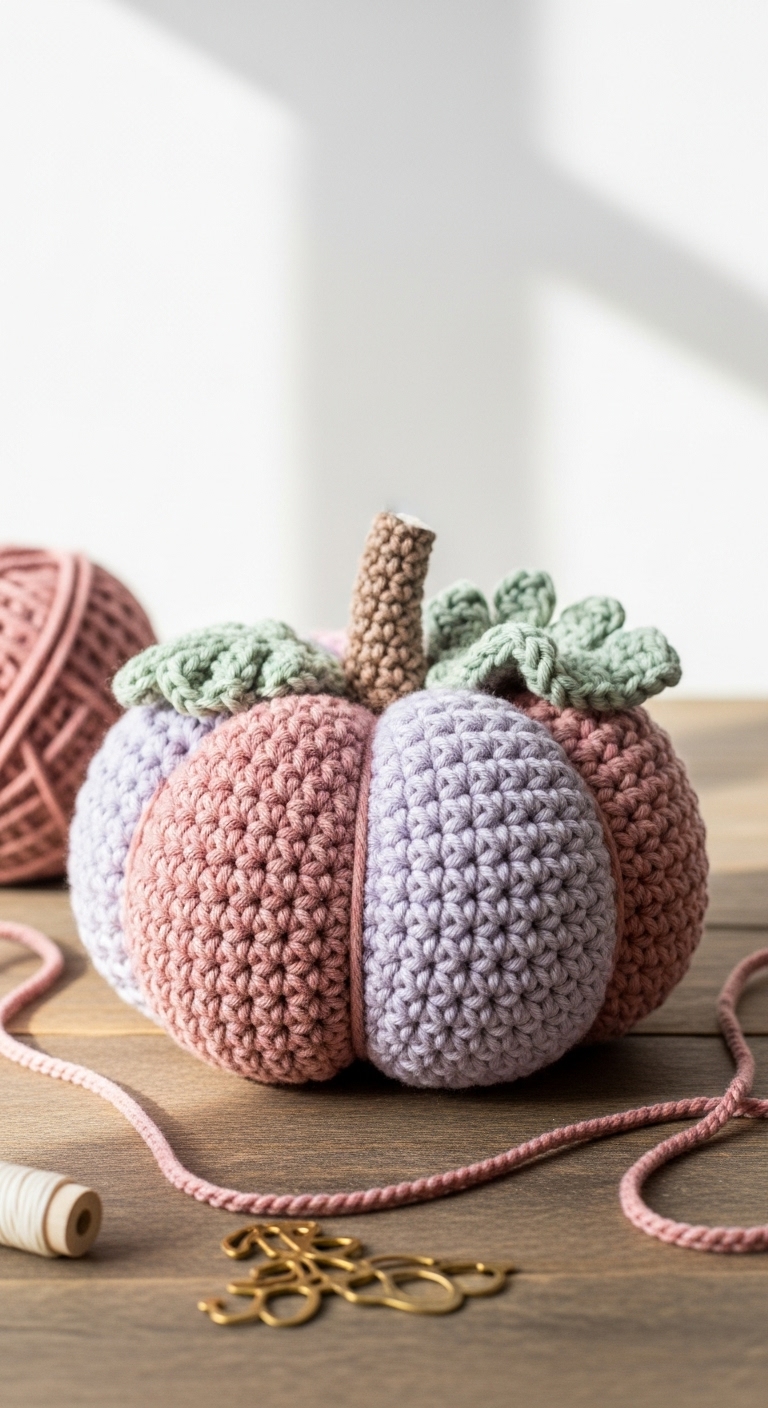
easy crochet pumpkin in 3 different sizes free pattern
2. Introduction
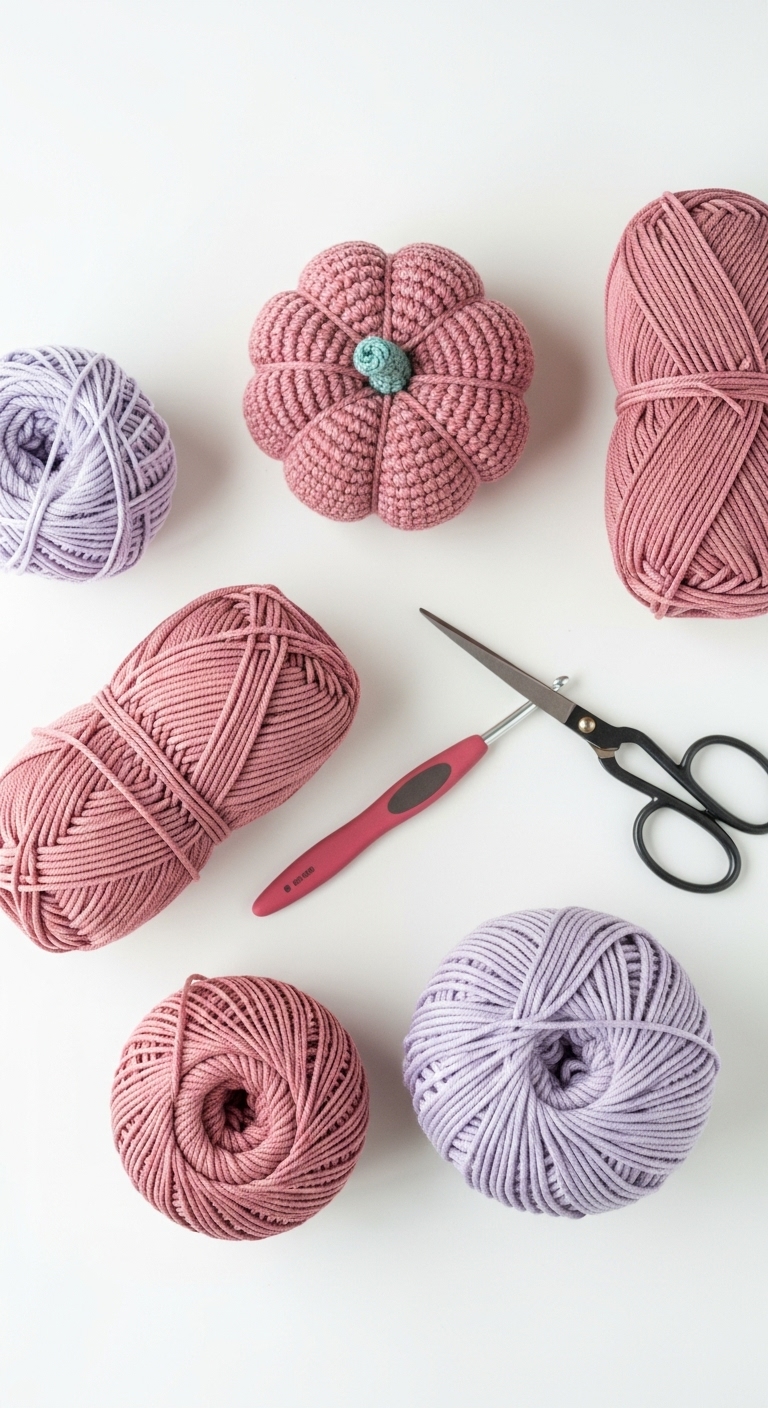
Welcome to a delightful crochet adventure where we create easy crochet pumpkins in three charming sizes! These plush pumpkins make perfect decor for the autumn season, with the option to create small, medium, and large versions to suit your space. Ranging from about 3 to 8 inches in height, they’ll add a touch of fall whimsy to your home or serve as unique gifts for friends and family.
For this project, I recommend using a soft, medium-weight yarn in a classic pumpkin orange, a deep green for the stems, and a touch of cream for accents. These adult-friendly colors not only evoke the cozy feeling of fall but also make your pumpkins eye-catching and sophisticated. This pattern is beginner-friendly, making it an excellent choice for new crocheters eager to try their hand at creating seasonal decor. Plus, these pumpkins are quick to make, offering a satisfying project that you can easily whip up over a weekend!
3. Materials Needed
– Yarn: Worsted weight yarn in pumpkin orange (approx. 100 yards), deep green (approx. 20 yards), and cream (approx. 10 yards)
– Hook: 4.0mm crochet hook
– Eyes: N/A (optional if you wish to add embellishments)
– Stuffing: Polyester fiberfill stuffing
– Needle: Tapestry needle for weaving in ends and sewing pieces
– Marker: Stitch marker for keeping track of rounds
– Optional extras: Twine or ribbon for decorative accents
4. Designer Notes / Tips
Creating these pumpkins involves basic stitches, but you can add texture by using a front post double crochet (FPdc) for the body if you’re feeling adventurous. For stuffing, I recommend a light and squishy fill to give your pumpkins a more plush and realistic look. Stuff them just enough to keep their shape without overfilling – you want them to be soft and cuddly!
When assembling your pumpkins, use a tapestry needle to sew the stem securely to the body. You can make the stem by simply rolling a small piece of green yarn into a tube and sewing it on top. If you’re considering yarn substitutions, any worsted weight yarn will work, but consider a cotton blend for a sturdier finish.
Keep in mind that gauge isn’t as crucial for this project since the pumpkins are meant to be whimsical; however, if you are concerned about size, aim for a tension that allows for a tight fabric to prevent stuffing from showing. Finally, if you’re making these for children, ensure no small parts are included, or use embroidery to create facial features instead of safety eyes.
5. Pattern Instructions
For Plushies:
Small Pumpkin (3 inches)
– Round 1: 6 sc in magic ring (6)
– Round 2: inc in each st (12)
– Round 3: [sc, inc] repeat (18)
– Round 4: [2 sc, inc] repeat (24)
– Round 5-8: sc in each st around (24)
– Round 9: [2 sc, dec] repeat (18)
– Round 10: [sc, dec] repeat (12)
– Stuff the pumpkin lightly and finish with a round of dec until closed. Fasten off.
Medium Pumpkin (5 inches)
– Round 1: 6 sc in magic ring (6)
– Round 2: inc in each st (12)
– Round 3: [sc, inc] repeat (18)
– Round 4: [2 sc, inc] repeat (24)
– Round 5: [3 sc, inc] repeat (30)
– Round 6-9: sc in each st around (30)
– Round 10: [3 sc, dec] repeat (24)
– Round 11: [2 sc, dec] repeat (18)
– Round 12: [sc, dec] repeat (12)
– Stuff the pumpkin firmly and finish with a round of dec until closed. Fasten off.
Large Pumpkin (8 inches)
– Round 1: 6 sc in magic ring (6)
– Round 2: inc in each st (12)
– Round 3: [sc, inc] repeat (18)
– Round 4: [2 sc, inc] repeat (24)
– Round 5: [3 sc, inc] repeat (30)
– Round 6: [4 sc, inc] repeat (36)
– Round 7-10: sc in each st around (36)
– Round 11: [4 sc, dec] repeat (30)
– Round 12: [3 sc, dec] repeat (24)
– Round 13: [2 sc, dec] repeat (18)
– Round 14: [sc, dec] repeat (12)
– Stuff the pumpkin tightly and finish with a round of dec until closed. Fasten off.
Assembly:
To create the stem, make a chain of about 10-12 stitches in deep green, then sc in the second chain from the hook and down the chain. Roll it into a tube and sew it securely to the top center of the pumpkin. You can embellish your pumpkins with twine or ribbons for an extra touch!
6. Closing & Social Engagement
I hope you enjoy making these adorable crochet pumpkins! They are not only fun to create but will also brighten up your fall decor. I’d love to see your version! Leave a comment below and let me know what color combination you choose. Don’t forget to share your finished pumpkins on social media, and let’s spread the joy of handmade crafts together!