Donald Duck and Daisy Duck – Free Crochet Patterns
2. Introduction
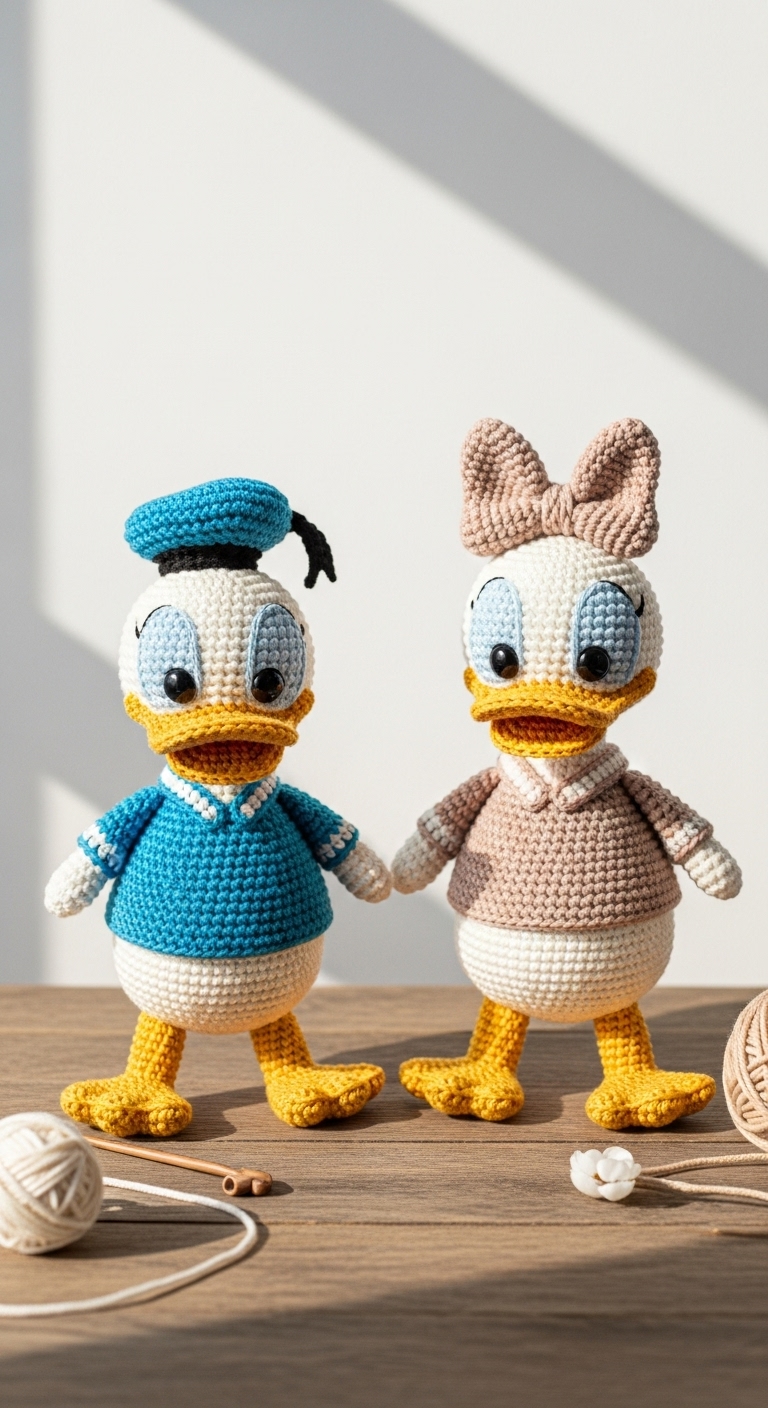
Are you ready to embark on a whimsical crochet adventure? Today, we’re diving into the delightful world of Disney with these free crochet patterns for plushie versions of Donald Duck and Daisy Duck! Each plushie stands approximately 8 inches tall, making them the perfect size for cuddling or displaying on a shelf. Crafted from soft yarn, these characters are sure to bring a smile to anyone’s face.
For this project, you’ll need worsted weight yarn in a few cheerful colors: bright blue for Donald, sunny yellow for Daisy, and classic white for both characters. These color choices create a modern yet nostalgic feel, ideal for adult fans of all ages. The best part? This project is not only quick to make but also incredibly satisfying. With simple stitches and basic shaping, it’s perfect for crocheters who are at a beginner to intermediate skill level. These adorable plushies are excellent gifts for birthdays, baby showers, or just because—who wouldn’t love a handmade Donald or Daisy?
3. Materials Needed
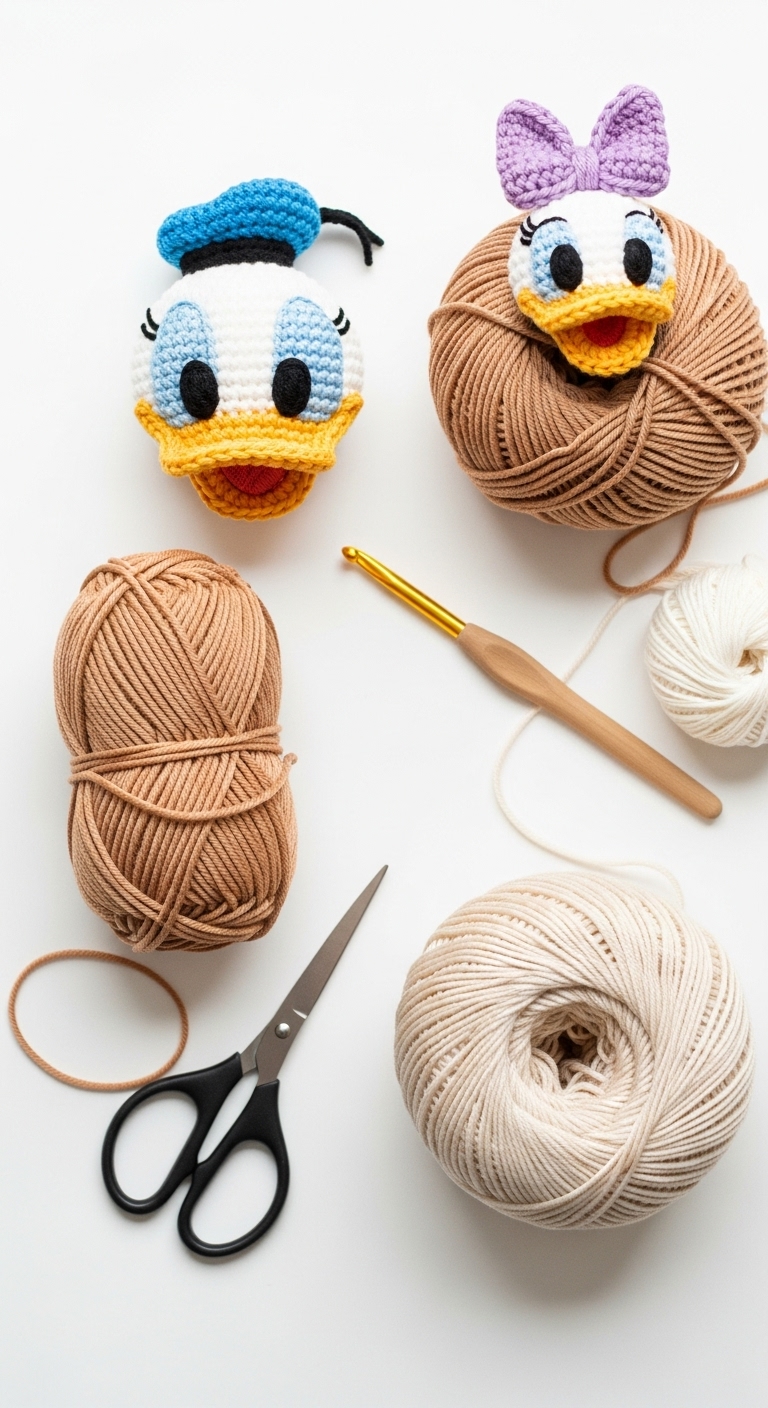
– Yarn: Worsted weight yarn in bright blue (approx. 100 yards), sunny yellow (approx. 50 yards), and white (approx. 75 yards)
– Hook: 3.5mm or 4.0mm crochet hook
– Eyes: Safety eyes (12mm) or black embroidery thread for hand stitching
– Stuffing: Polyester fiberfill stuffing
– Needle: Tapestry needle for sewing
– Marker: Stitch marker
– Optional extras: Pipe cleaners for added stability in legs, buttons for extra decoration (if desired)
4. Designer Notes / Tips
As you crochet, be mindful of your stitch tension to ensure your plushies have a nice, firm structure. Using a combination of single crochet and increases will help create the rounded shapes needed for the heads and bodies of Donald and Daisy. When stuffing your plushies, aim for a medium density—too much stuffing can lead to misshapen limbs, while too little may result in a floppy figure.
For assembly, I recommend sewing pieces together with a tapestry needle to keep everything secure. Placing stitch markers at the beginning of your rounds can also help you keep track of where your work begins, especially when switching colors or working in the round. If you’re making these plushies for children, consider using safety eyes to avoid any choking hazards, or simply embroider the eyes for added safety.
5. Pattern Instructions
For Plushies:
Donald Duck
Head:
Body:
Arms:
Legs:
Assembly:
– Attach the head to the body using the long tail from the head.
– Sew arms on either side of the body.
– Attach legs at the bottom of the body.
– Add a crochet bow or use a small piece of fabric as a bow on Donald’s head if desired.
Daisy Duck
Follow the same pattern as Donald Duck, adjusting the color changes to include sunny yellow for the body and pink for the bow, if you choose to add one.
Note: When working on Daisy’s round head, consider slightly increasing the body size for a more rounded appearance.
6. Closing & Social Engagement
Congratulations on bringing Donald Duck and Daisy Duck to life! I’d love to see your version! Leave a comment below sharing your thoughts or any modifications you made. What color combination will you try? Whether you’re making these as gifts or keeping them for yourself, they’re sure to be cherished. Don’t forget to share your finished plushies on social media with your crochet community—let’s celebrate the joy of handmade creations together!