crochet mini easter gnome free pattern

2. Introduction
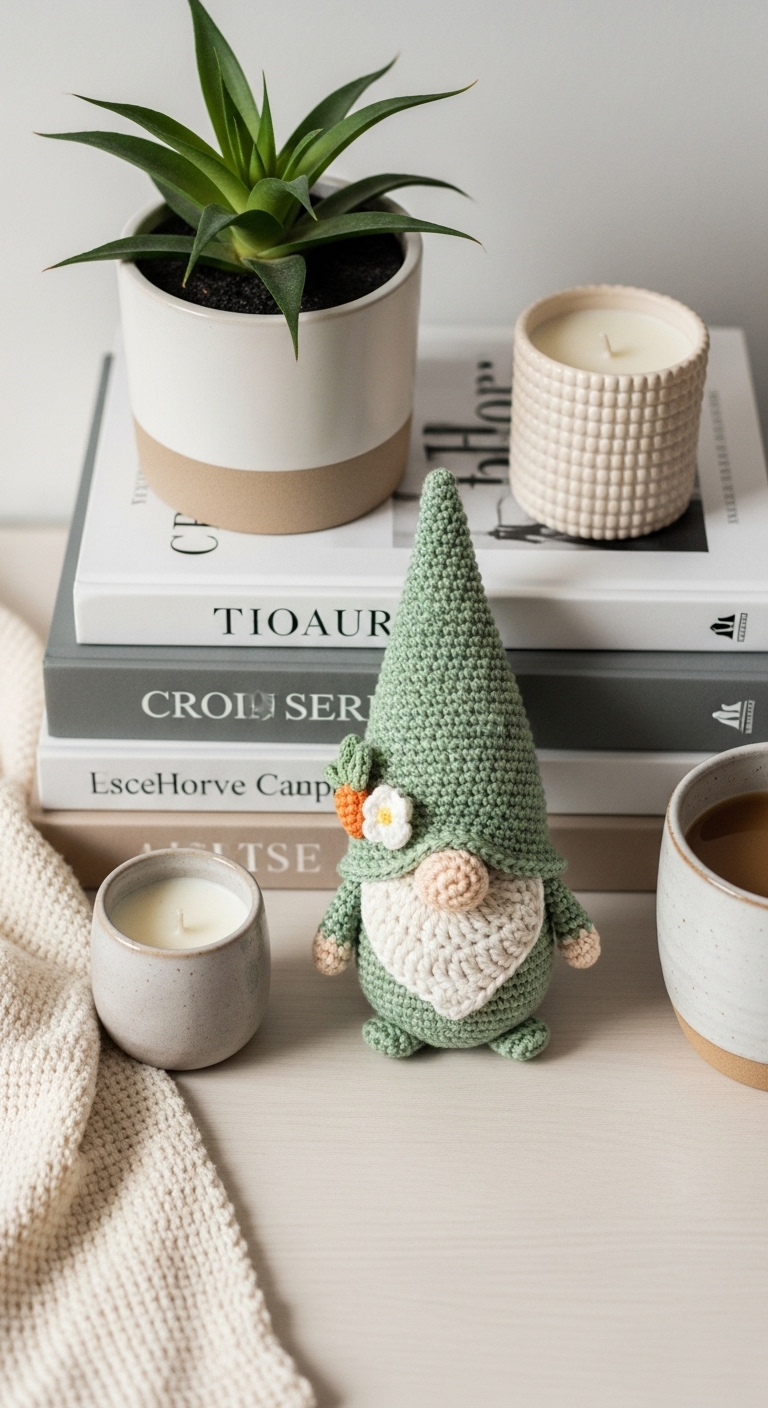
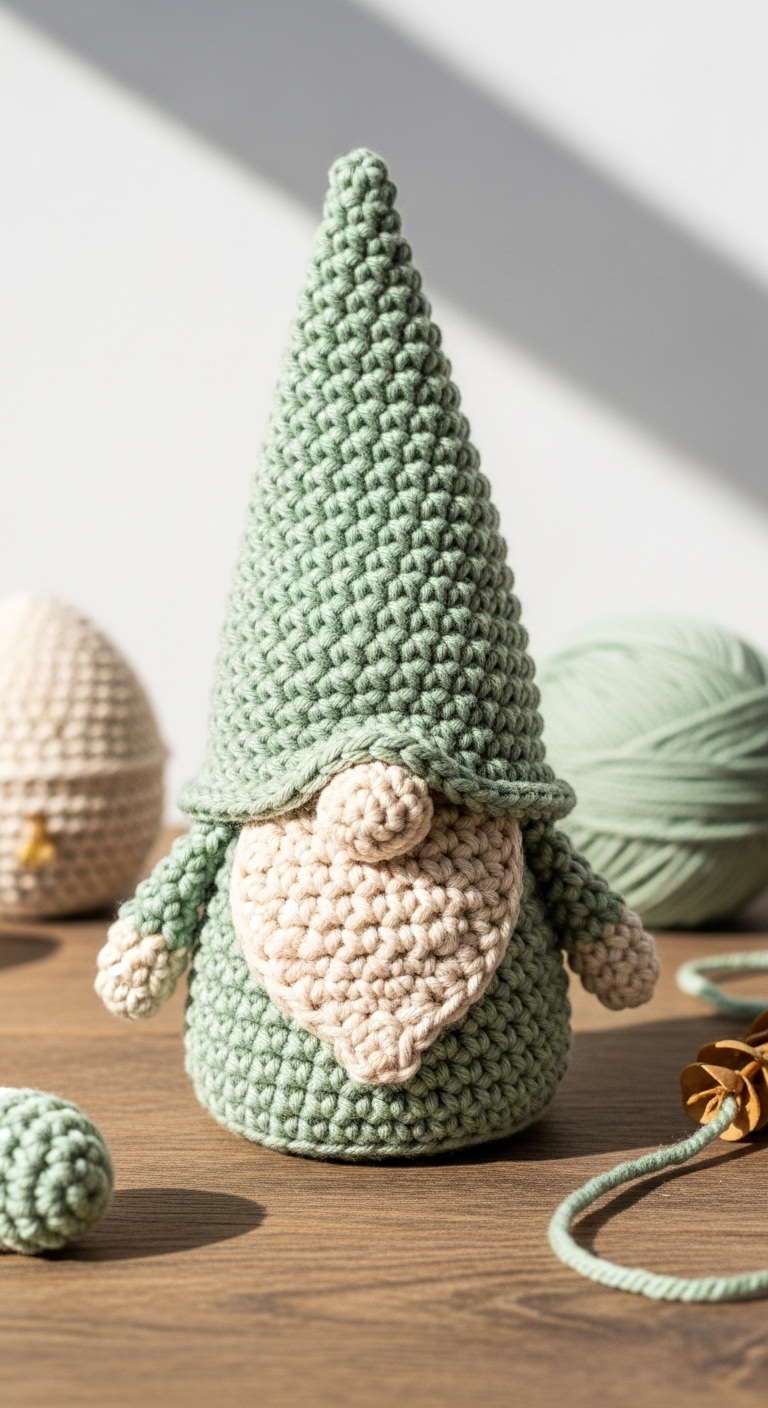
Get ready to celebrate Easter in style with this adorable Crochet Mini Easter Gnome! Standing at approximately 6 inches tall, this delightful little gnome is the perfect festive decoration or gift for your loved ones. With its whimsical charm and bright colors, it brings a touch of joy and magic to your seasonal celebrations.
For this project, you’ll want to use soft worsted weight yarn in cheerful colors like pastel yellow, mint green, and soft lavender. These adult-friendly shades not only create a friendly and inviting vibe but also make it easy to mix and match to suit your style. This pattern is special because it allows you to express your creativity while creating a charming piece that can easily fit into your home decor or be given as a thoughtful gift during the holiday season.
This pattern is beginner-friendly, making it an ideal choice for crafters who are looking to hone their skills or jump into a fun new project. The quick assembly and straightforward stitches ensure that you’ll have your very own gnome ready to celebrate in no time!

3. Materials Needed
– Yarn: Worsted weight yarn in pastel yellow (about 50 yards), mint green (30 yards), and soft lavender (30 yards)
– Hook: 3.5mm or 4.0mm crochet hook
– Eyes: 8mm safety eyes OR black embroidery thread for stitching eyes
– Stuffing: Polyester fiberfill stuffing
– Needle: Tapestry needle for sewing
– Marker: Stitch marker
– Optional extras: Small pom-pom for the hat tip, felt for embellishments
4. Designer Notes / Tips
– Stitch technique: You’ll be using basic stitches like single crochet (sc), increase (inc), and slip stitch (sl st) throughout the project. Don’t worry if you’re unfamiliar with any; they’re all beginner-friendly and commonly used!
– Stuffing density: For a charmingly plump gnome, aim for a medium density in your stuffing. This helps maintain the shape while still allowing for a soft and cuddly feel.
– Assembly: Take your time when joining the pieces together. It’s best to sew the hat and body onto the head gently to ensure a neat finish.
– Yarn substitutions: If you’d like to use cotton yarn for a more structured feel, that’s perfectly fine too! Just ensure that the gauge remains consistent.
– Gauge tips: While gauge is not crucial for this project, if you want your gnome to be a specific size, check your tension and adjust the hook size if necessary.
– Safety considerations: If you plan to give this gnome to a young child, consider using stitched eyes instead of safety eyes to avoid any choking hazards.
5. Pattern Instructions
For Plushies:
Head:
Body:
Arms (Make 2):
Hat:
Assembly:
1. Sew the head to the body securely.
2. Attach the arms on either side of the body.
3. Carefully place safety eyes on the head between Rounds 4 and 5, about 3 stitches apart, or stitch eyes if preferred.
4. Position the hat on the gnome’s head, making sure it covers the top of the head. Stitch in place.
5. Add a pom-pom or embellishment to the tip of the hat if desired.
6. Closing & Social Engagement
I hope you enjoy crocheting your very own Mini Easter Gnome! I’d love to see your version – leave a comment below sharing your color combinations! What fun twist will you add to your gnome? Don’t forget to share your finished gnome on social media; it’s always exciting to see how others interpret the pattern!