crochet gnome along cal 2024

2. Introduction
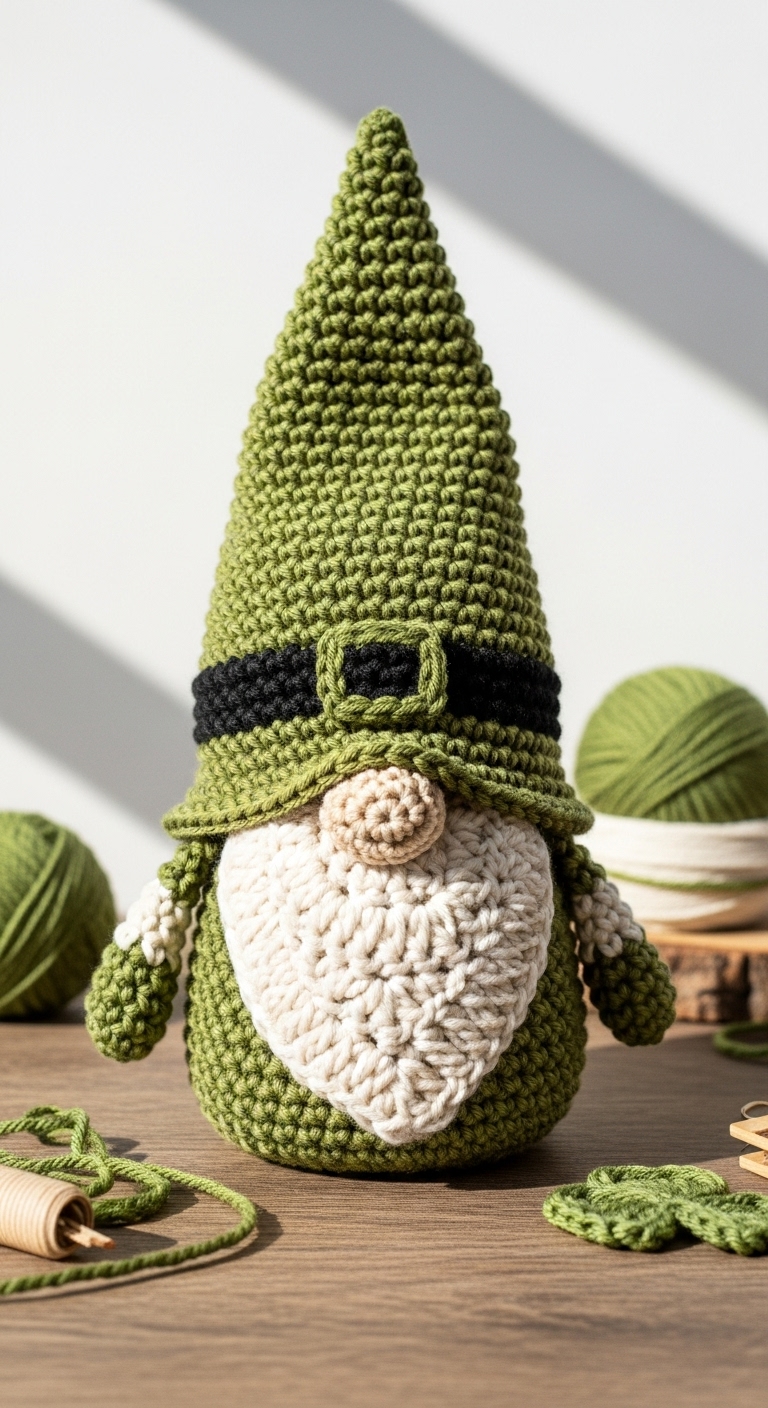
Welcome to the “Crochet Gnome Along CAL 2024”! This delightful project features an adorable gnome plushie that stands approximately 12 inches tall, making it the perfect tabletop decoration or gift for friends and family. With its whimsical charm, this gnome can brighten up any space and is sure to bring a smile to anyone who sees it.
For this project, you’ll use medium-weight yarn in a lovely palette of complementary adult-friendly colors. Think of soft greys, earthy greens, and warm creams that blend harmoniously together. This combination not only appeals to adult aesthetics but also allows for a playful yet sophisticated gnome that will fit right in with your home decor.
This CAL is not only fun and engaging but also quick to complete, allowing you to create a stunning piece in just a few sessions. It is beginner-friendly, making it an excellent choice for those who are new to crochet or looking to build their skills. Plus, with the upcoming holiday season, this gnome makes a thoughtful gift that spreads joy and warmth!

3. Materials Needed
– Yarn: Medium-weight yarn (Category 4) in:
– Main color: Soft Grey (approx. 150 yards)
– Accent color: Earthy Green (approx. 50 yards)
– Beard color: Warm Cream (approx. 30 yards)
– Hook: 3.5mm or 4.0mm crochet hook
– Eyes: 12mm safety eyes
– Stuffing: Polyester fiberfill stuffing
– Needle: Tapestry needle for sewing
– Marker: Stitch marker
– Optional extras: Pipe cleaners (for added stability in the gnome’s hat)
4. Designer Notes / Tips
Crocheting the gnome involves a few unique stitches that add texture and character. Don’t hesitate to explore the “puff stitch” for the beard, as it provides a fluffy and inviting look. For stuffing, I recommend a firm but not overstuffed approach; this gives the gnome a sturdy shape while still feeling soft to the touch.
When assembling your gnome, take your time to ensure each piece is securely attached. Use a tapestry needle to weave in ends and to sew components together, ensuring no gaps remain. If you’re looking for alternative yarn options, consider any soft yarns that offer a similar weight and texture; just keep an eye on the color choices to maintain the overall look.
Gauge is not critical for this project, but if you’d like the gnome to be the exact height specified, I recommend checking your tension periodically. And if this gnome is intended for a child, consider using embroidery thread for the eyes instead of safety eyes to eliminate any choking hazards.
5. Pattern Instructions
For Plushies:
Head:
Body:
Arms:
Legs:
Ears:
– Make two using 5 sc in a magic ring, and sew them onto the head.
Assembly:
1. Stuff the head lightly and attach the safety eyes between Rounds 8 and 9, about 6 stitches apart.
2. Attach the arms and legs securely.
3. For the hat, crochet a long rectangle and attach it to the head, folding it over to form a point.
Finishing Touches:
– Add the beard using puff stitches, attaching it just below the nose (or where the eyes are placed).
– Weave in all ends and ensure everything is secure.
6. Closing & Social Engagement
I can’t wait to see your version of the Crochet Gnome! Leave a comment below sharing your color combinations and any tips you discovered along the way. What unique twist will you add to your gnome? Don’t forget to share your finished creation on social media—let’s celebrate our crochet journey together!