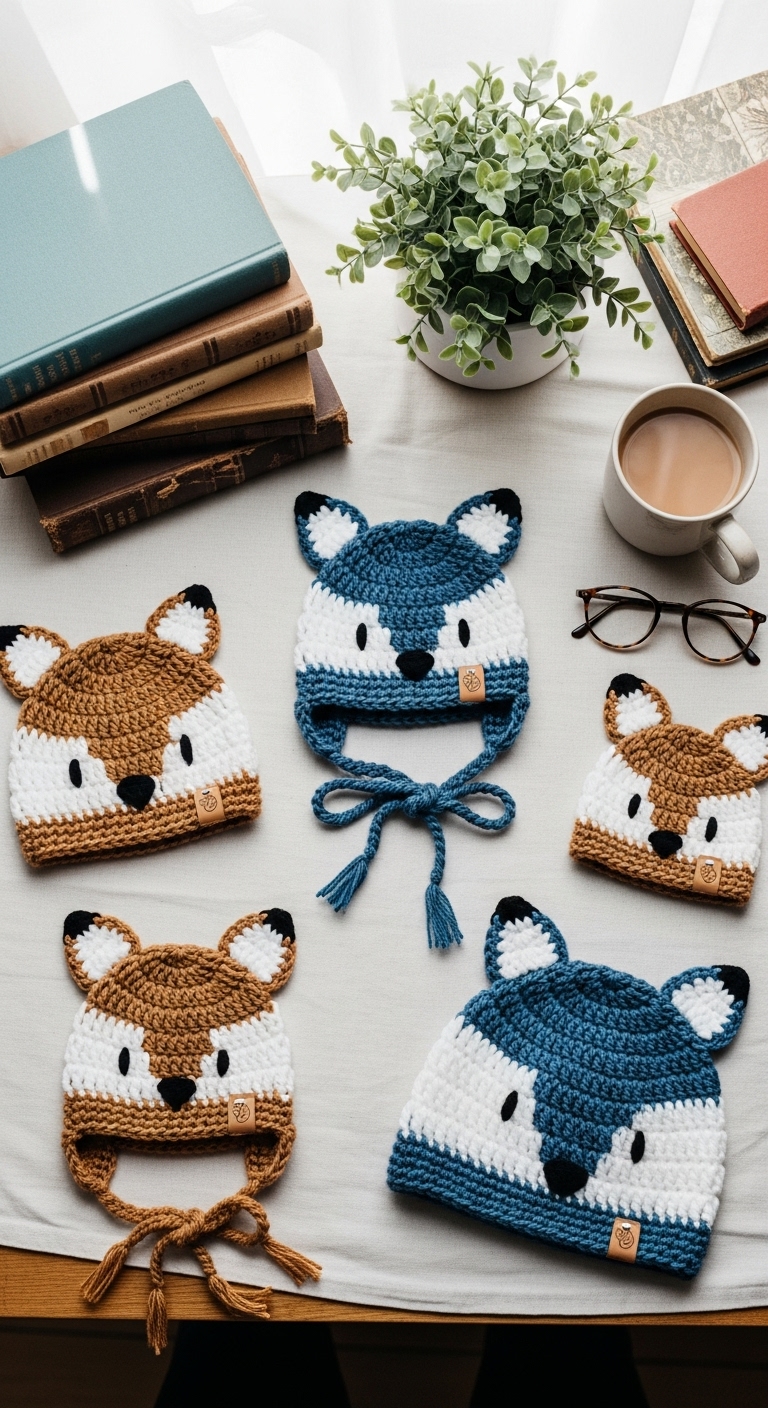
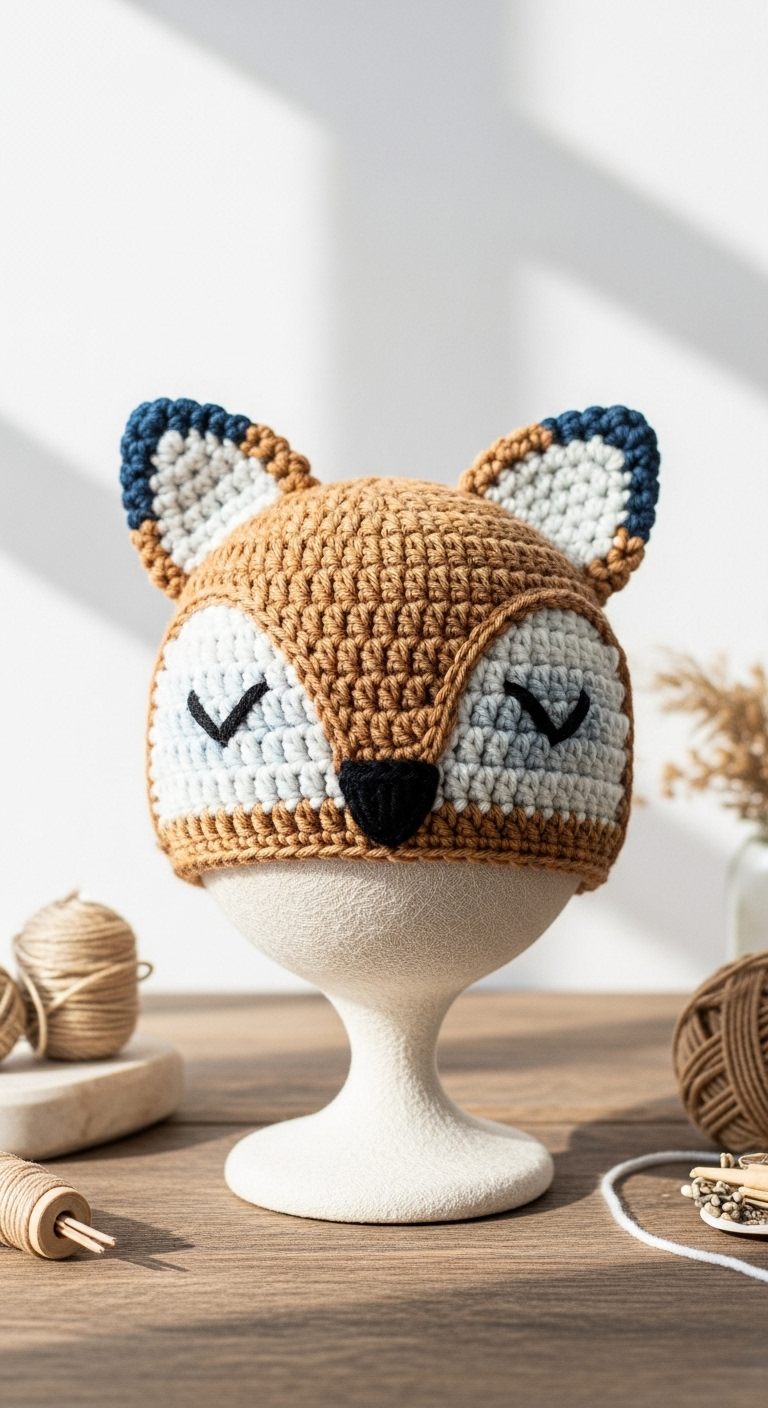
crochet fox hat sizes newborn to teen free pattern
2. Introduction
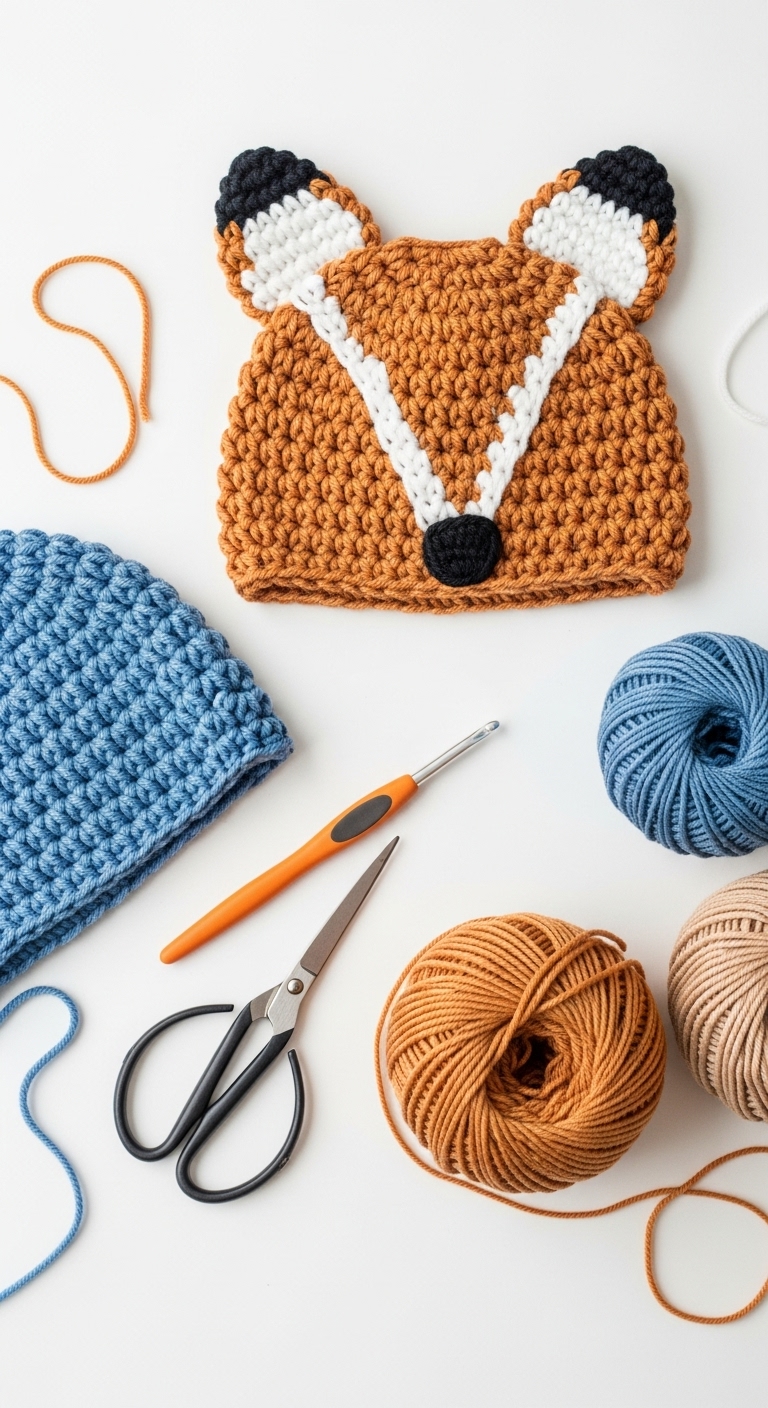
Welcome to the world of cozy crochet! This delightful crochet fox hat is designed to keep little heads warm and stylish from newborns up to teens. With its charming ears and adorable snout, this hat will surely turn heads and bring smiles. The pattern is versatile and customizable, allowing for a snug fit that grows with your child, making it a perfect project for family or friends.
For this fun project, you’ll be using worsted weight yarn in rich orange, creamy white, and a touch of black for the facial details. These colors come together beautifully to create a vibrant and eye-catching accessory that’s suitable for any season. Whether you’re preparing for chilly days or looking for a whimsical gift, this crochet hat is both enjoyable to make and delightful to wear. Plus, it’s a beginner-friendly pattern, so don’t worry if you’re new to crochet—you’re in for a rewarding experience!
This project is not only quick to work up but also offers a unique charm that makes it a great gift idea for birthdays or holidays. Kids and teenagers alike will love showing off their new fox hat, making it a perfect addition to their winter wardrobe or costume collection.
3. Materials Needed
– Yarn: Worsted weight yarn in orange (approximately 150-200 yards), white (approximately 50-75 yards), and black (approximately 25 yards)
– Hook: 3.5mm or 4.0mm crochet hook
– Eyes: Safety eyes (12mm) or black embroidery thread for stitching
– Stuffing: Polyester fiberfill stuffing (if desired for extra plushness in ears)
– Needle: Tapestry needle for sewing ends
– Marker: Stitch marker to track rounds
– Optional extras: Embellishments like buttons or felt for additional facial features
4. Designer Notes / Tips
This pattern employs basic stitches—single crochet (sc) and increases (inc)—to shape the hat and ears, making it a perfect project for newbies. Ensure you maintain a consistent tension, as this will help the hat fit well. If you’re unfamiliar with the magic ring technique, don’t hesitate to look it up; it provides a neat start to your rounds.
When stuffing the ears, opt for a light density to keep them floppy and cute. Feel free to adjust the size of the hat by adding or subtracting rounds, but keep in mind that changing yarn types may affect the fit. For safety considerations, especially for younger children, ensure that all embellishments, like eyes, are securely attached or use stitched features instead.
5. Pattern Instructions
For the Hat:
Main Panel:
After Round 10, don’t forget to try the hat on your little one to ensure a snug fit!
For the Ears (Make 2):
You can stuff the bottom part of the ear lightly before closing for added dimension.
For the Snout:
Assembly:
– Attach the ears to the top of the hat using your tapestry needle and yarn.
– Position the snout centered below the ears and sew it on securely.
– If you opt for safety eyes, place them on either side of the snout before sewing it down—adjust placement as desired.
– Weave in all ends and block the hat if necessary to maintain shape.
6. Closing & Social Engagement
Congratulations on creating your very own crochet fox hat! I’d love to see your version—leave a comment below sharing your thoughts on the pattern and any color combinations you chose. What colors will you try next? Don’t forget to share your finished projects on social media using the tag #CrochetFoxHat! Happy crocheting!