crochet fall gnome pattern free the scarecrow gnome
2. Introduction
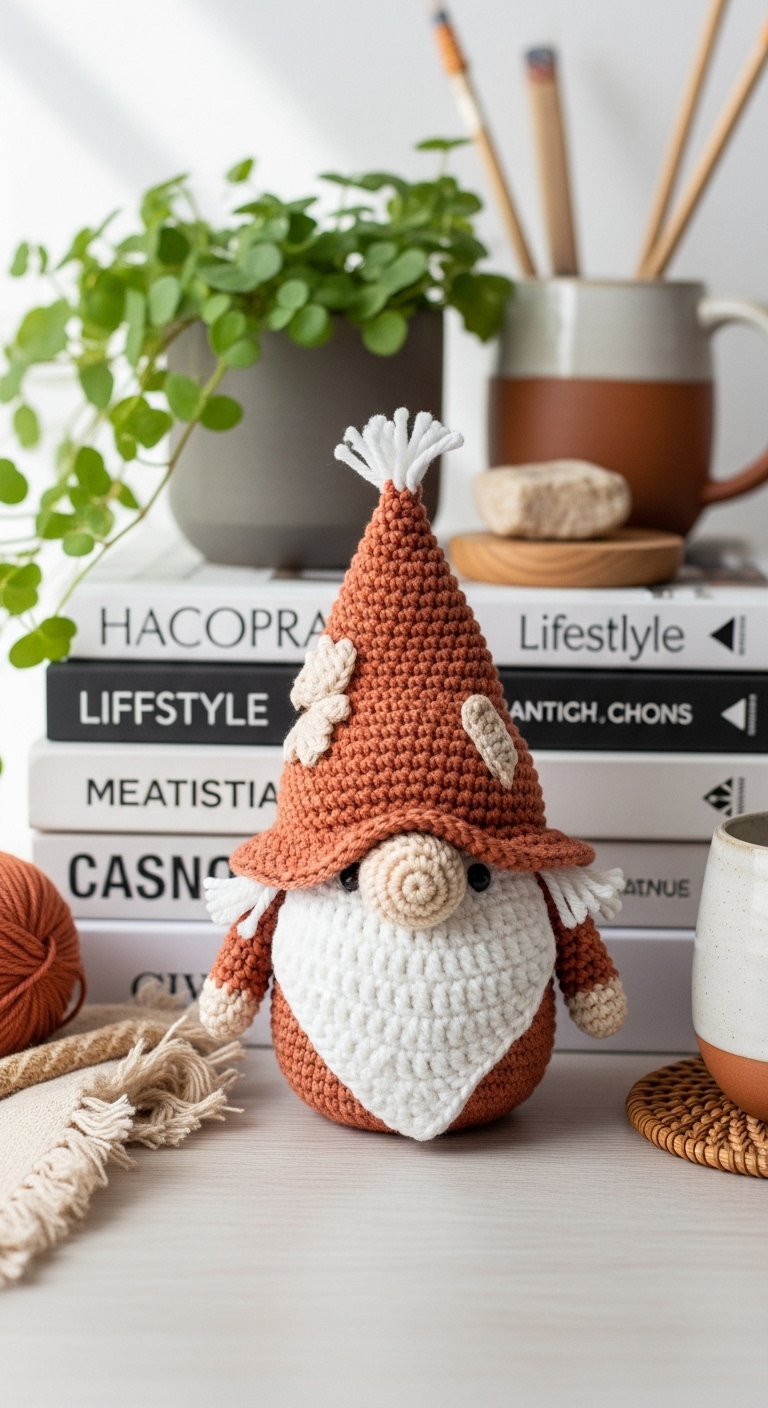
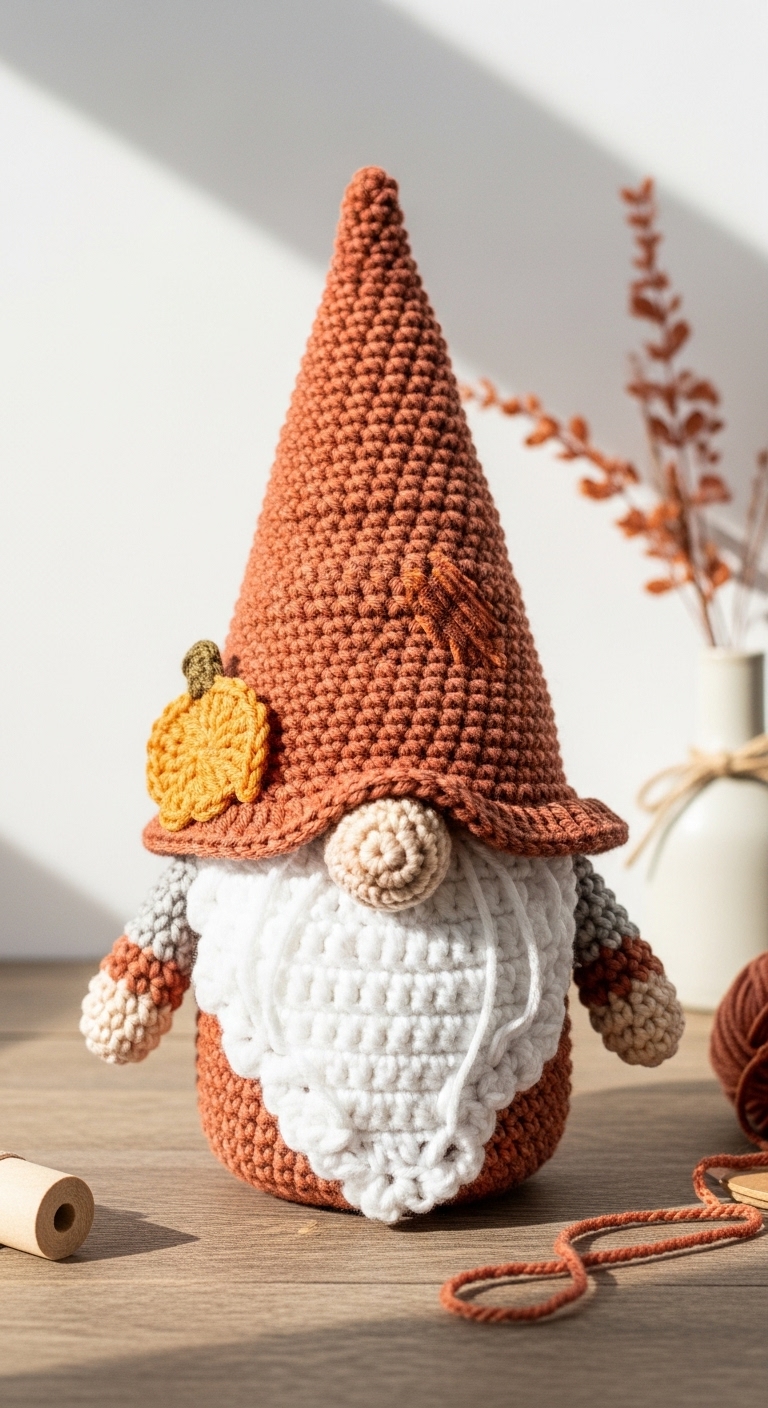
Welcome to your next cozy crochet project: the Crochet Fall Gnome Pattern featuring an adorable Scarecrow Gnome! Standing at approximately 10 inches tall, this cute character is perfect for celebrating the fall season and adding a touch of whimsy to your home decor. With its charming details and warm colors, the Scarecrow Gnome is sure to bring a smile to your face and joy to your crafting space.
For this project, I recommend using a soft worsted weight yarn in a palette of earthy tones. Picture a rich mustard yellow for the gnome’s hat, a deep brown for the body, and a soft cream for the beard. These adult-friendly colors not only reflect the warmth of the season but are also sophisticated enough to blend beautifully with any autumn decor.
This pattern is not just fun to make; it’s also quick! Ideal for beginner to intermediate crocheters, it consists of simple stitches and techniques that you can easily master. Plus, the Scarecrow Gnome makes for a delightful gift or festive decoration, perfect for welcoming the fall season into your home.
3. Materials Needed
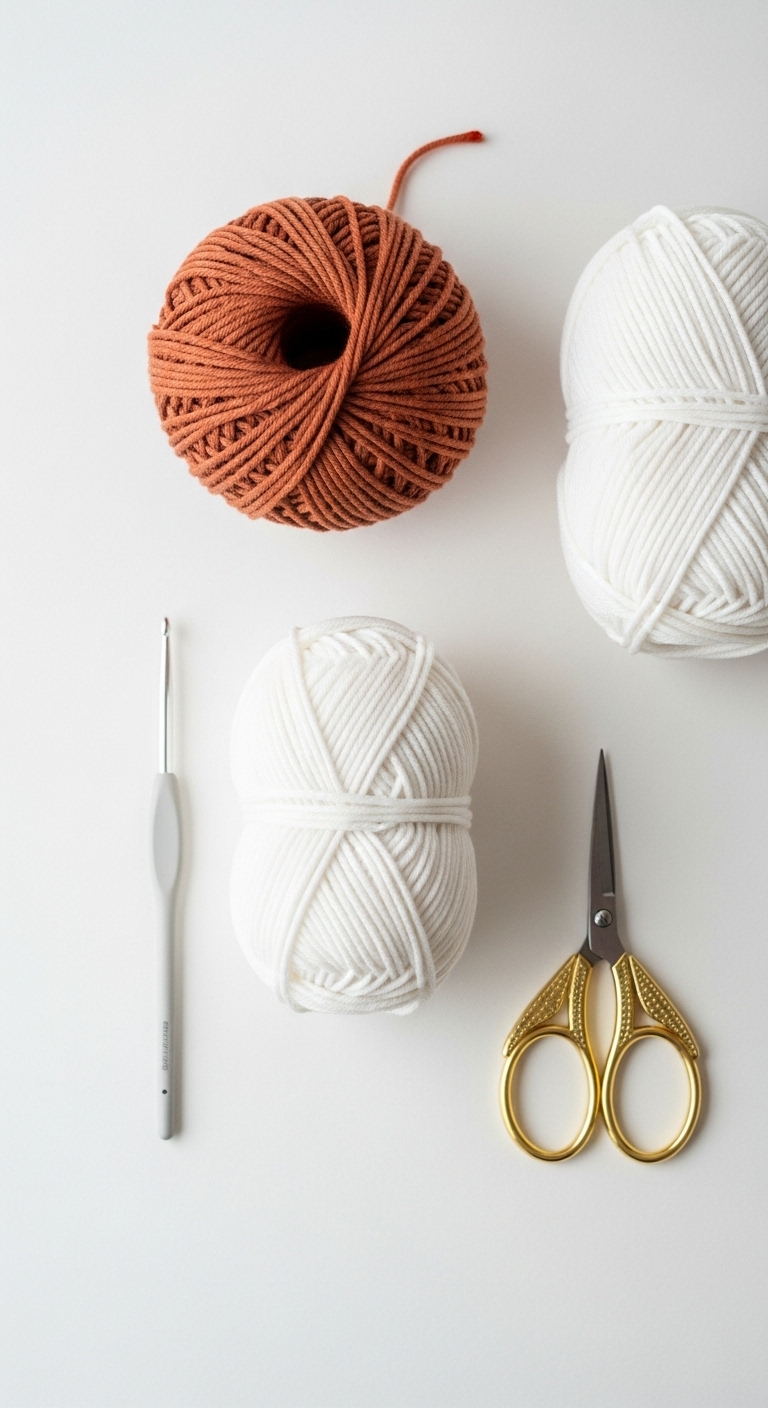
To create your Scarecrow Gnome, gather the following materials:
– Yarn: Worsted weight yarn in mustard yellow (approx. 100 yards), deep brown (approx. 100 yards), and soft cream (approx. 50 yards)
– Hook: 3.5mm or 4.0mm crochet hook
– Eyes: 12mm safety eyes OR black embroidery thread for a stitched look
– Stuffing: Polyester fiberfill stuffing
– Needle: Tapestry needle for sewing
– Marker: Stitch marker
– Optional extras: Pipe cleaners for the hat’s brim, small buttons for decoration
4. Designer Notes / Tips
– Stitch technique: This pattern primarily uses single crochet (sc) stitches, which create a tight, solid fabric for your gnome. Don’t hesitate to experiment with half double crochet (hdc) in some sections for added texture!
– Stuffing density: Aim for a medium firmness when stuffing your gnome to ensure it holds its shape while remaining cuddly.
– Assembly: When joining pieces, use a whip stitch for a seamless look. Make sure to stuff the head before closing it up completely for a nice, rounded shape.
– Yarn substitutions: If you prefer, you can substitute with any worsted weight yarn; just ensure it’s of similar softness for the best results.
– Gauge tips: While gauge isn’t critical for this project, maintaining a consistent tension will ensure that your gnome turns out the right size.
– Safety considerations: If making this gnome for a child, consider using stitched eyes instead of safety eyes for added safety.
5. Pattern Instructions
Let’s get started on your Scarecrow Gnome!
For Plushies:
Head:
Body:
Arms:
Legs:
Assembly:
– Attach the head to the body using the long tail from the body.
– Position the arms and legs as desired and sew them on securely.
– Use safety eyes and place them between rounds 6 and 7 of the head.
– For the hat, crochet a simple cone shape or use a piece of felt shaped like a cone and attach it to the top of the head.
6. Closing & Social Engagement
I’m excited for you to bring this Scarecrow Gnome to life! Don’t forget to share your finished creation and let me know what color combinations you chose. I’d love to see your version! Feel free to leave a comment below and connect with fellow crafters in our community. Happy crocheting!