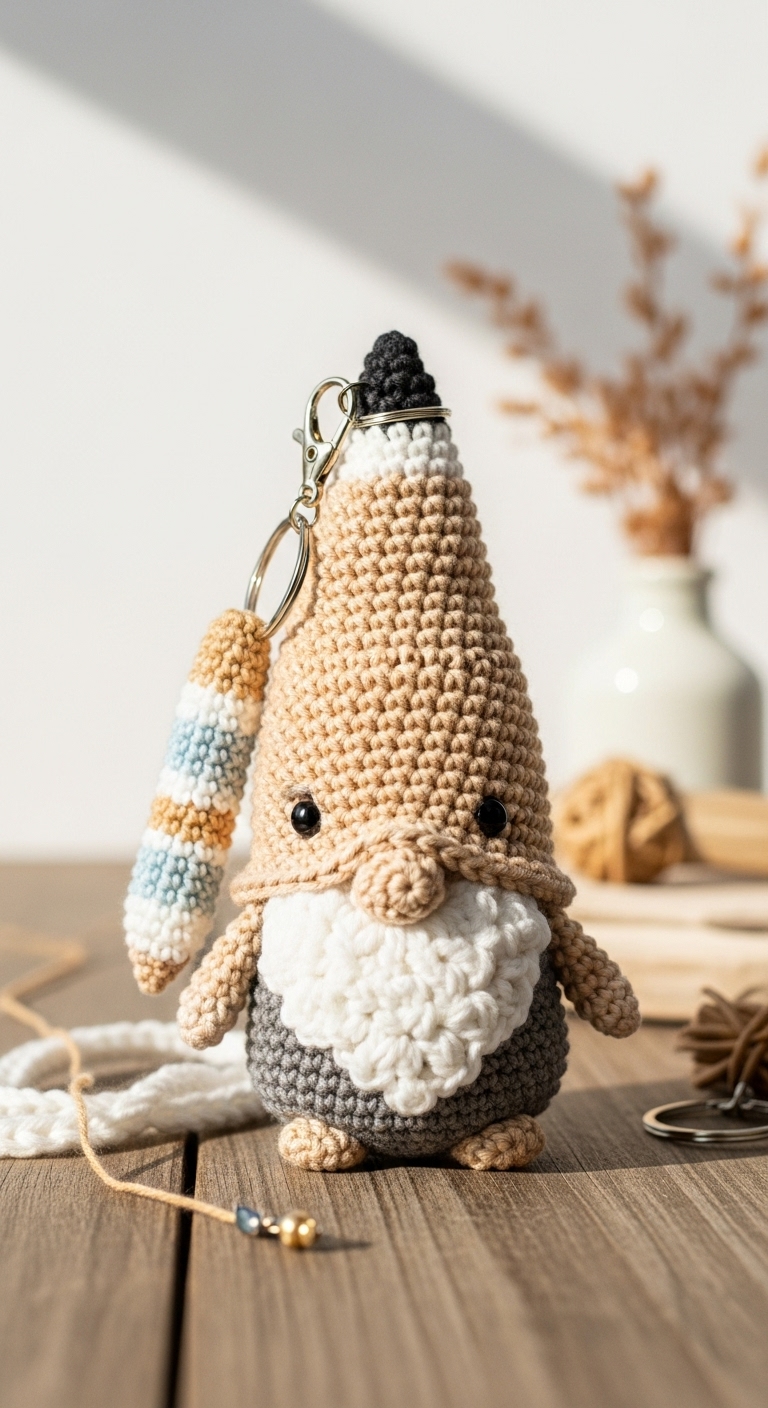
butterfly gnome free crochet pattern
2. Introduction
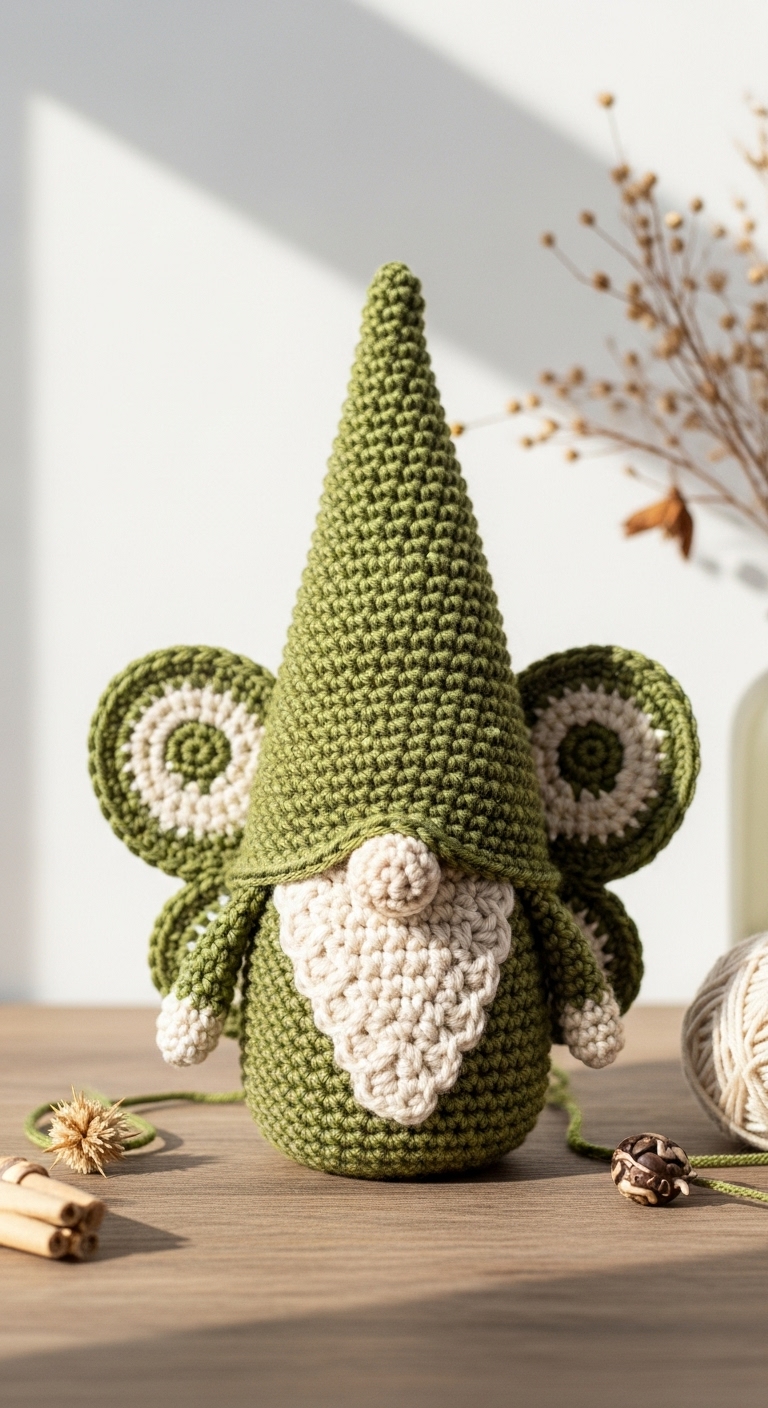
Welcome to the whimsical world of crocheting with our delightful Butterfly Gnome pattern! This charming plushie measures approximately 10 inches tall, making it a perfect size for adorning your home decor or gifting to a loved one. With its enchanting butterfly wings and cute gnome hat, this project brings a splash of color and playfulness to any space.
For this project, you’ll need a medium-weight yarn in complementary colors such as soft lavender, sunny yellow, and rich teal. These adult-friendly hues not only elevate the overall look of the gnome but also make it a versatile addition to your seasonal decorations. Whether you’re preparing for spring celebrations or just want a cheerful companion to brighten your day, this gnome is both fun and quick to create. The skill level is beginner-friendly, so even if you’re new to crochet, you’ll find it easy to follow along and create your very own gnome masterpiece.
This Butterfly Gnome would make a fantastic gift for friends or family, especially for those who adore unique, handmade treasures. It adds a festive touch to any occasion, be it birthdays, holidays, or just because!

3. Materials Needed
– Yarn: Medium-weight yarn (worsted) in soft lavender (approximately 150 yards), sunny yellow (approximately 50 yards), and rich teal (approximately 50 yards)
– Hook: 3.5mm crochet hook
– Eyes: 12mm safety eyes
– Stuffing: Polyester fiberfill stuffing
– Needle: Tapestry needle for sewing
– Marker: Stitch marker
– Optional extras: Pipe cleaners (for wings), buttons (for embellishing)
4. Designer Notes / Tips
– Stitch technique: This project primarily uses single crochet (sc) and some increases (inc) to create the structured shape of the gnome. Be mindful of your tension, as consistency will help your plushie maintain its shape.
– Stuffing density: Light stuffing is recommended for the head and body to allow for a soft yet stable plushie that stands well. Firm stuffing can be used in the hat for a structured look.
– Assembly: When joining the pieces, use a whip stitch for a seamless finish. This technique will help you keep the edges tidy and secure.
– Yarn substitutions: If you can’t find the recommended yarn, consider using a cotton blend or an acrylic yarn with similar weight and texture.
– Gauge tips: While gauge is not critical for this pattern, if you desire a specific size, aim for 4 inches of fabric to equal approximately 10 single crochets.
– Safety considerations: If making this gnome for a child, consider using embroidery thread for the eyes instead of safety eyes to eliminate choking hazards.
5. Pattern Instructions
For Plushies:
Head:
Body:
Arms:
Legs:
Ears/Wings:
Assembly:
1. Attach safety eyes to the head between rounds 6 and 7, spaced about 3 stitches apart.
2. Sew the head onto the body using the tapestry needle and the long tail left from the body.
3. Attach arms to the sides of the body, positioning them about halfway down the body.
4. Sew the legs to the bottom of the body, ensuring they are well secured.
5. Gather the wings at the base and shape them. Attach the wings to the back of the gnome using a needle and thread.
6. Optionally, embellish the gnome’s hat with buttons or other decorative elements.

6. Closing & Social Engagement
I hope you enjoyed creating this charming Butterfly Gnome! I’d love to see your version! Leave a comment below sharing your experience or any color combinations you experimented with. What color combination will you try? Don’t forget to share your finished gnome on social media using the hashtag #ButterflyGnomeCrochet. Happy crocheting!