Amigurumi Duck Crochet Patterns
2. Introduction
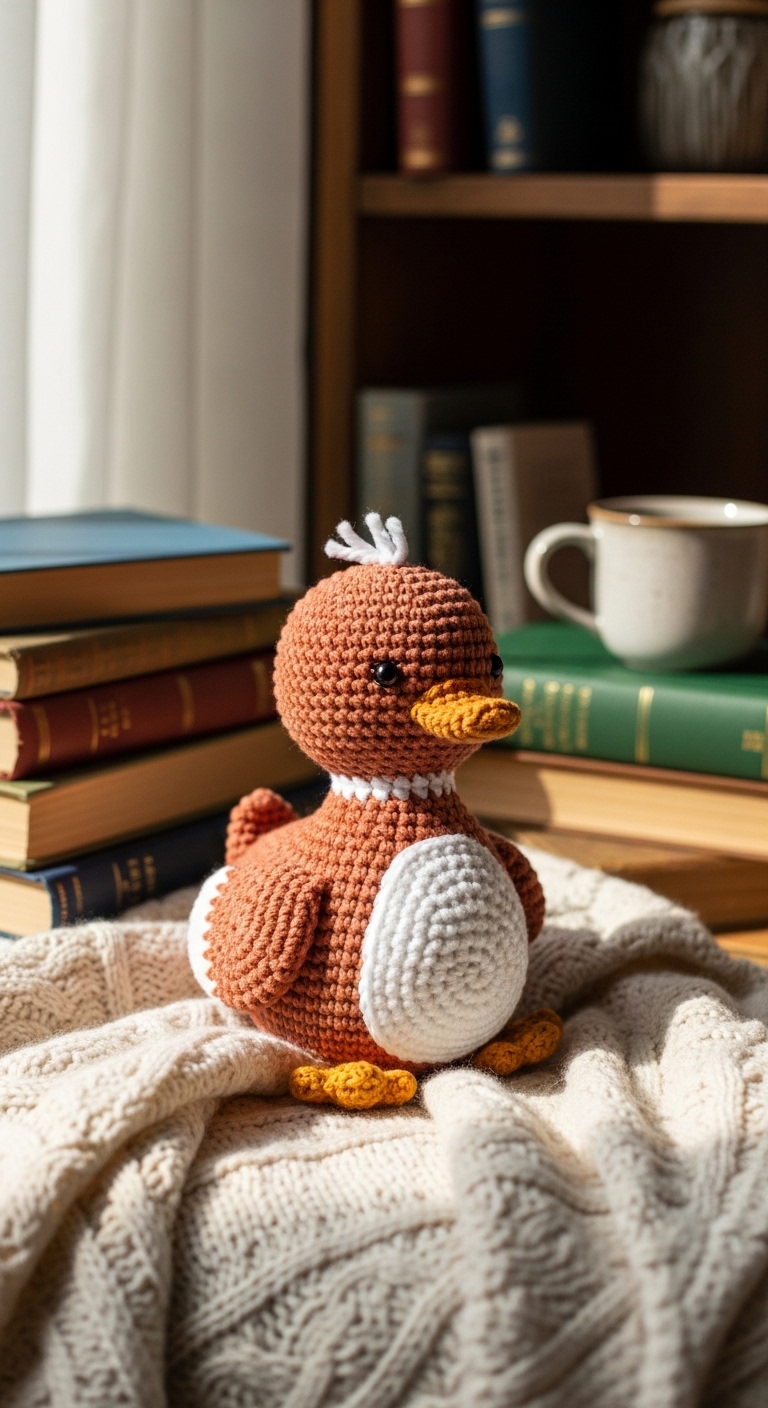
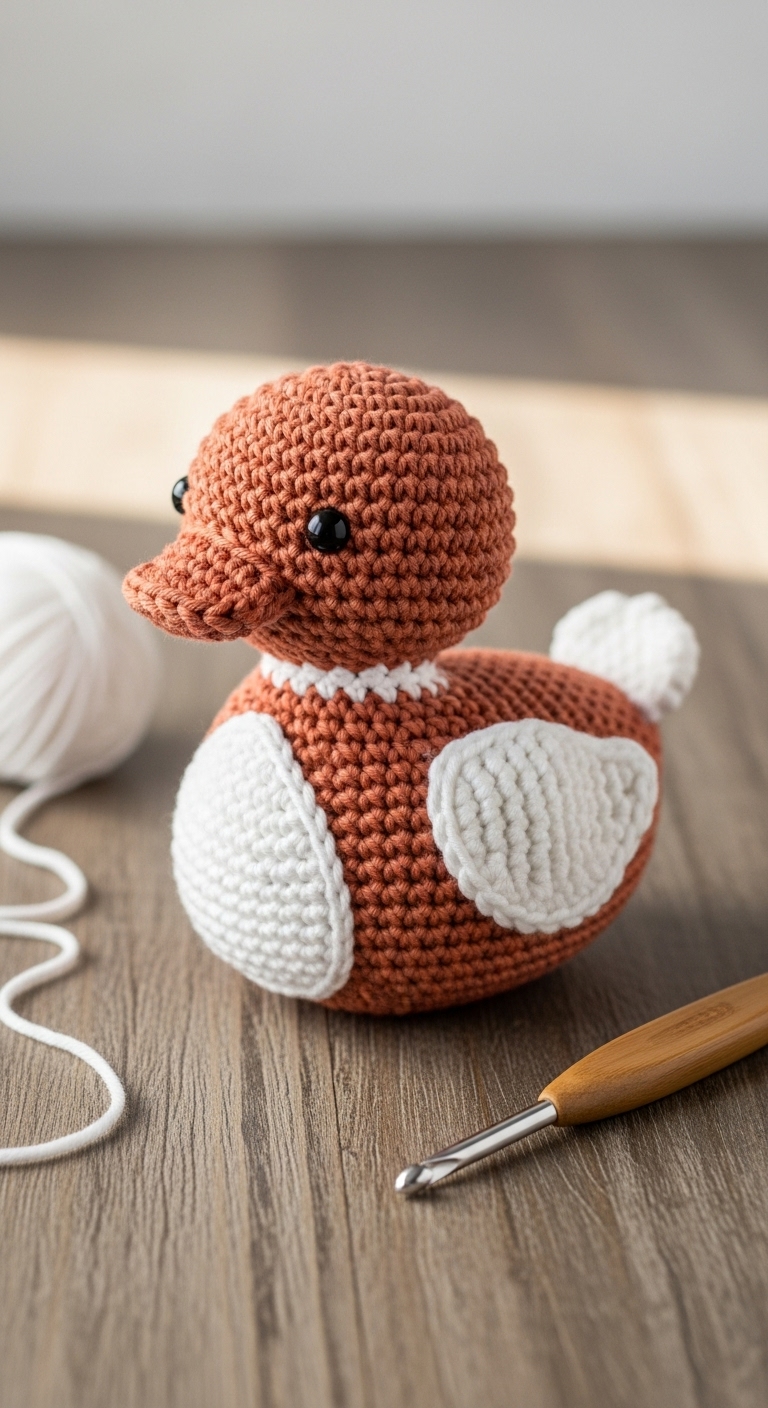
Welcome to the delightful world of amigurumi! In this article, we will be diving into an adorable project: the Amigurumi Duck. This charming little plushie measures approximately 6 inches tall and makes a perfect companion for both children and adults. With its soft, rounded form and bright, cheerful colors, this duck is sure to bring a smile to anyone’s face.
For this project, we will be using medium-weight yarn in complementary adult-friendly colors: a sunny yellow, a crisp white, and a gentle orange. These colors not only evoke the warmth of spring but also create a sophisticated look that appeals to mature crafters. This amigurumi duck is not only quick to crochet, but it’s also great for introducing new crochet techniques, making it an excellent choice for beginners. Whether you’re looking for a charming gift for a loved one or a delightful decoration for your own home, this pattern is sure to inspire creativity and joy.

3. Materials Needed
– Yarn: Medium weight (worsted) yarn in:
– Sunny Yellow – approx. 100 yards
– Crisp White – approx. 25 yards
– Gentle Orange – approx. 25 yards
– Hook: 3.5mm or 4.0mm crochet hook
– Eyes: Safety eyes (12mm) OR black embroidery thread
– Stuffing: Polyester fiberfill stuffing
– Needle: Tapestry needle for sewing
– Marker: Stitch marker
– Optional extras: Small piece of felt for a beak, if not using yarn
4. Designer Notes / Tips
When working on your amigurumi duck, keep in mind the importance of tension. This project uses standard single crochet stitches, which creates a nice, dense fabric that holds its shape well. If you find that your stitches are too loose, consider switching to a smaller hook size to achieve that perfect plushie texture.
Stuffing is an essential part of this project. For a plush, huggable finish, aim for a medium density when adding fiberfill. This will give your duck a lovely shape while still allowing it to be soft and cuddly. When it comes to assembly, take your time to sew on the limbs and eyes securely. This ensures that your duck not only looks great but is also safe for play.
If you’re looking for yarn substitutions, consider using cotton yarn for a tighter finish, but keep in mind that the plushiness may vary. For gauge, a tight tension is preferable to prevent stuffing from showing through. If making this for a child, ensure any embellishments are securely attached or consider using safety eyes.
5. Pattern Instructions
For Plushies:
Head:
Body:
Arms (make 2):
Legs (make 2):
Tail:
Assembly:
1. Stuff the head and body firmly using polyester fiberfill.
2. Attach the safety eyes on the head between rounds 6 and 7, spaced about 4 stitches apart.
3. Sew the head to the body securely, ensuring it is centered.
4. Attach the arms to the sides of the body and the legs to the bottom.
5. Sew the tail to the back of the body.
6. Optionally, cut a small triangle from felt for the beak and sew it onto the head.
6. Closing & Social Engagement
Congratulations on completing your adorable amigurumi duck! I’d love to see your version! Leave a comment below and let me know what colors you chose for your duck. What color combination will you try next? Don’t forget to share your finished creation on social media with the hashtag #AmigurumiDuck. Happy crocheting!