free crochet monkey applique pattern
2. Introduction
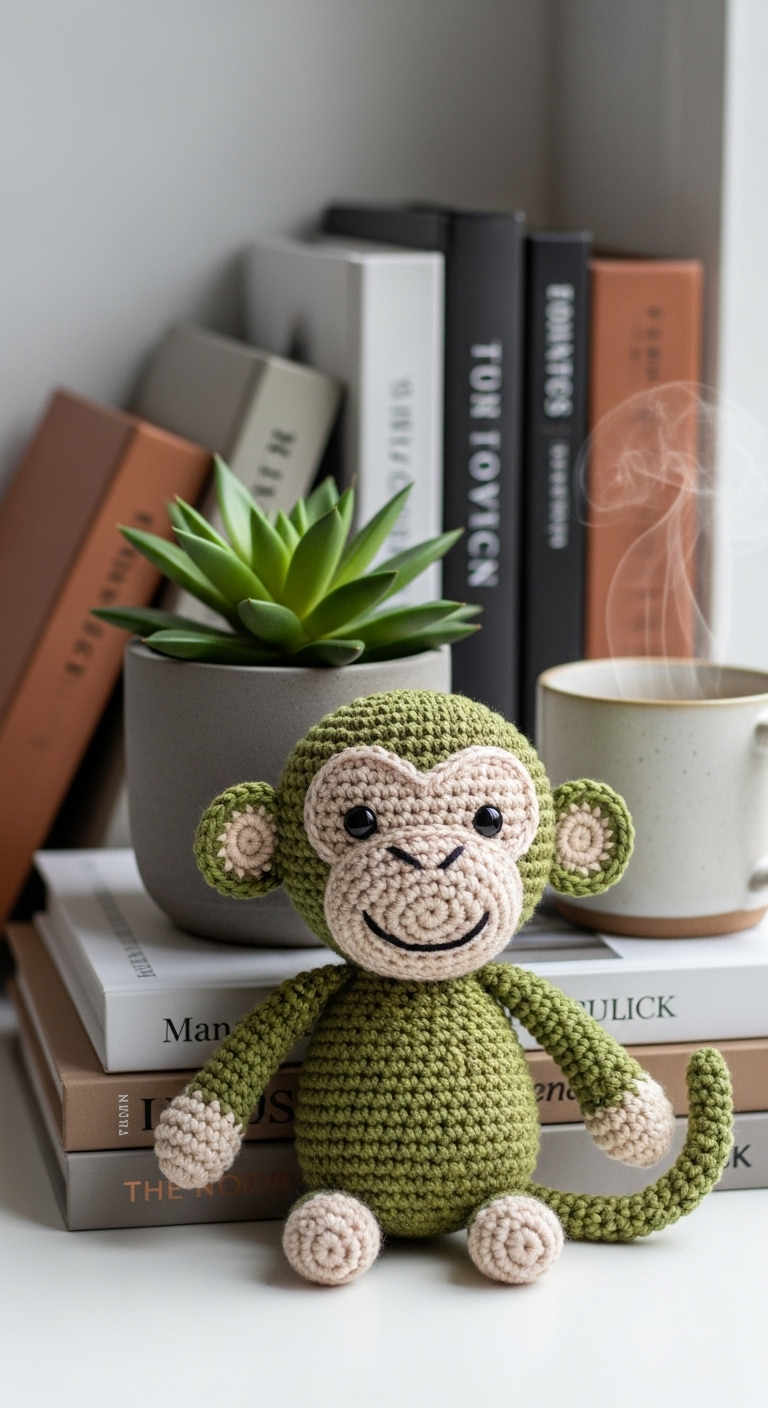
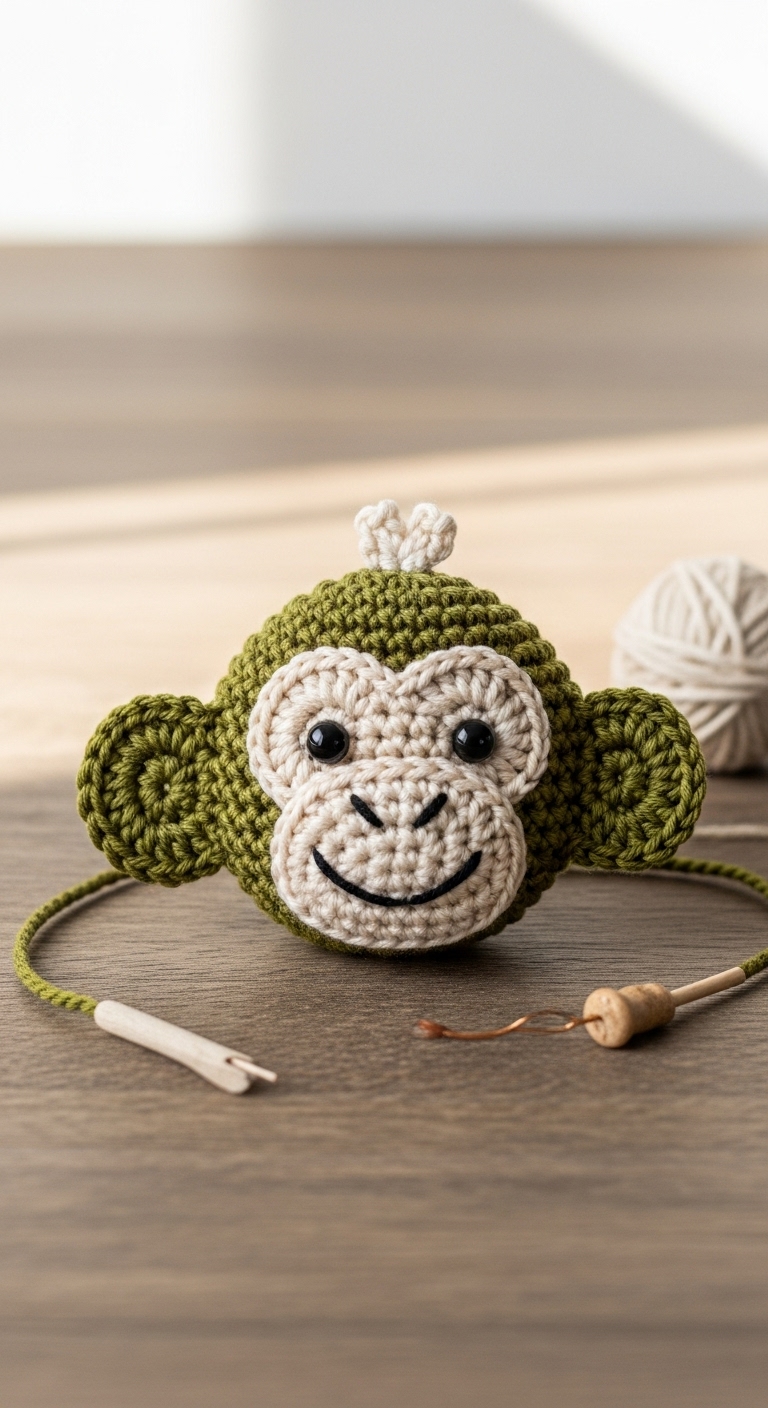
Welcome to this delightful project—a charming crochet monkey applique! This playful little monkey measures approximately 4 inches tall, making it the perfect size for embellishing bags, hats, or even for decorating nursery items. With its friendly smile and vibrant colors, this monkey will surely bring joy to anyone who sees it.
For this project, we’ll be using worsted weight yarn in a lovely palette of soft brown, creamy beige, and a cheerful yellow. These adult-friendly colors not only make the monkey look adorable but also versatile for various applications. Whether you’re looking to create a thoughtful gift for a child or a whimsical addition to your own crochet collection, this quick and fun project is perfect for crocheters of all skill levels, especially beginners.
Crocheting this monkey applique is a great way to practice your skills while producing something cute and functional. It’s a fantastic opportunity to explore color combinations and add a personal touch to your handmade items. Plus, it’s a wonderful project to whip up in an afternoon, making it ideal for last-minute gifts or seasonal decorations.
3. Materials Needed
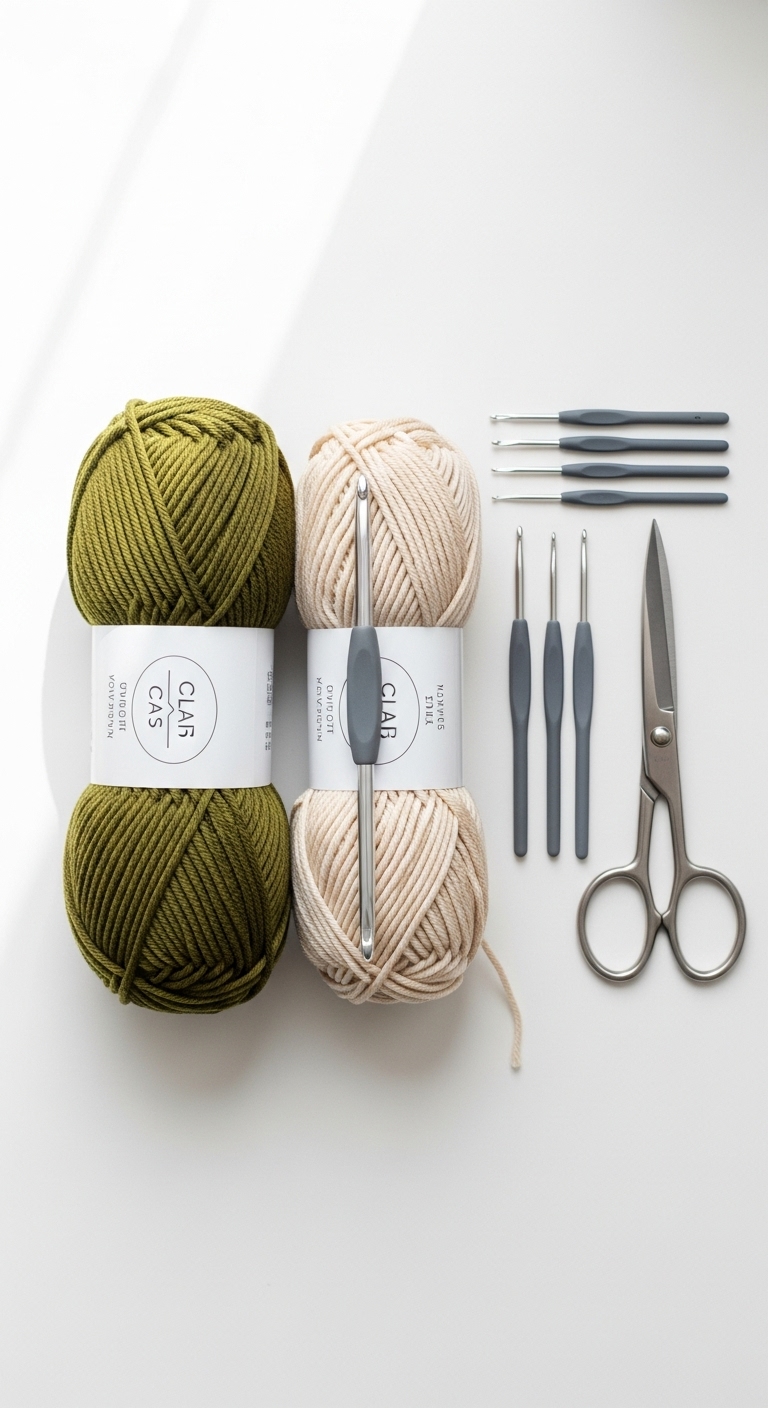
– Yarn: Worsted weight yarn in soft brown (approx. 50 yards), creamy beige (approx. 20 yards), and cheerful yellow (approx. 10 yards).
– Hook: 3.5mm or 4.0mm crochet hook
– Eyes: Safety eyes (10mm) OR black embroidery thread
– Stuffing: Polyester fiberfill stuffing (optional for a 3D effect)
– Needle: Tapestry needle for sewing
– Marker: Stitch marker
– Optional extras: None needed, but feel free to embellish further with buttons or fabric paint for added details.
4. Designer Notes / Tips
– Stitch technique: This pattern primarily uses single crochet (sc) and increases (inc). Make sure to maintain a consistent tension for a neat finish. If you’re new to these stitches, take your time and don’t hesitate to refer to online tutorials for guidance.
– Stuffing density: If you choose to stuff the monkey, aim for a light filling to keep it flat for easy attachment. If you prefer a more dimensional look, use a firmer stuffing.
– Assembly: When joining pieces, use your tapestry needle and slip stitches to create a seamless look. It’s helpful to pin your pieces together before sewing to ensure proper placement.
– Yarn substitutions: You can easily substitute with acrylic or cotton yarn; just be sure to adjust your hook size accordingly to maintain the desired gauge.
– Gauge tips: While gauge isn’t critical for an applique, maintaining a consistent tension will ensure your monkey looks even and neat.
– Safety considerations: If this applique is for a small child, consider using embroidery thread for the eyes instead of safety eyes, as this can minimize choking hazards.
5. Pattern Instructions
For Plushies:
Head:
*At this point, you can choose to stuff the head lightly before closing it.*
Body:
*Stuff lightly before closing.*
Arms (make 2):
Legs (make 2):
Ears (make 2):
Tail:
Assembly:
1. Attach the head to the body using your tapestry needle.
2. Sew the arms on either side of the body, positioning them so they look like the monkey is waving.
3. Attach the legs at the bottom of the body.
4. Position the ears on the sides of the head and sew them in place.
5. Sew the tail to the back of the body.
6. Attach the safety eyes between rounds 4 and 5 of the head or sew eyes with embroidery thread.
Finishing:
Weave in all ends and trim excess yarn. For a polished look, you may want to block your finished monkey lightly.
6. Closing & Social Engagement
I’d love to see your version of this adorable crochet monkey applique! Feel free to leave a comment below with your thoughts or any questions you may have. What color combination will you try for your monkey? Don’t forget to share your finished creations on social media—let’s celebrate our crochet joy together!