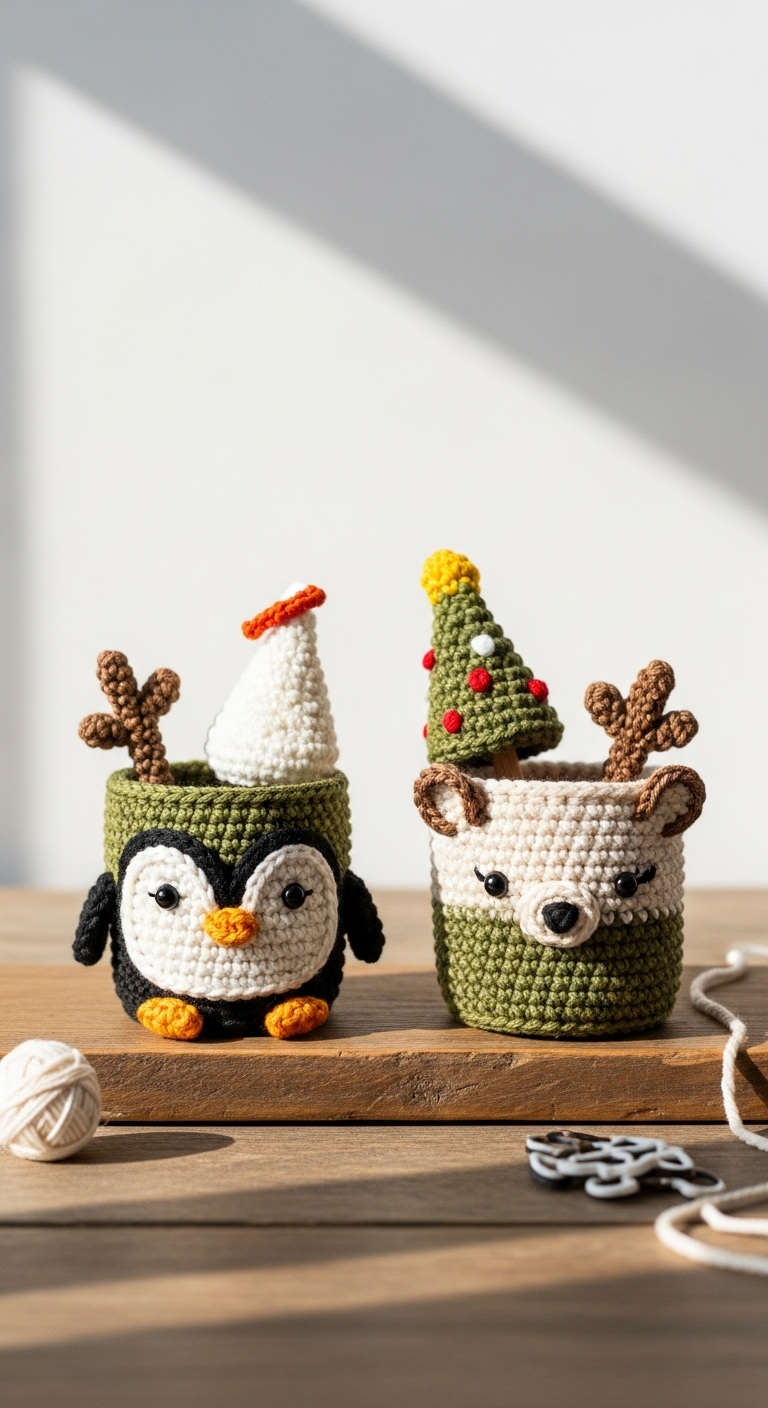
penguin and reindeer christmas mini cups free crochet pattern
2. Introduction
Welcome to our delightful crochet adventure with the “Penguin and Reindeer Christmas Mini Cups”! These charming little cups are perfect for holding treats, small gifts, or even just as decorative pieces during the festive season. Each mini cup stands at approximately 4 inches tall, making them the ideal size to add a whimsical touch to your holiday décor or table setting.
For this project, we will be using soft, worsted weight yarn in classic colors: a beautiful deep black for the penguin, a warm chocolate brown for the reindeer, and a cheerful white for the accents. These adult-friendly colors not only capture the playful essence of these festive characters but also make them a suitable gift for anyone who enjoys a cozy, handcrafted touch during the holidays.
What makes this project extra special is that it’s quick to whip up and offers a delightful way to bring cheer into your home or to delight loved ones. It’s beginner-friendly, so even if you’re new to crochet, you’ll find it easy to follow along. Plus, they are perfect for gifting or as festive decorations to spread holiday joy throughout your space!
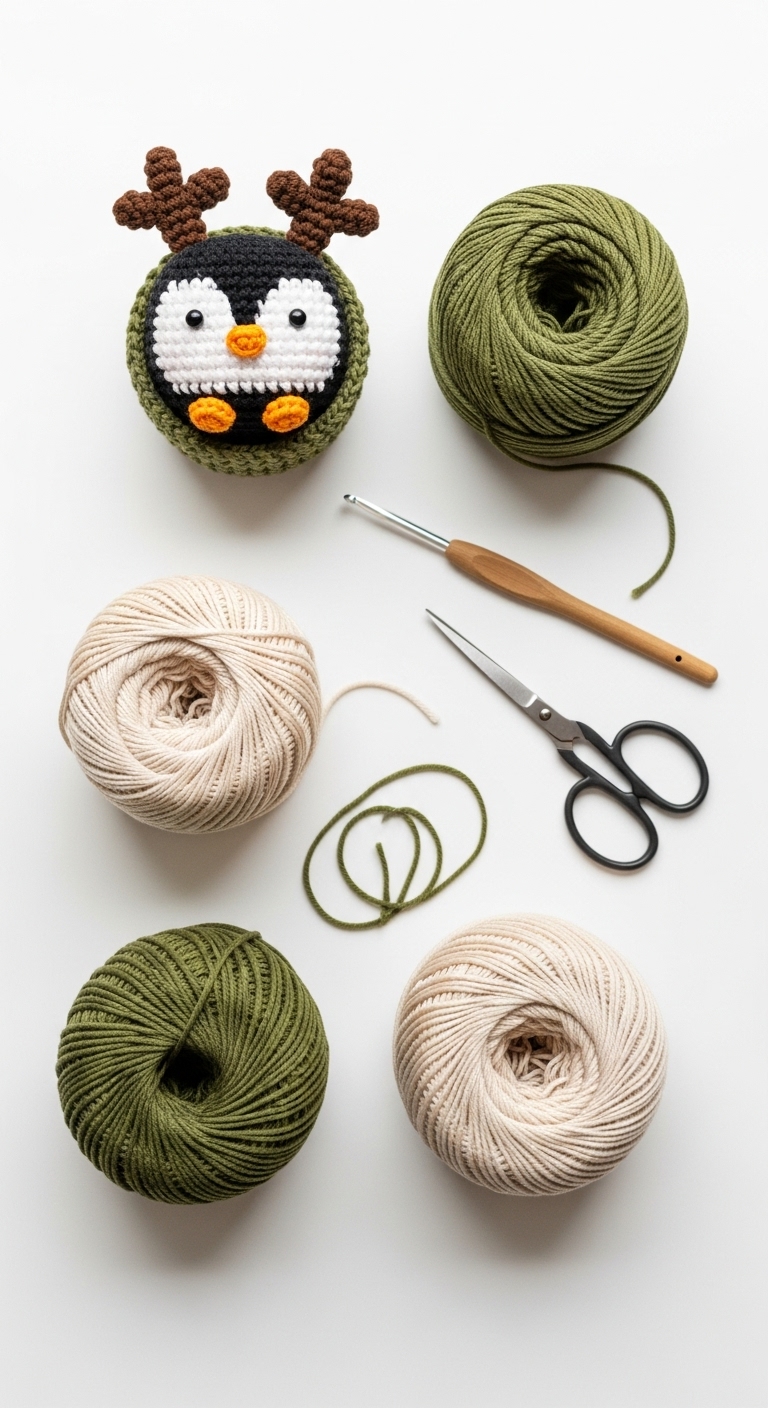
3. Materials Needed
– Yarn: Worsted weight yarn in black, chocolate brown, and white – approximately 150 yards total
– Hook: 3.5mm or 4.0mm crochet hook
– Eyes: 12mm safety eyes OR black embroidery thread for stitching
– Stuffing: Polyester fiberfill stuffing
– Needle: Tapestry needle for sewing
– Marker: Stitch marker
– Optional extras: Small bells or pom-poms for added festive flair
4. Designer Notes / Tips
– Stitch technique: Familiarize yourself with working in the round, as the mini cups are constructed using a continuous spiral. You may find using a stitch marker helpful to keep track of your rounds.
– Stuffing density: It’s best to stuff these mini cups lightly to keep them soft and pliable, allowing them to hold small items without losing their shape.
– Assembly: When joining pieces like the eyes or antlers, use a tapestry needle to sew them securely in place. Don’t worry if your stitches aren’t perfect; the charm of handmade items often lies in their uniqueness!
– Yarn substitutions: If you prefer a different texture, you can use a cotton yarn for a sturdier cup or a chenille yarn for a softer touch.
– Gauge tips: While gauge isn’t critical for this project, maintaining a consistent tension will help ensure your cups turn out even and beautiful.
– Safety considerations: If you’re making these for small children, consider using stitched eyes instead of safety eyes to eliminate any choking hazards.
5. Pattern Instructions
For Plushies:
Penguin Mini Cup
Head & Body:
*Stuff the body lightly before closing.*
Beak:
*Attach beak to the center of the head.*
Eyes: Sew on safety eyes or stitch using black embroidery thread, placing them about 4 stitches apart.
Reindeer Mini Cup
Head & Body:
*Stuff lightly before closing.*
Antlers:
*Attach each antler at the top of the head.*
Eyes: Place safety eyes or stitch them on, ensuring they are placed evenly.
Assembly
– Join the beak and eyes onto the penguin and the antlers and eyes onto the reindeer using your tapestry needle.
– For a fun touch, consider embellishing with small bells or pom-poms attached to the reindeer’s antlers.
6. Closing & Social Engagement
Congratulations on completing your adorable Penguin and Reindeer Christmas Mini Cups! They’re sure to bring a smile to anyone lucky enough to receive them. I’d love to see your version! Leave a comment below sharing your experiences or any color combinations you tried. What color combination will you try for your next mini cup? Don’t forget to share your finished creations on social media using #ChristmasMiniCups – let’s spread the holiday cheer together!