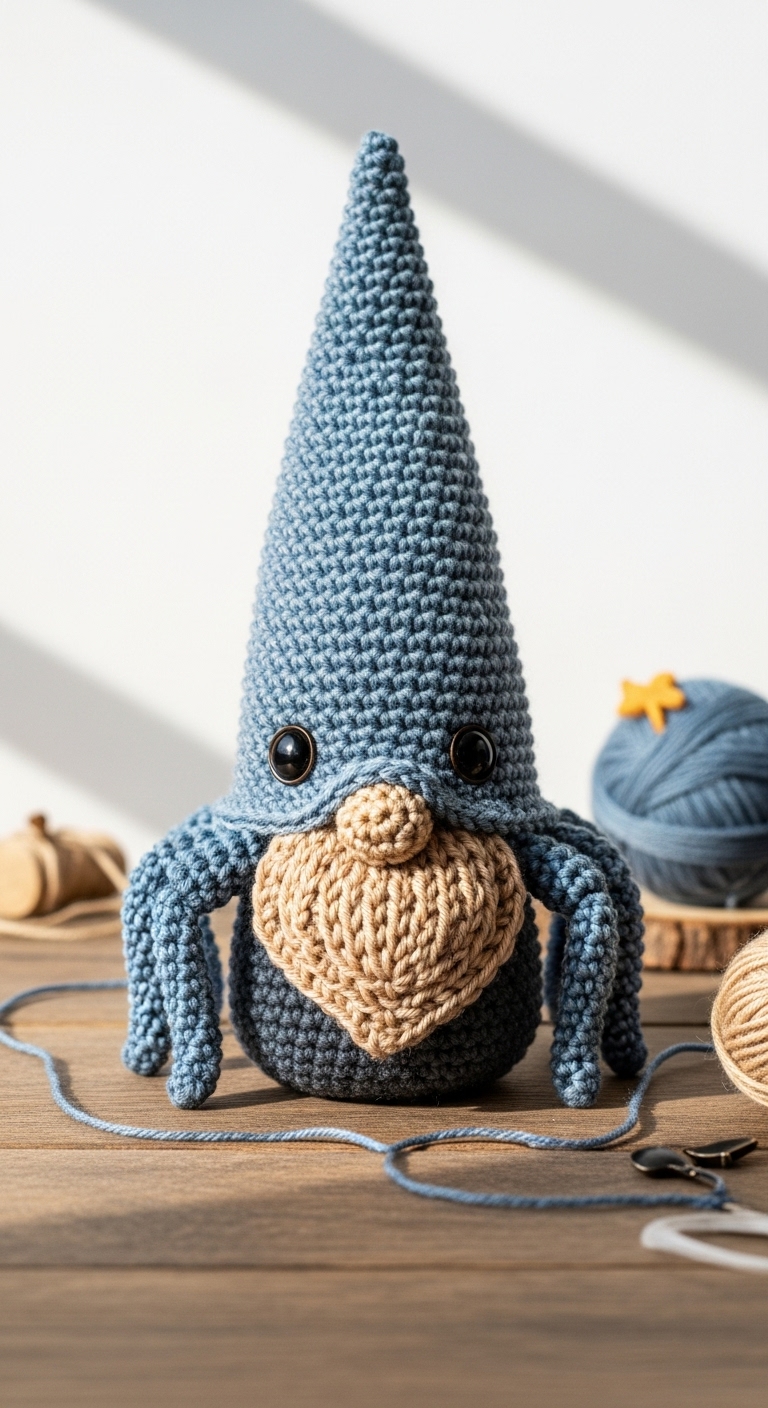
spider halloween gnome free crochet pattern
2. Introduction
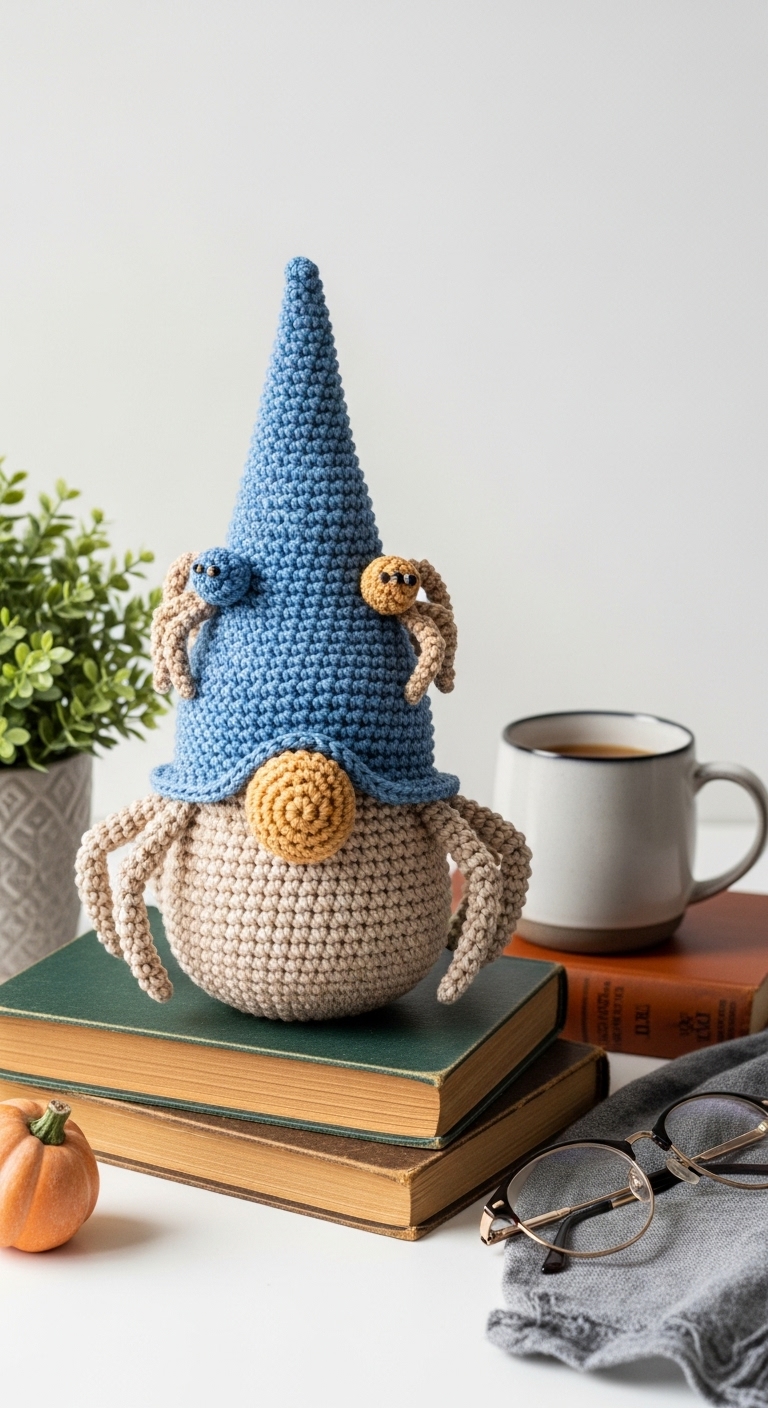
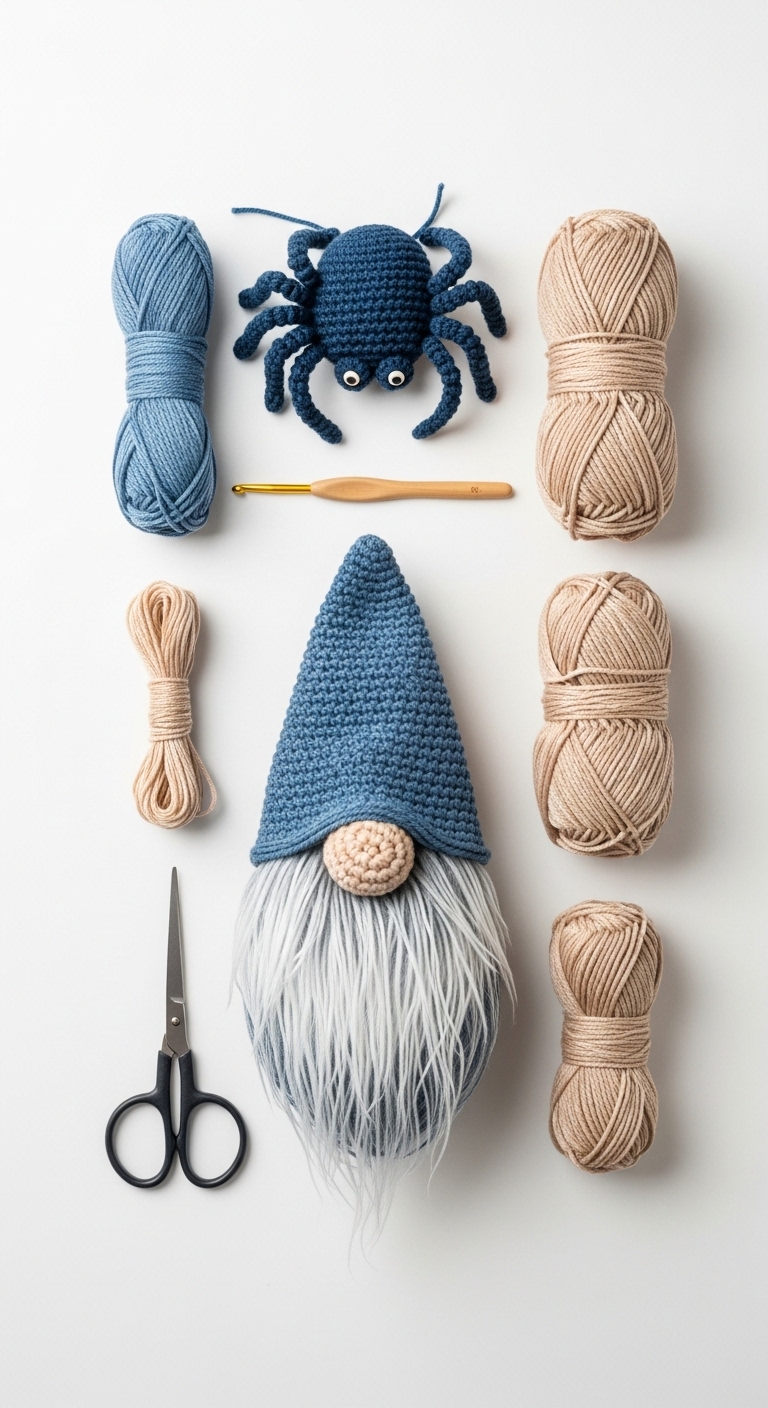
Welcome to the world of whimsical crochet with this free pattern for a Spider Halloween Gnome! This delightful plushie stands approximately 10 inches tall and is the perfect addition to your fall decor. With its charming gnome hat and playful spider accents, it’s sure to bring a smile to anyone who sees it. You’ll love working with soft, cozy yarn that feels great to the touch, making it a delightful project to complete.
For this gnome, we recommend using a combination of adult-friendly colors like deep purple, charcoal gray, and a touch of bright orange. These colors embody the spirit of Halloween while maintaining a sophisticated aesthetic that appeals to adults and children alike. The best part? This project is not only fun and quick to whip up, but it also serves as a unique gift or a seasonal decoration that will add a festive touch to your home.
This pattern is beginner-friendly, making it accessible for crafters just starting their crochet journey as well as those looking for a quick and enjoyable project. You’ll find that creating this Spider Halloween Gnome is not only satisfying but also a cute way to celebrate the spooky season!
3. Materials Needed
– Yarn: Worsted weight yarn in deep purple (approx. 100 yards), charcoal gray (approx. 50 yards), and bright orange (approx. 25 yards)
– Hook: 3.5mm or 4.0mm crochet hook
– Eyes: 12mm safety eyes OR black embroidery thread for stitching
– Stuffing: Polyester fiberfill stuffing
– Needle: Tapestry needle for sewing
– Marker: Stitch marker
– Optional extras: Pipe cleaners for spider legs, small orange buttons for decoration
4. Designer Notes / Tips
When crafting the Spider Halloween Gnome, pay attention to the stitch techniques you’ll be using. The pattern primarily utilizes single crochet stitches for a smooth texture, with some increases and decreases to shape the gnome’s body and hat. Don’t hesitate to use a stitch marker to keep track of the first stitch in each round, especially when working in the round.
For stuffing, consider using a light filling to maintain a soft, plushy feel, ensuring your gnome retains a cute and cuddly appearance. Firm stuffing can lead to a stiffer gnome, which may not look as inviting. When assembling the pieces, it’s best to attach the hat first, followed by the body, to ensure everything aligns perfectly.
If you’re looking for yarn substitutions, any worsted weight yarn will work well, just be sure to match the tension to maintain the intended size. If you’re planning to make this gnome for a child, consider using embroidered features instead of safety eyes for added safety.
5. Pattern Instructions
For Plushies:
Head:
Stuff the head lightly before closing.
Body:
Stuff the body as you work, ensuring it has a nice shape.
Arms (make 2):
Do not stuff the arms; leave them flexible for positioning.
Legs (make 2):
Stuff lightly for a cute, plump look.
Hat:
Leave an opening to attach to the head.
Assembly:
1. Sew the head onto the body securely.
2. Attach the arms on either side of the body.
3. Attach the legs at the bottom of the body.
4. Secure the hat onto the head, making sure it leans slightly to one side for a whimsical look.
5. Place safety eyes before sealing up the head, or stitch them with black embroidery thread if preferred.
6. Optionally, bend pipe cleaners to create spider legs and attach them to the gnome for an extra spooky touch!
6. Closing & Social Engagement
I hope you enjoy creating your Spider Halloween Gnome! Don’t hesitate to get creative with colors and embellishments. I’d love to see your version! Leave a comment below sharing your thoughts on the pattern. What color combinations will you try? Remember to share your finished gnome on social media, and let’s celebrate the spooky season together!