crochet gnome ornament for christmas the mini christmas tree

2. Introduction
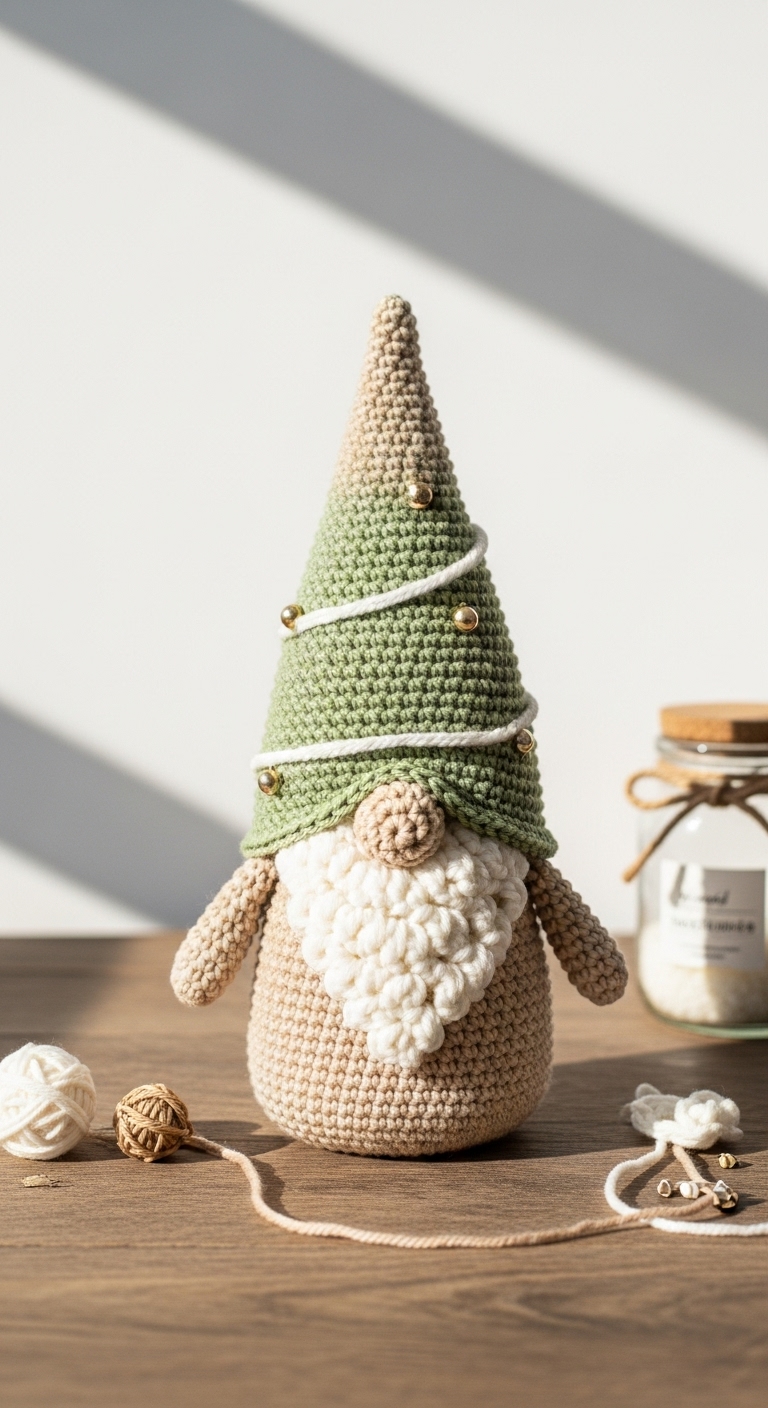
Welcome to the delightful world of crochet with this adorable Crochet Gnome Ornament for Christmas! This whimsical gnome stands at about 6 inches tall, making it a perfect addition to your mini Christmas tree or as a charming holiday decoration. With its vibrant colors and unique design, this ornament is sure to spread festive cheer throughout your home.
For this project, you’ll want to gather some worsted weight yarn in complementary colors such as deep red, forest green, and crisp white. These hues not only evoke the spirit of the season but also lend a sophisticated touch that will appeal to adult crafters. The quick and straightforward nature of this pattern makes it a wonderful choice for both beginner and intermediate crocheters, allowing you to whip up several ornaments in time for holiday gifting or decorating.
Crochet gnomes have become a beloved holiday tradition, and they make for thoughtful, handmade gifts. Whether you choose to hang them on your tree, add them to a festive wreath, or give them to friends and family, this gnome ornament is sure to bring smiles and warmth to any holiday setting.

3. Materials Needed
– Yarn: Worsted weight yarn in deep red (approx. 50 yards), forest green (approx. 30 yards), and crisp white (approx. 20 yards)
– Hook: 3.5mm or 4.0mm crochet hook
– Eyes: 12mm safety eyes or black embroidery thread
– Stuffing: Polyester fiberfill stuffing
– Needle: Tapestry needle for sewing
– Marker: Stitch marker
– Optional extras: Small bells for embellishment, wire for hat support
4. Designer Notes / Tips
– Stitch technique: This pattern primarily uses single crochet (sc) stitches, with some increases and decreases for shaping. Don’t worry if you’re unfamiliar with these – they’re easy to master with a bit of practice!
– Stuffing density: For an ideal gnome shape, aim for a light but firm stuffing. This will help maintain the gnome’s structure while keeping it cuddly.
– Assembly: When joining pieces, use a whip stitch for a clean finish. Make sure to securely attach the hat to the head to prevent it from flopping over.
– Yarn substitutions: If you’d like to use a different brand or type of yarn, just ensure that it’s a similar weight (like acrylic or cotton) to maintain the gnome’s proportions.
– Gauge tips: Aim for a gauge of about 5 stitches per inch to ensure your gnome turns out the right size. It’s always good practice to check your tension before starting!
– Safety considerations: If your gnome will be around small children, consider using embroidery for eyes instead of safety eyes to ensure they are safe.
5. Pattern Instructions
For Plushies:
Head:
– Stuff the head firmly before closing. Place safety eyes between Rounds 7 and 8, spaced about 4 stitches apart.
Body:
– Lightly stuff the body before closing.
Arms:
– Attach 2 arms to the body just below the head.
Hat:
– Do not stuff the hat. Leave it open at the bottom, and fold it down once you attach it to the head.
Assembly:
1. Sew the hat to the top of the head.
2. Attach the head to the body.
3. Sew arms onto the sides of the body.
4. Optional: Add small bells to the tip of the hat for extra charm.
6. Closing & Social Engagement
I hope you enjoy making your own Crochet Gnome Ornament for Christmas! Each gnome can be uniquely styled, so don’t hesitate to get creative with your colors and embellishments. I’d love to see your version! Leave a comment below. What color combination will you try? Share your finished gnome on social media with the hashtag #CrochetGnomeOrnament!