crochet standing christmas tree pattern
2. Introduction
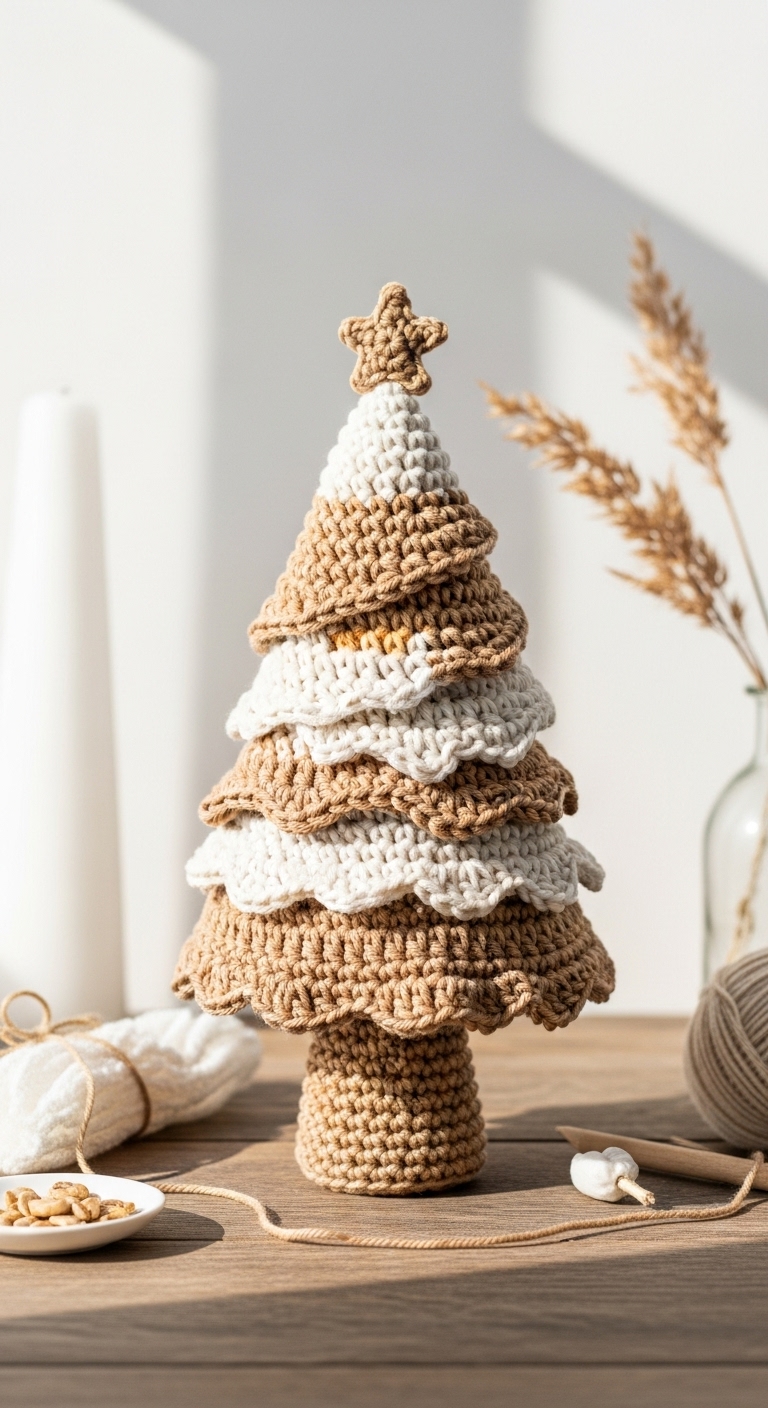
Welcome to the world of crochet! In this article, we’ll be crafting a charming standing Christmas tree that can add a festive touch to your holiday decor. This delightful project stands approximately 10 inches tall, making it a perfect size for tabletops, mantels, or as a cheerful centerpiece for your holiday gatherings.
For this project, you’ll be using a soft worsted weight yarn in complementary colors like deep emerald green, warm ivory, and a delicate touch of gold or silver for embellishment. These adult-friendly colors not only evoke the spirit of the season but also create a sophisticated look that will suit any home decor style. This Christmas tree is not only a fun and quick project, perfect for using up some scrap yarn, but it also makes for a wonderful gift or a festive addition to your holiday celebrations.
This pattern is designed to be beginner-friendly, so whether you’re just starting out or you’re looking for a simple project to get into the holiday spirit, you’ve come to the right place! Let’s make something special together.

3. Materials Needed
– Yarn: Worsted weight yarn in deep emerald green (approx. 150 yards), warm ivory (approx. 30 yards), and gold or silver (approx. 10 yards) for embellishments.
– Hook: 3.5mm or 4.0mm crochet hook
– Eyes: Safety eyes (10mm) OR black embroidery thread for detailing
– Stuffing: Polyester fiberfill stuffing
– Needle: Tapestry needle for sewing
– Marker: Stitch marker
– Optional extras: Small pom-poms for decorations, beads for added sparkle
4. Designer Notes / Tips
When it comes to creating your standing Christmas tree, consider using the double crochet stitch for the body to give it a lovely texture. If you want your tree to be a bit firmer, stuff it lightly, but for a more plush effect, don’t hesitate to add a bit more fiberfill.
Assembly is key to a well-structured tree; ensure that you join the pieces securely, using a tapestry needle to weave in ends neatly. If you can’t find the exact yarn suggested, look for a soft, wash-safe acrylic or cotton blend that holds its shape well. Pay attention to gauge; it’s important to maintain a consistent tension for a finished product that looks polished and professional.
If you’re making this tree for a child, consider omitting small embellishments or securing them firmly to prevent any choking hazard. This fun pattern can be a great way to introduce younger crafters to the joy of crochet, so feel free to involve them in the process!
5. Pattern Instructions
Standing Christmas Tree
Tree Base
Tree Body
*At the end of Round 15, stuff your tree lightly.*
Tree Top
*Stuff the top section firmly for stability.*
Assembly
– Joining Sections: Use your tapestry needle to sew the tree top to the body securely, ensuring there are no gaps.
– Embellishments: Attach small pom-poms or beads to decorate the tree. You can sew them on or use hot glue for a quick application.
– Adding Eyes: If using safety eyes, place them between rounds 14 and 15 (approximately) before closing the top. If opting for embroidery, stitch two small black dots for an adorable face.
6. Closing & Social Engagement
I hope you find joy in crafting your very own standing Christmas tree! This pattern is a wonderful way to celebrate the holiday season with handmade decor or thoughtful gifts. I’d love to see your version! Leave a comment below and tell me about your color combinations. What unique twist will you put on the design?
Share your finished trees on social media using the hashtag #CrochetChristmasTree, and let’s inspire each other with our holiday creations! You’ve got this!