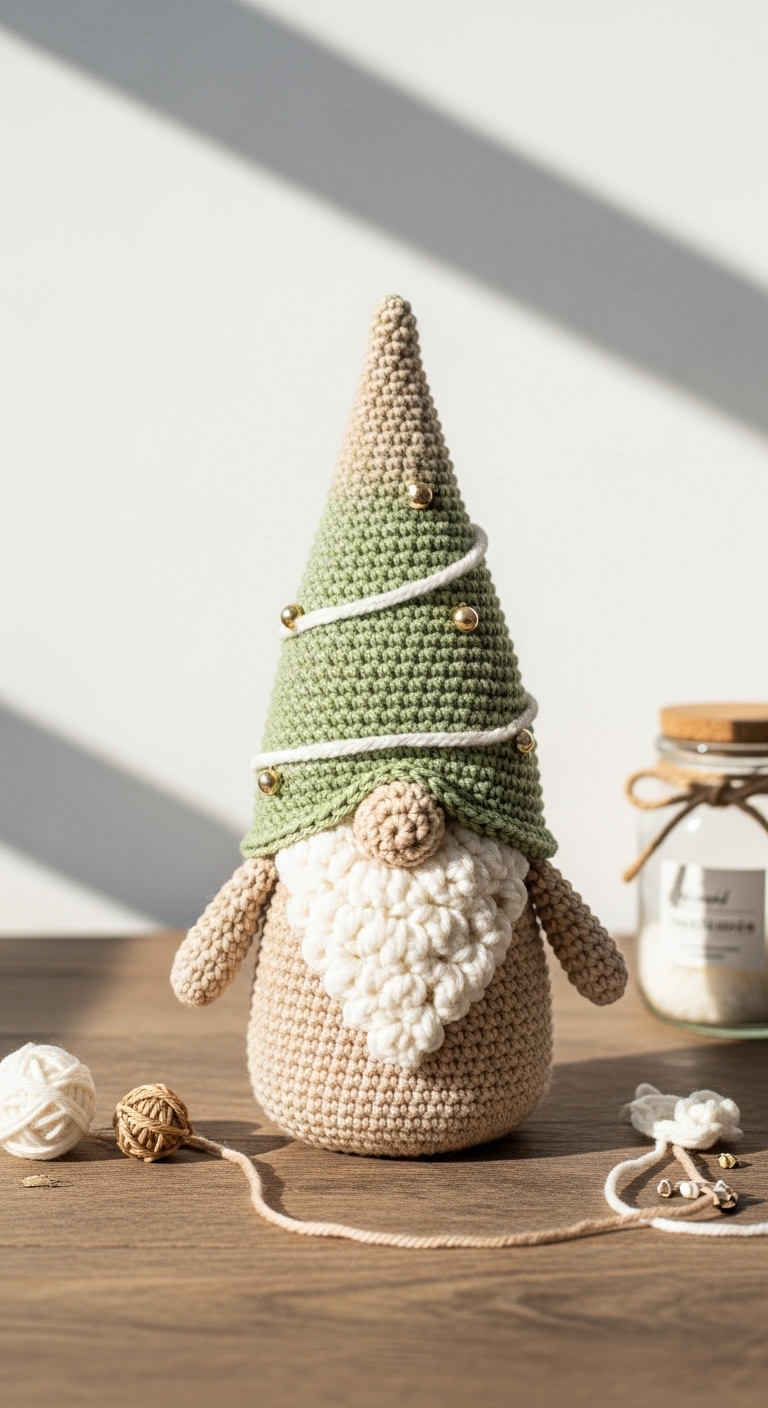
crochet dog gnome free pattern
2. Introduction
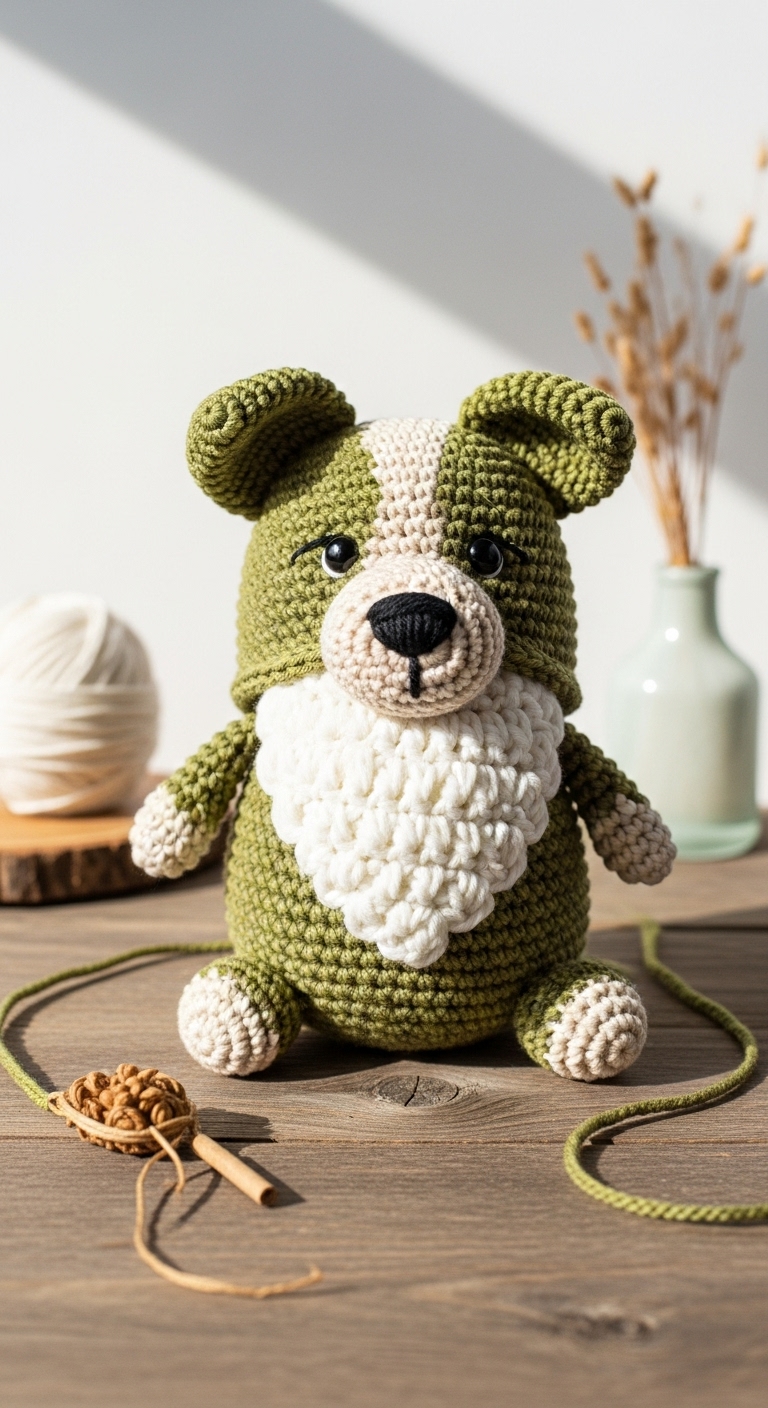
Welcome to the delightful world of crochet with our adorable Crochet Dog Gnome! This charming plushie stands approximately 10 inches tall and is the perfect companion for any dog lover or gnome enthusiast. The combination of whimsical design and cuddly form makes this project not only enjoyable to create but also a sweet addition to your home decor or a thoughtful gift for a friend.
For this project, we will be using soft, worsted weight yarn in three complementary colors: a warm caramel brown for the dog’s body, a vibrant red for the gnome hat, and a cream-colored yarn for the face and paws. These adult-friendly colors bring a sophisticated yet playful touch to your crochet gnome, ensuring it will fit seamlessly into any living space. This pattern is beginner-friendly, breaking down each step to ensure you feel confident and capable as you work through it.
With the holiday season approaching, this Crochet Dog Gnome makes for a perfect gift that is sure to bring a smile to anyone’s face. It’s quick to make, taking just a few evenings to complete, allowing you to create several in a variety of colors for all your loved ones!
3. Materials Needed
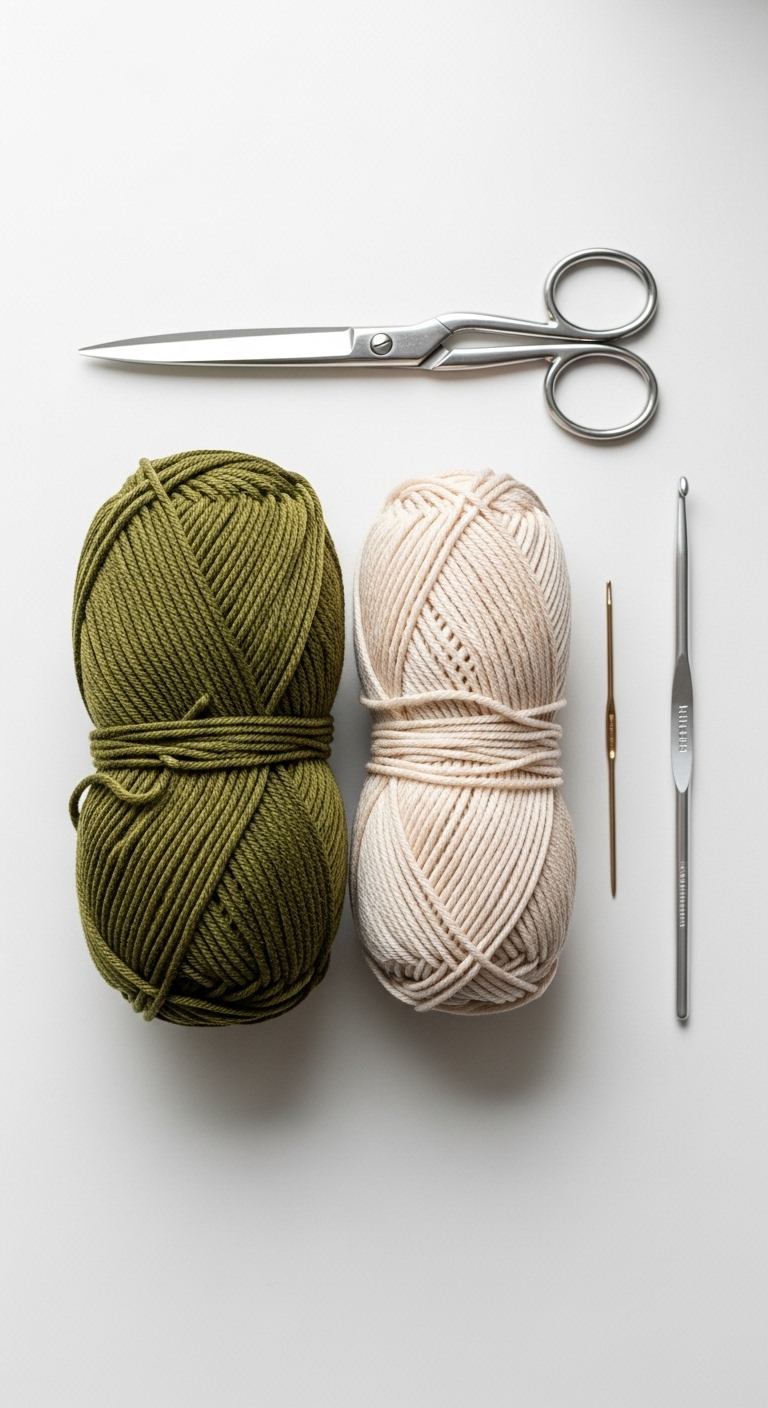
– Yarn: Worsted weight yarn in:
– Caramel Brown (approx. 150 yards)
– Vibrant Red (approx. 50 yards)
– Cream (approx. 50 yards)
– Hook: 3.5mm or 4.0mm crochet hook
– Eyes: Safety eyes (12mm) OR black embroidery thread
– Stuffing: Polyester fiberfill stuffing
– Needle: Tapestry needle for sewing
– Marker: Stitch marker
– Optional extras: Pipe cleaners (for added stability in the gnome hat)
4. Designer Notes / Tips
When working with this pattern, you will use basic stitches such as single crochet (sc) and increases (inc) to create the body of the gnome. To add some texture, you can try using a half double crochet (hdc) stitch on the gnome’s hat. Don’t worry if this is your first time using different stitches; just take your time, and you’ll get the hang of it!
For stuffing, aim for a firm density in the body and head to help maintain their shapes, while the hat can be lightly stuffed to give it a floppy look. When assembling the gnome, it’s helpful to secure pieces with pins before permanently stitching them together, ensuring everything aligns perfectly.
If you’re considering yarn substitutions, any worsted weight yarn will work, but remember to check your gauge to maintain the size. The tension can slightly vary based on your crochet style, so keep an eye on how your pieces measure up. Lastly, if this gnome is intended for small children, consider using embroidery thread for the eyes rather than safety eyes to prevent any choking hazards.
5. Pattern Instructions
For Plushies:
Head:
Body:
Arms:
Legs:
Ears:
Hat:
Assembly:
– Sew the head onto the body securely.
– Attach the arms and legs on either side of the body, positioning them slightly forward.
– Sew the ears onto the head, taking care to place them symmetrically.
– Finally, position the hat on the head and sew it in place. You can add a little bend or curve to the top with pipe cleaners for a whimsical touch.
6. Closing & Social Engagement
Congratulations on completing your own Crochet Dog Gnome! I’d love to see your version, so please leave a comment below sharing your experience. What color combination will you try? Don’t forget to share your finished gnome on social media and inspire others to join in the fun of crochet!