crochet rose and daisy turtle no sew turtle crochet pattern free
2. Introduction
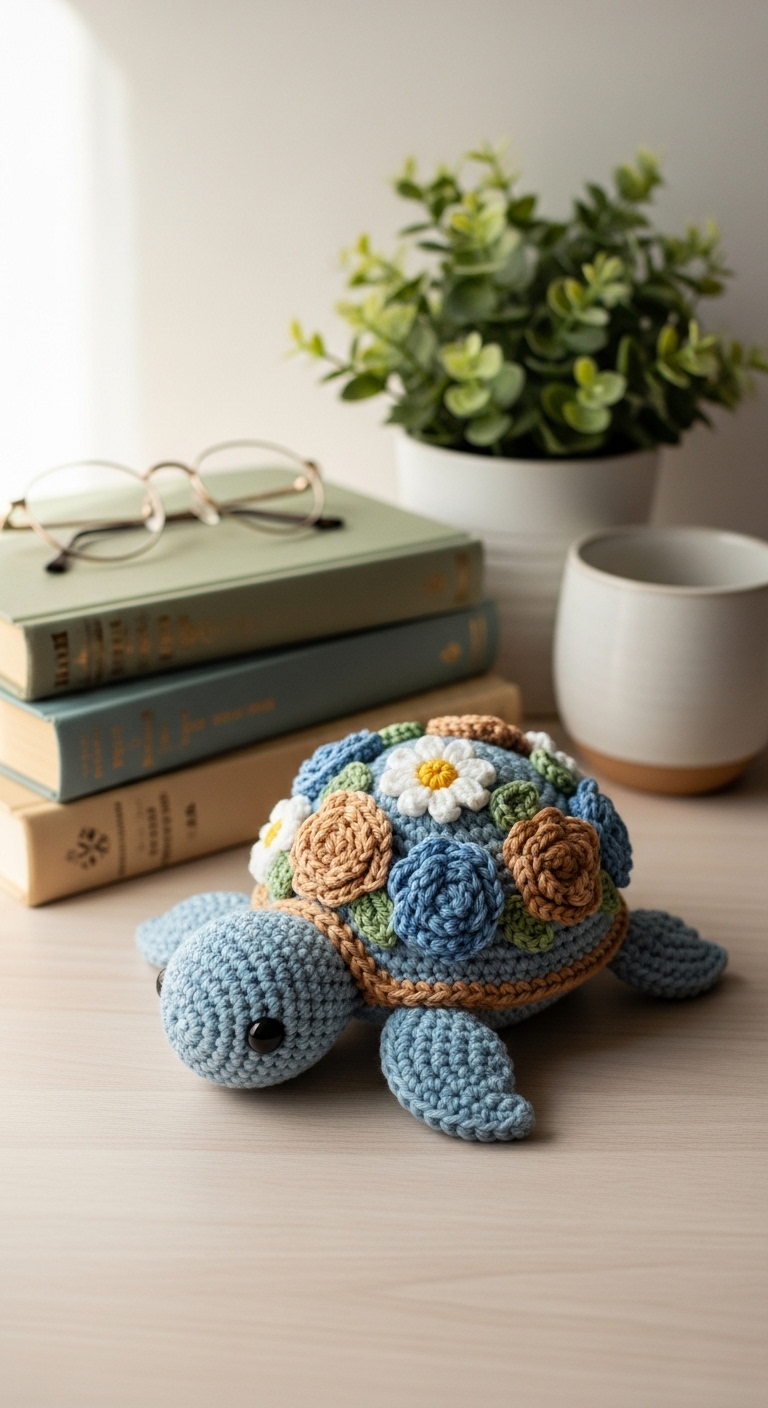
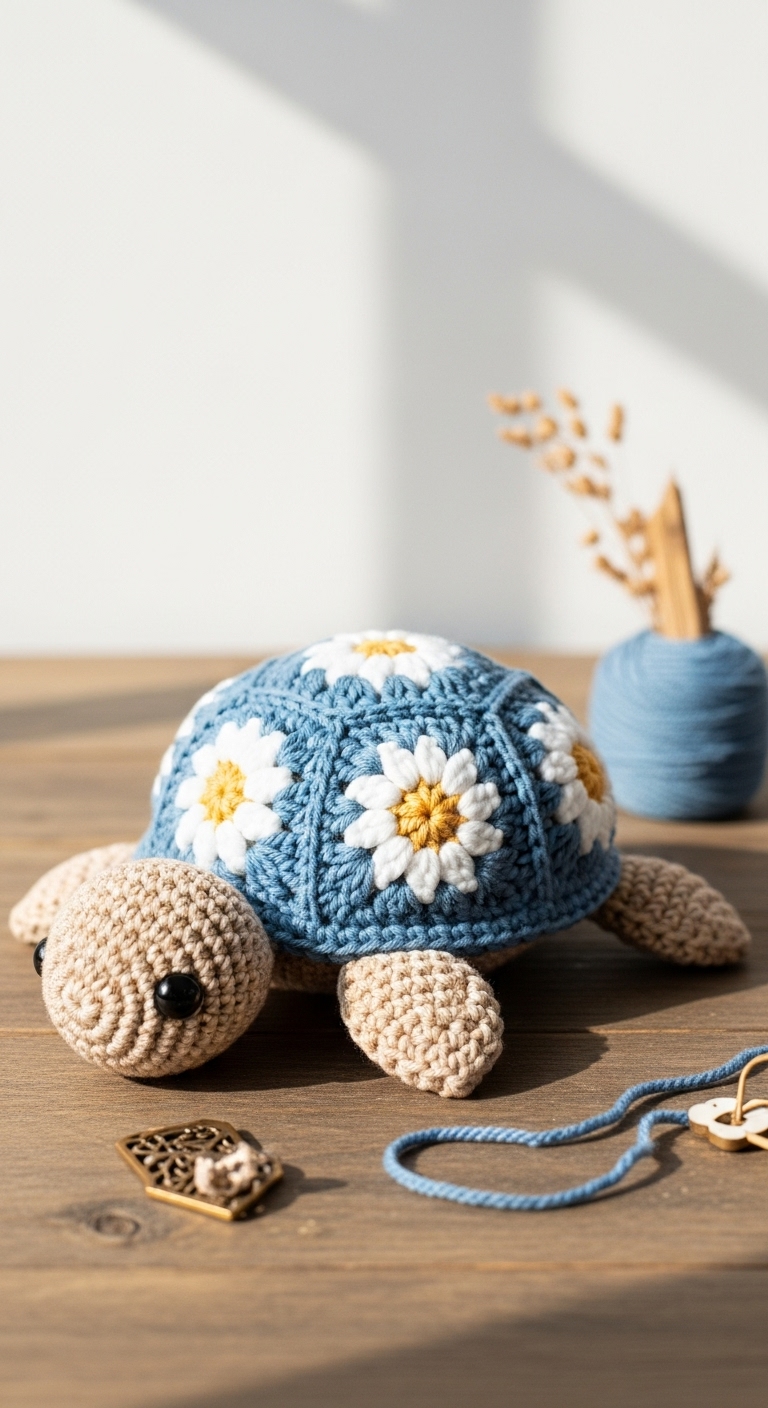
Welcome to the delightful world of crochet with this enchanting pattern for a no-sew rose and daisy turtle! Measuring approximately 8 inches from its shell to its little feet, this adorable plushie is perfect for cuddling or decorating a nursery. The best part? You can make it in just a few hours, making it an ideal project for weekend crafting sessions or as a quick gift for a loved one.
For this project, you’ll need some soft, medium-weight yarn in vibrant adult-friendly colors. Think a deep emerald green for the turtle’s body, a lovely rose pink for the shell adorned with delicate daisies in sunny yellow and white. This color combination not only adds charm but also reflects a modern aesthetic that would appeal to various tastes. Whether you’re creating it for a child or an adult who loves whimsical decor, this turtle is sure to bring joy.
This no-sew technique is beginner-friendly, ensuring that even those new to crochet can successfully complete their very own turtle. Its gift potential is high, making it a fantastic option for birthdays, baby showers, or just because you want to brighten someone’s day!
3. Materials Needed
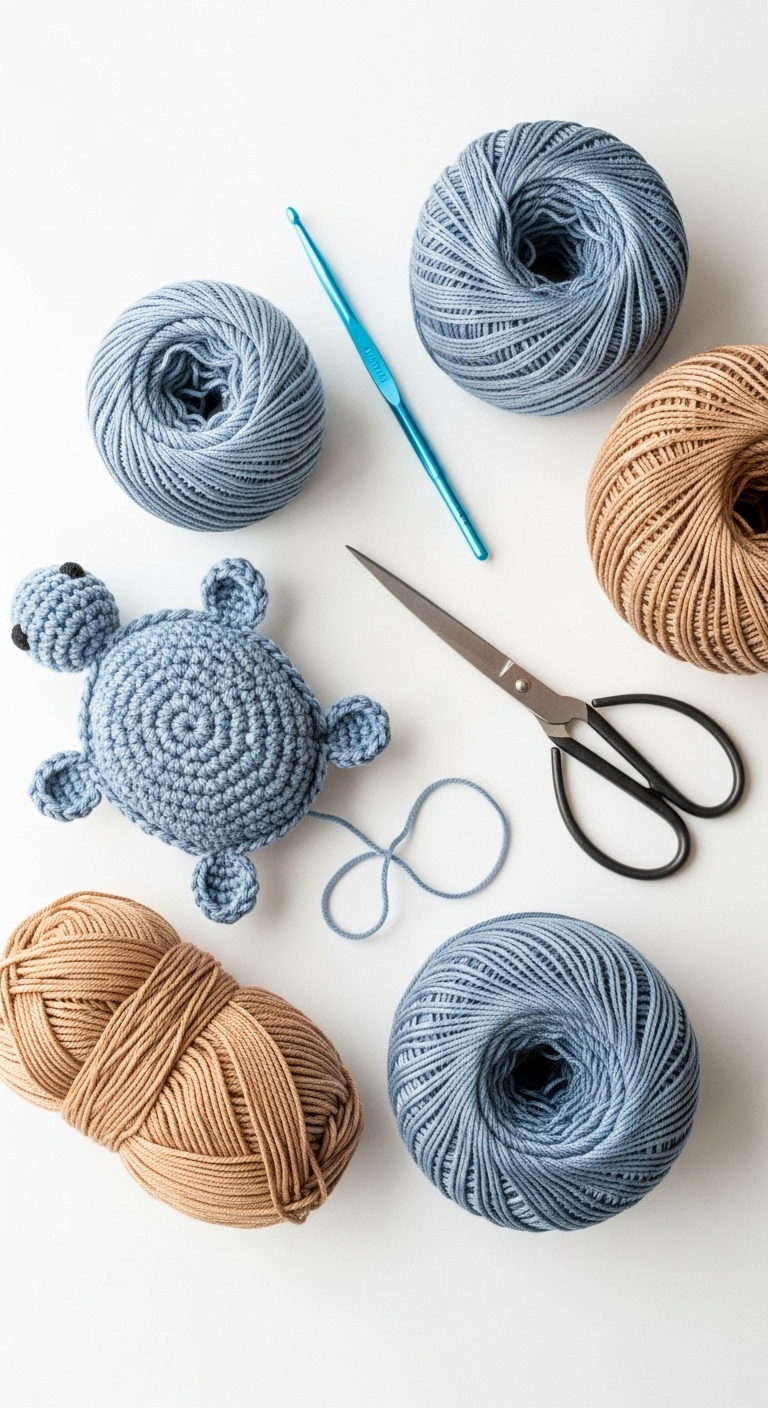
– Yarn: Medium-weight (worsted) yarn in emerald green (approx. 150 yards), rose pink (approx. 50 yards), and white/yellow for flowers (approx. 25 yards each)
– Hook: 3.5mm or 4.0mm crochet hook
– Eyes: 10mm safety eyes OR use black embroidery thread for stitching eyes
– Stuffing: Polyester fiberfill stuffing
– Needle: Tapestry needle for weaving in ends
– Marker: Stitch marker
– Optional extras: None needed for this project
4. Designer Notes / Tips
When working on the turtle, a basic single crochet stitch (sc) will be your best friend, along with occasional increases (inc) and decreases (dec) for shaping. To achieve a smooth texture, be mindful of your tension; keeping your stitches even will not only make your turtle look better but will also help it hold its shape.
When stuffing, aim for a light fluffing to maintain a plush feel, allowing the turtle to be huggable but still hold its form. This is particularly important when creating the rounded shell. For the safety eyes, place them after finishing the turtle’s head, ensuring they’re positioned evenly and not too close to the edge for safety.
If you’re using different yarns, check your gauge to match the intended size. A consistent stitch size is key to a harmonious look. For safety considerations, avoid small parts if you’re gifting to a child under three years old or substitute with safe embroidery options.
5. Pattern Instructions
For Plushies:
Head:
(At this point, place safety eyes between rounds 6 and 7, about 6 stitches apart.)
Body:
(Stuff your turtle body firmly before closing it off in the next rounds.)
Arms/Legs (Make 4):
(Leave a long tail for attaching to the body.)
Shell:
For the rose and daisy details, you can create small flowers as follows:
– Daisy (Make 3):
– Rose (Make 1):
(Shape and place these on the turtle’s back as desired.)
Assembly:
1. Attach the head to the body using the tails left from the head and body.
2. Sew the legs and arms onto the body.
3. Securely attach the shell pieces to the back of the turtle.
4. Weave in all ends.
6. Closing & Social Engagement
I hope you’re as excited to make this crochet rose and daisy turtle as I am! Don’t worry if it’s not perfect on the first try; each piece you create is uniquely yours. I’d love to see your version! Share your finished turtle on social media or leave a comment below.
What color combination will you try for your turtle? Happy crocheting!