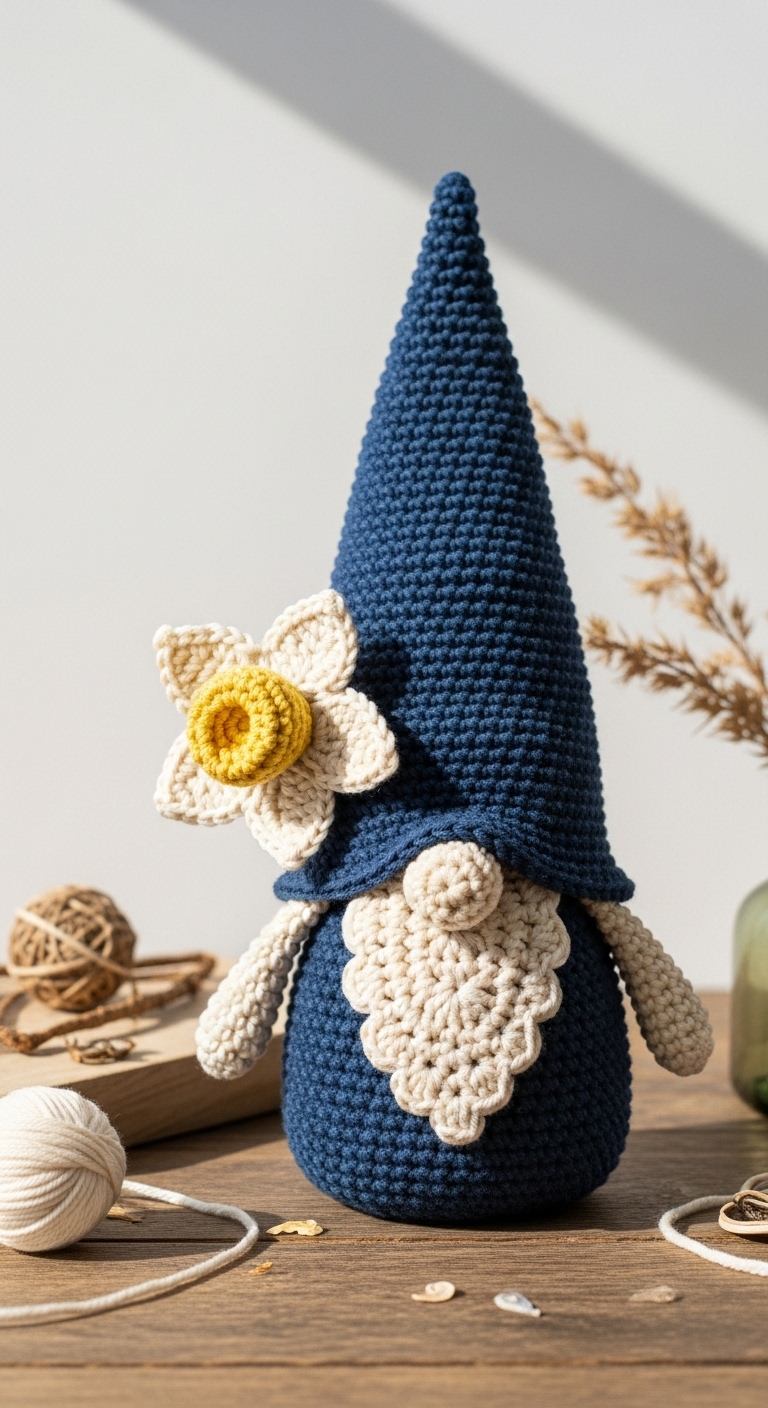
crochet daffodil gnome free pattern
2. Introduction
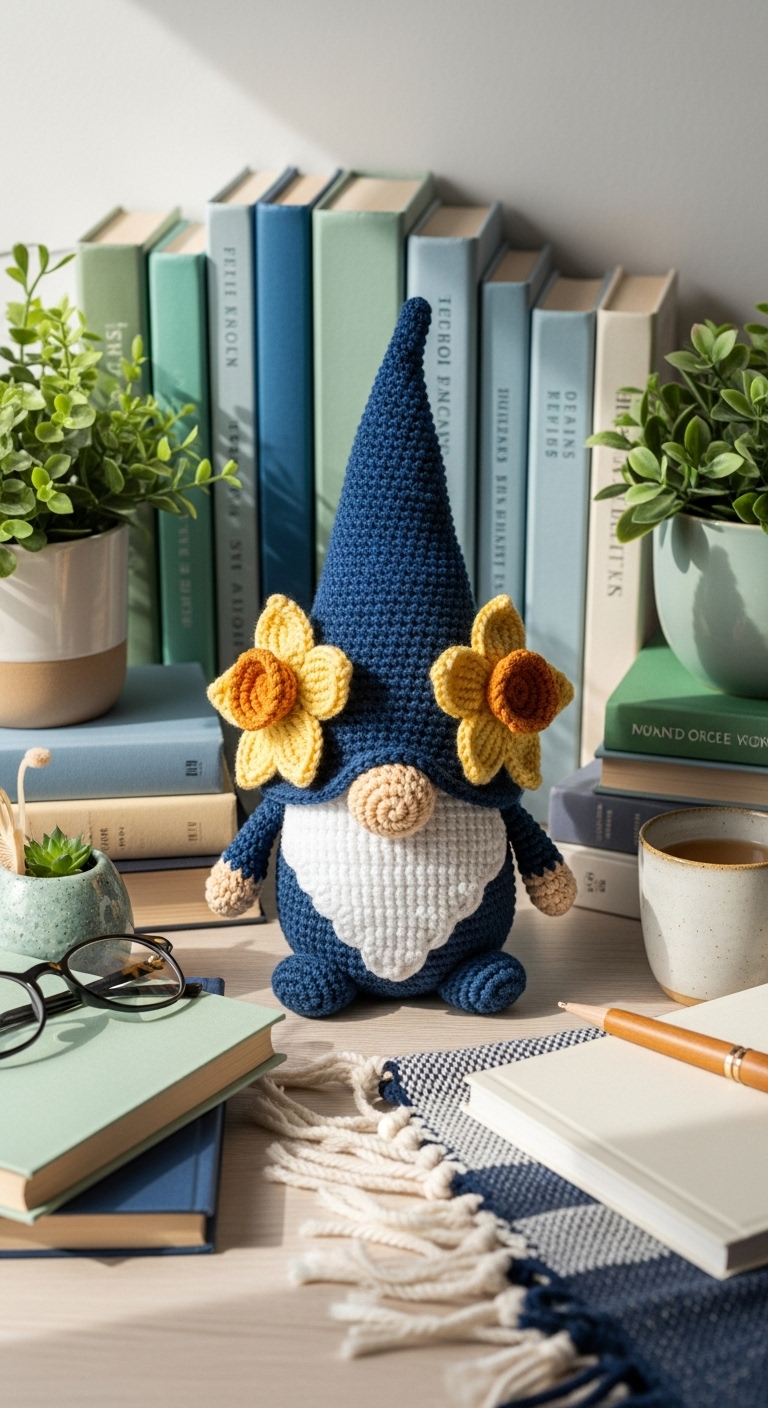
Welcome to the cheerful world of crochet with this delightful Daffodil Gnome pattern! This charming gnome, standing at approximately 10 inches tall, is a wonderful addition to your spring décor or a lovely gift for a gardening enthusiast in your life. With its vibrant yellow daffodil hat and sweet, whimsical face, this gnome is bound to bring a smile to anyone who sees it.
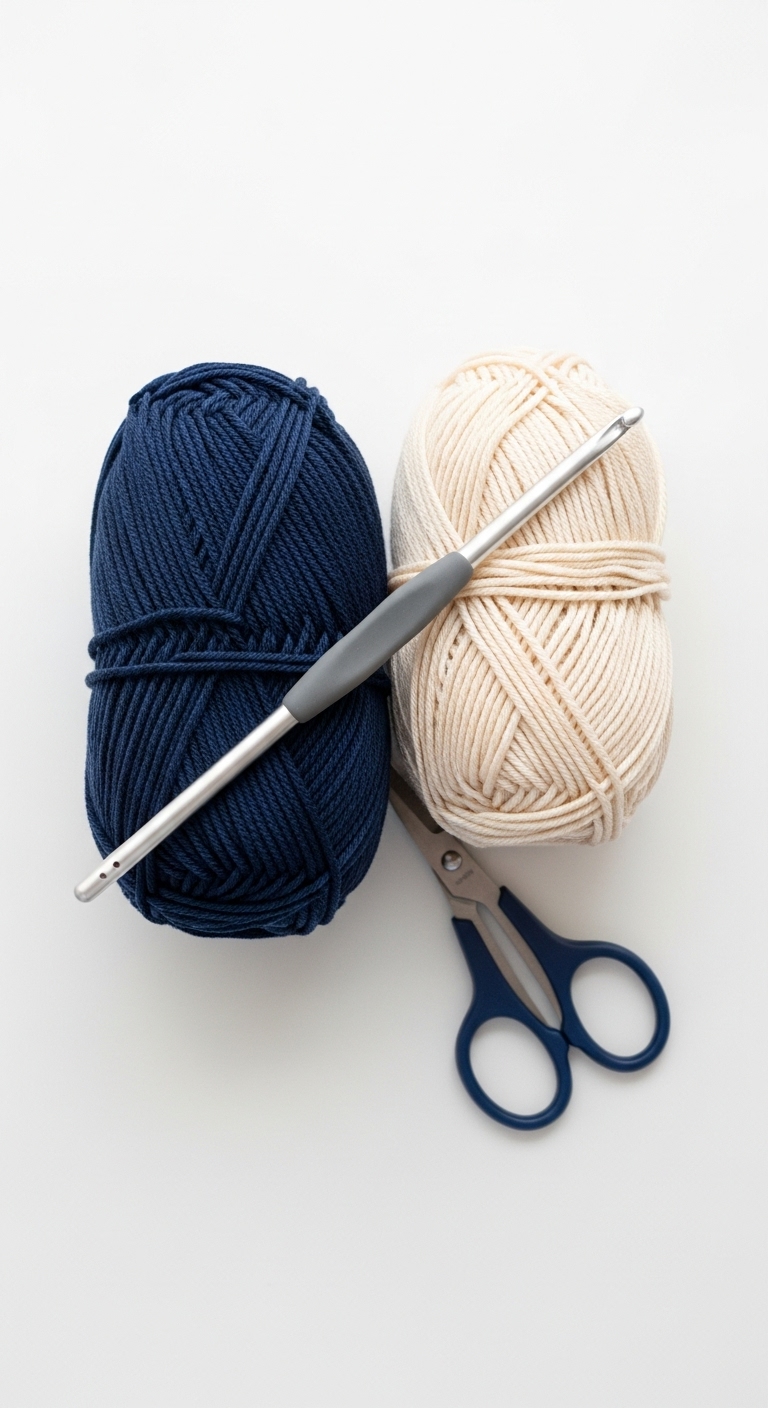
For this project, you’ll be using worsted weight yarn in complementary colors like a sunny yellow, soft green, and a warm beige. These colors not only reflect the beauty of spring but also blend seamlessly to create a modern yet playful aesthetic. This pattern is designed to be beginner-friendly, making it perfect for those new to amigurumi or crochet in general. Plus, with a quick project time, you can whip up several of these adorable gnomes to adorn your home or share with friends during the blooming season!
3. Materials Needed
– Yarn: Worsted weight yarn in yellow (approx. 100 yards), green (approx. 50 yards), and beige (approx. 50 yards)
– Hook: 3.5mm crochet hook
– Eyes: Safety eyes (12mm) OR black embroidery thread for stitching
– Stuffing: Polyester fiberfill stuffing
– Needle: Tapestry needle for sewing
– Marker: Stitch marker
– Optional extras: Embellishments like buttons or felt for added detail
4. Designer Notes / Tips
When crocheting your Daffodil Gnome, you’ll be using basic stitches, such as single crochet and increases, making it a great project for beginners. One tip to create a lovely texture for the gnome’s body is to use a tighter tension while working on the lower half; this will help maintain its shape without any stuffing poking through.
For stuffing density, aim for a medium firmness—enough to help the gnome stand, but not so firm that it loses its cuddly charm. As you assemble your gnome, take your time joining the pieces. Using a whip stitch to attach the hat to the head ensures a neat finish, and placing your safety eyes before fully stuffing the head will help secure them in place.
If you’re considering yarn substitutions, any worsted weight yarn will work; just be mindful of the color choices to keep the spring vibe intact. And remember, it’s important to keep a consistent gauge throughout the project to ensure all pieces fit together nicely. If making this for a child, consider using securely attached features instead of safety eyes, or embroider them for a safer option.
5. Pattern Instructions
For Plushies:
Head:
Body:
Arms:
Hat:
Assembly:
– Attach safety eyes to the head between rounds 5 and 6, about 6 stitches apart.
– Sew the hat onto the head using the long tail from the hat. Make sure the hat is positioned to create a point at the top.
– Stuff the arms lightly and sew them to the sides of the body.
– Attach the head to the body, ensuring it is centered.
6. Closing & Social Engagement
I hope you enjoy making your very own Daffodil Gnome! This cheerful little character is sure to brighten up your space and could become a beloved gift for anyone who appreciates the beauty of spring. I’d love to see your version! Leave a comment below or share your finished gnome on social media using the hashtag #DaffodilGnome. What color combination will you try? Happy crocheting!