crochet poppy gnome free pattern
2. Introduction
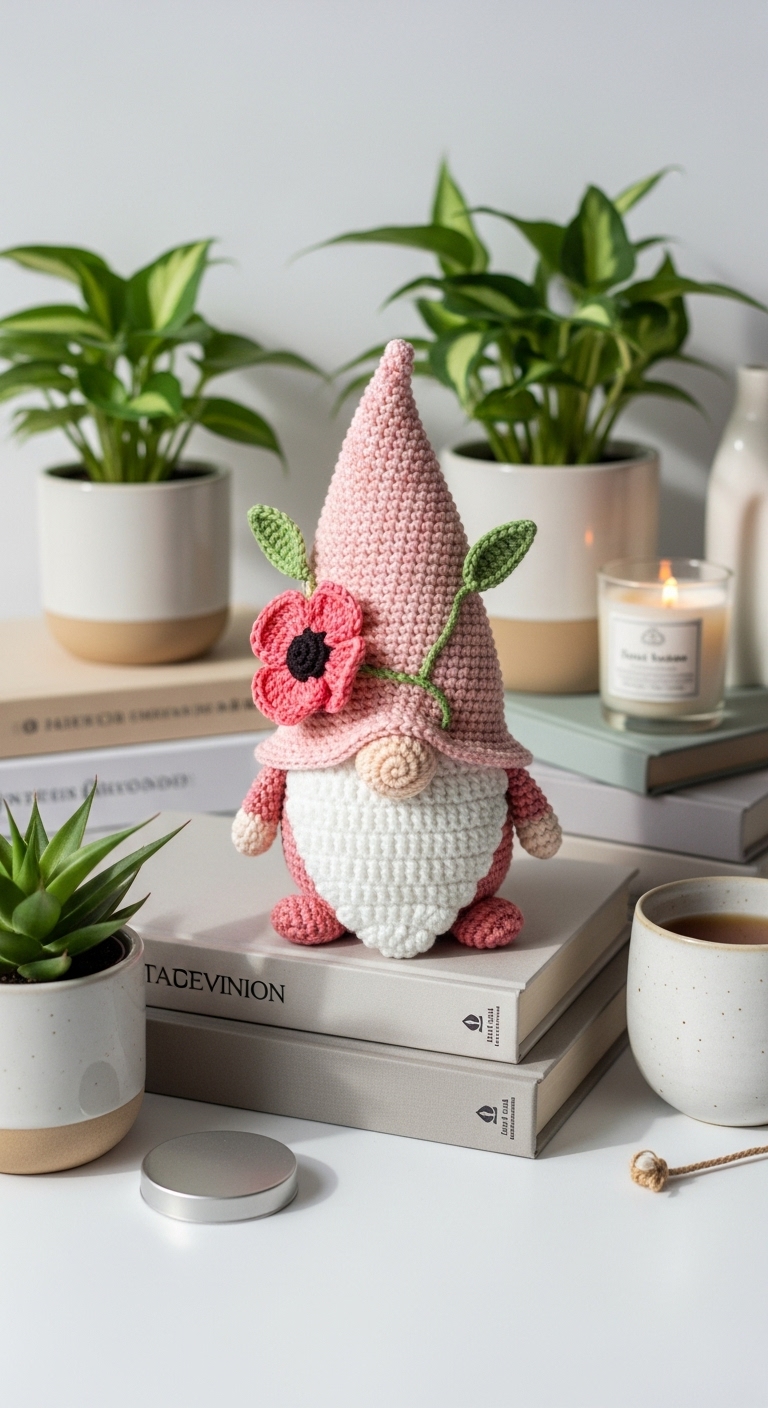
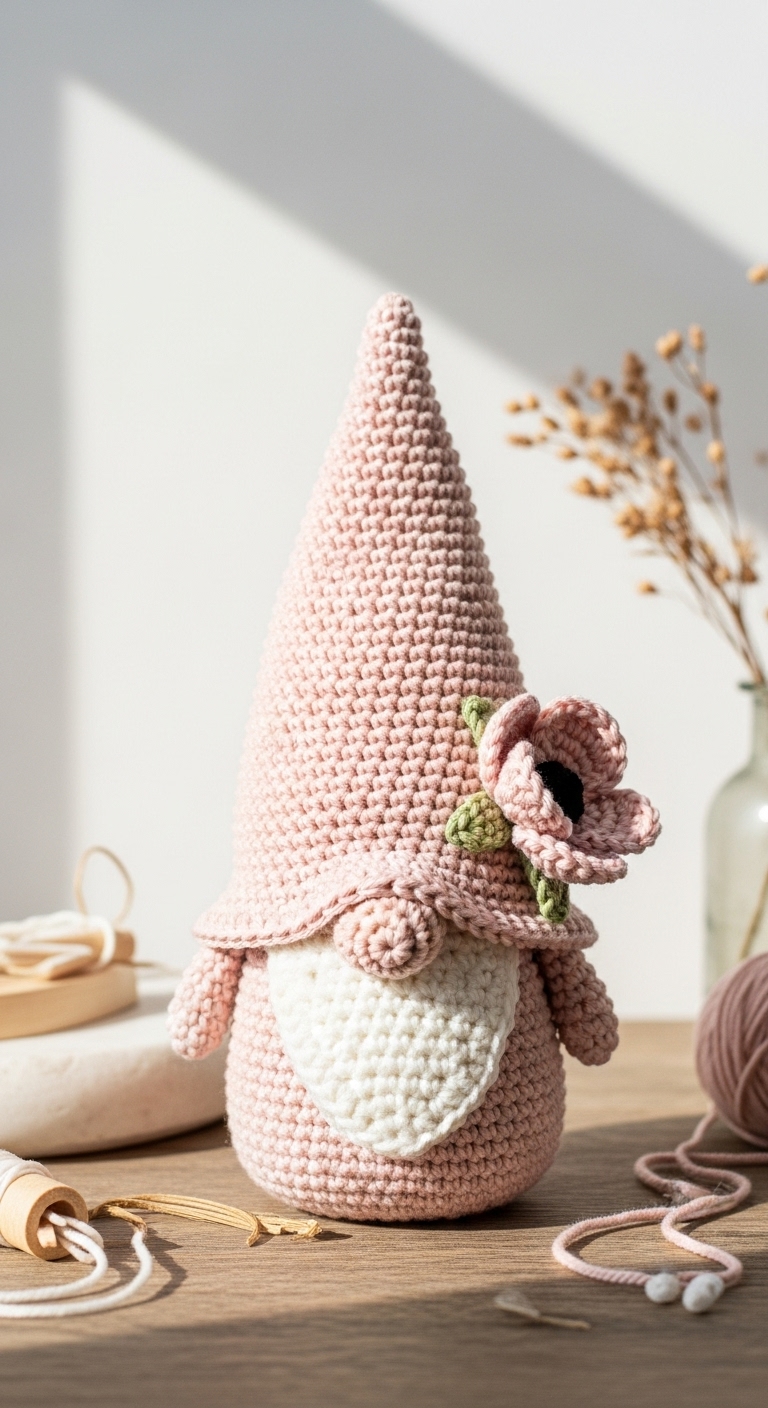
Welcome to the delightful world of crochet with our free pattern for the cheerful Crochet Poppy Gnome! This adorable plushie stands approximately 10 inches tall, making it the perfect size for home décor or as a charming gift for friends and family. Featuring a vibrant combination of red, green, and beige yarn, this gnome will brighten up any space. The bold colors not only reflect the beauty of poppies but also create a striking contrast that is sure to catch the eye.
Creating this gnome is not only enjoyable but also quick, taking just a few hours to complete. The pattern is designed to be beginner-friendly, making it accessible for crafters of all skill levels. Whether you’re looking for a fun project to unwind with or a lovely handmade gift for a special occasion, this poppy gnome fits the bill perfectly. It’s a seasonal delight that can be displayed during spring and summer or gifted as a thoughtful present for any time of year.
3. Materials Needed
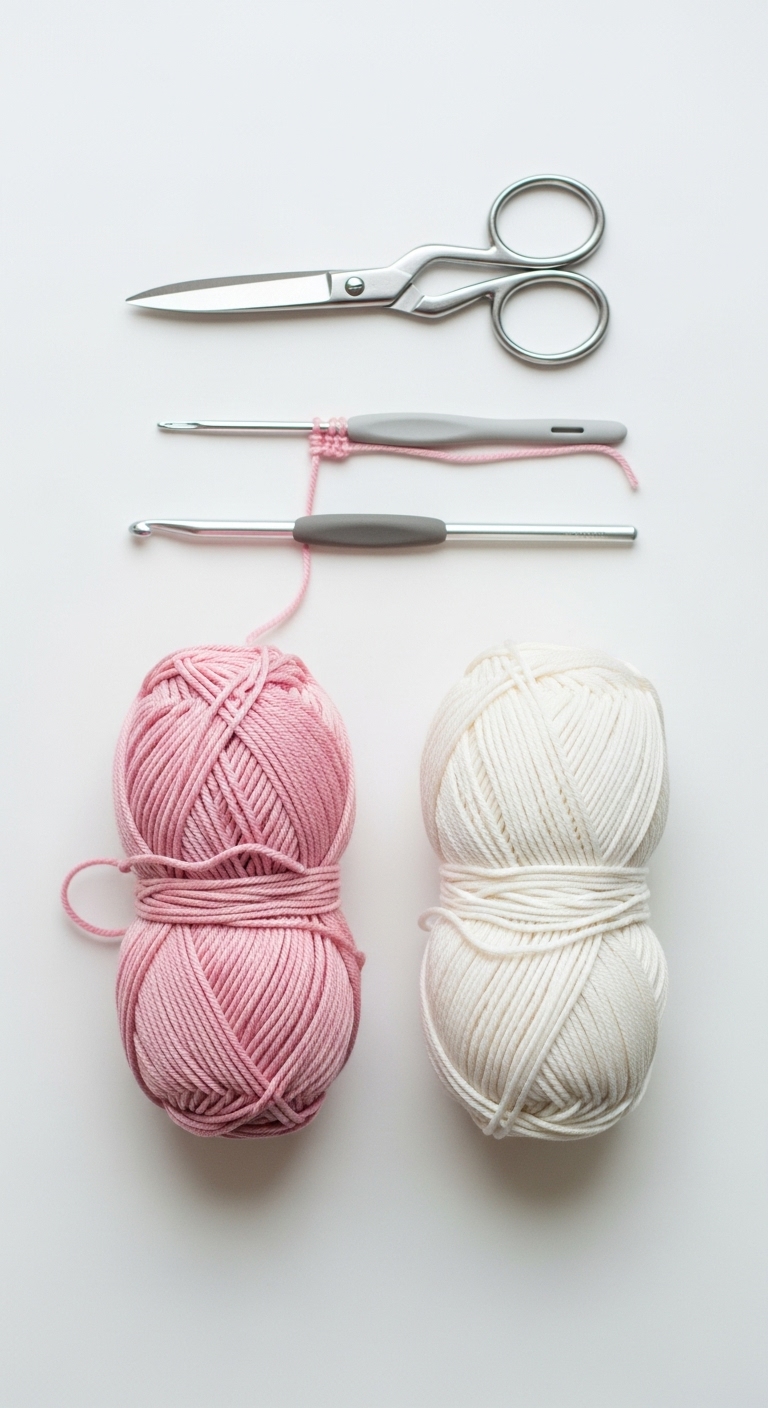
– Yarn: Worsted weight yarn in red (approx. 100 yards), green (approx. 50 yards), and beige (approx. 50 yards)
– Hook: 3.5mm (US E) or 4.0mm (US G) crochet hook
– Eyes: 12mm safety eyes OR black embroidery thread for detailing
– Stuffing: Polyester fiberfill stuffing
– Needle: Tapestry needle for sewing pieces together and weaving in ends
– Marker: Stitch marker to track rounds
– Optional extras: Small pom-pom maker for the gnome’s hat tip
4. Designer Notes / Tips
– Stitch Technique: This pattern incorporates basic stitches such as single crochet (sc) and increases (inc). If you’re unfamiliar with these stitches, there are plenty of online tutorials available to help you out!
– Stuffing Density: For the gnome, aim for a medium firmness when stuffing. This will give it a nice shape while ensuring that it remains cuddly.
– Assembly: When joining pieces, ensure that your stitches are neat and tight. Use your tapestry needle to weave in ends securely after assembly.
– Yarn Substitutions: If you can’t find the exact colors, feel free to experiment with any worsted weight yarns in similar shades. Acrylic yarn is a great alternative for vibrant colors that hold their shape well.
– Gauge Tips: While gauge isn’t crucial for this project, a tighter stitch will help prevent stuffing from showing through.
– Safety Considerations: If you plan to gift this gnome to a small child, consider using embroidered features instead of safety eyes to avoid any choking hazards.
5. Pattern Instructions
For Plushies:
Head:
Body:
Arms (make 2):
Hat:
Assembly:
– Attach the safety eyes to the head between rounds 6 and 7, spacing them about 5 stitches apart.
– Sew the head to the body using the long tail from the head.
– Attach the arms on either side of the body.
– Position the hat on the head, ensuring it fits snugly, and sew it in place.
– Optionally, create a small pom-pom for the tip of the hat using a pom-pom maker or wrap yarn around your fingers before trimming the ends.
6. Closing & Social Engagement
I hope you enjoy making your very own Crochet Poppy Gnome! It’s a delightful project that can be customized with different colors and embellishments. I’d love to see your version! Leave a comment below and share what color combination you decided to try. Don’t forget to share your finished gnome on social media; your creativity might inspire others in the crochet community!