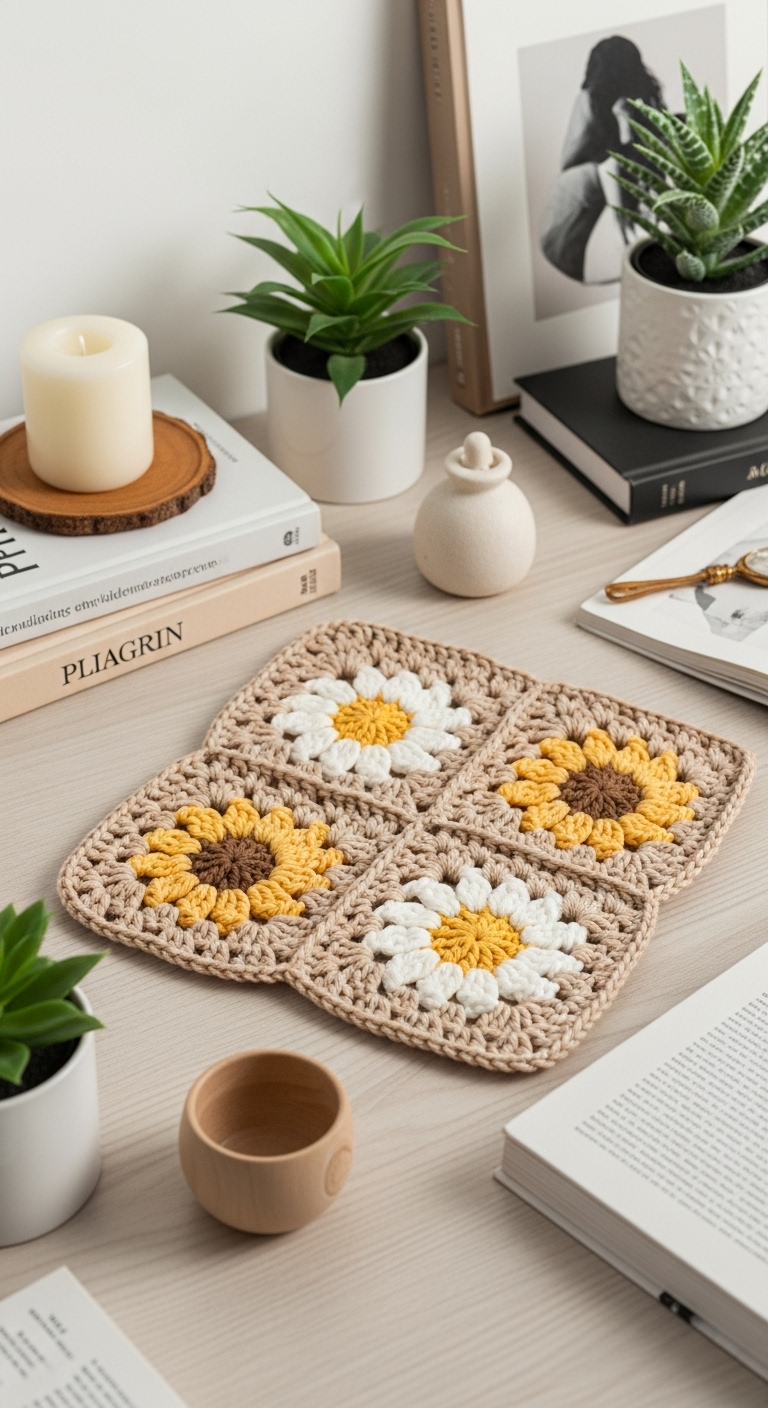
crochet daisy and sunflower granny square
2. Introduction
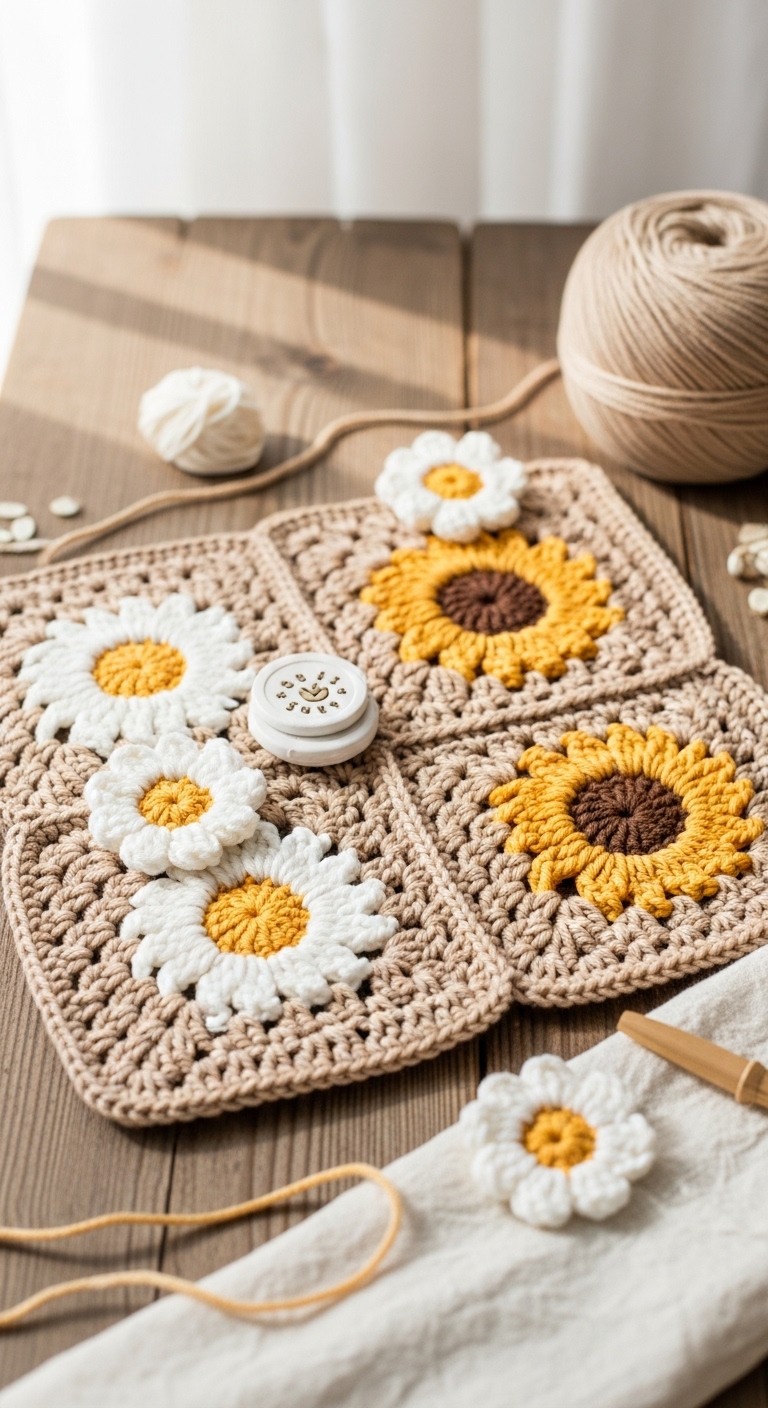
Welcome to your new crochet adventure—creating a lovely crochet daisy and sunflower granny square! This delightful project combines floral motifs to bring a touch of sunshine into your home. Each square measures approximately 6 inches (15 cm) when complete, making it the perfect size for coasters, cushion covers, or even a whimsical blanket throw.
For this project, I recommend using a lightweight cotton yarn that is easy to work with and has a beautiful drape. Opt for a sunny yellow for the sunflowers, a fresh white for the daisies, and a bright green for the leaves. These complementary colors create a modern yet cheerful aesthetic, perfect for adult crafters looking to brighten up their living spaces. This pattern is beginner-friendly, so whether you’re just starting your crochet journey or looking for a quick and enjoyable project, you’re in the right place! Plus, these squares make wonderful gifts or seasonal decorations, especially as spring approaches or to celebrate summer.
3. Materials Needed
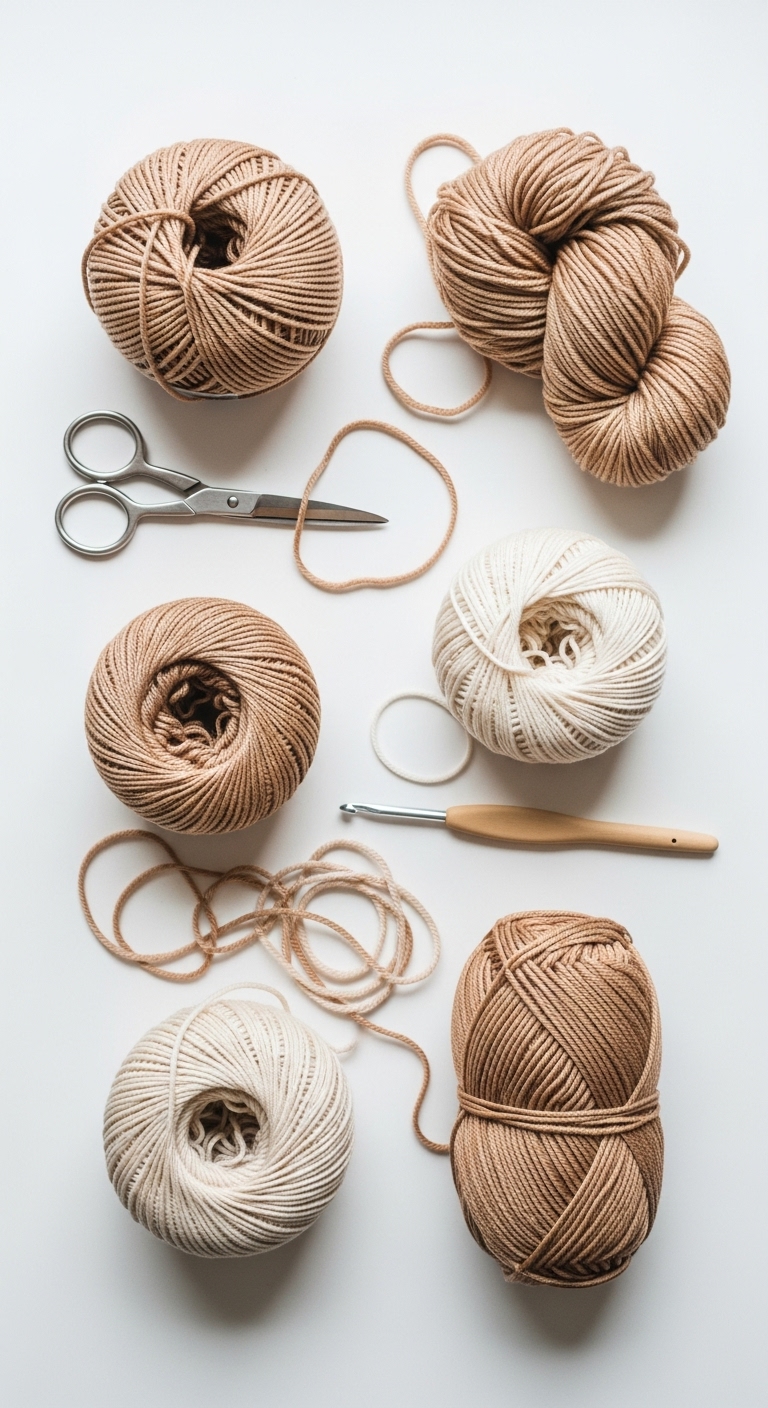
– Yarn: DK (Light) weight cotton yarn in yellow (approx. 50 yards), white (approx. 50 yards), and green (approx. 25 yards)
– Hook: 3.5mm or 4.0mm crochet hook
– Eyes: Not applicable for this project
– Stuffing: Not applicable for this project
– Needle: Tapestry needle for weaving in ends
– Marker: Stitch marker (optional but helpful)
– Optional extras: None needed for this project
4. Designer Notes / Tips
– Stitch technique: This granny square incorporates basic stitches such as chain stitches, slip stitches, and double crochet. Be sure to maintain a consistent tension throughout to keep your squares looking neat and uniform.
– Assembly: As this pattern consists of squares, there is no need for complex assembly. However, joining squares can be done using slip stitches or whip stitches for a neat finish.
– Yarn substitutions: If you can’t find the recommended yarn, any DK weight yarn in similar colors will work well. Just keep in mind that different fibers may affect the drape and texture of the squares.
– Gauge tips: It’s not critical to achieve an exact gauge, but if your squares are significantly larger or smaller than 6 inches, consider adjusting your hook size.
– Safety considerations: This project is safe for all ages; however, it’s perfect as a decorative item rather than a toy.
5. Pattern Instructions
Daisy and Sunflower Granny Square
Foundation:
– Round 1: In yellow, make a magic ring, ch 3 (counts as 1st dc), add 11 dc in the ring, pull the ring tight. Join with a slip stitch to the top of the beginning ch-3 (12 dc).
Sunflower Petals:
– Round 2: Switch to yellow, ch 2 (counts as 1st hdc), *hdc, ch 2, hdc* in the same stitch, repeat this in each stitch around. Join with a slip stitch (12 petals).
Daisy Center:
– Round 3: Switch to white, slip stitch into the first ch-2 space, ch 3 (counts as 1st dc), *2 dc, ch 1, 3 dc* in the same space, repeat in each ch-2 space. Join with a slip stitch (12 clusters).
Daisy Petals:
– Round 4: In white, ch 2, *slip stitch in the next space, ch 5, slip stitch in the same space* to create a petal, repeat this around. Join with a slip stitch (12 petals).
Green Leaf Border:
– Round 5: Switch to green, slip stitch into the first petal, ch 3, *dc in same petal, ch 1, dc in the next petal, ch 1* around. Join with a slip stitch (24 stitches).
Finishing:
– Weave in all loose ends using a tapestry needle. Your granny square is now complete!
Notes:
– Be sure to place your stitch marker at the beginning of each round to keep track.
– Feel free to mix and match colors or even add more rounds for larger squares!
6. Closing & Social Engagement
I’d love to see your version of the crochet daisy and sunflower granny square! What color combination will you try? Leave a comment below or share your finished squares on social media! Happy crocheting!