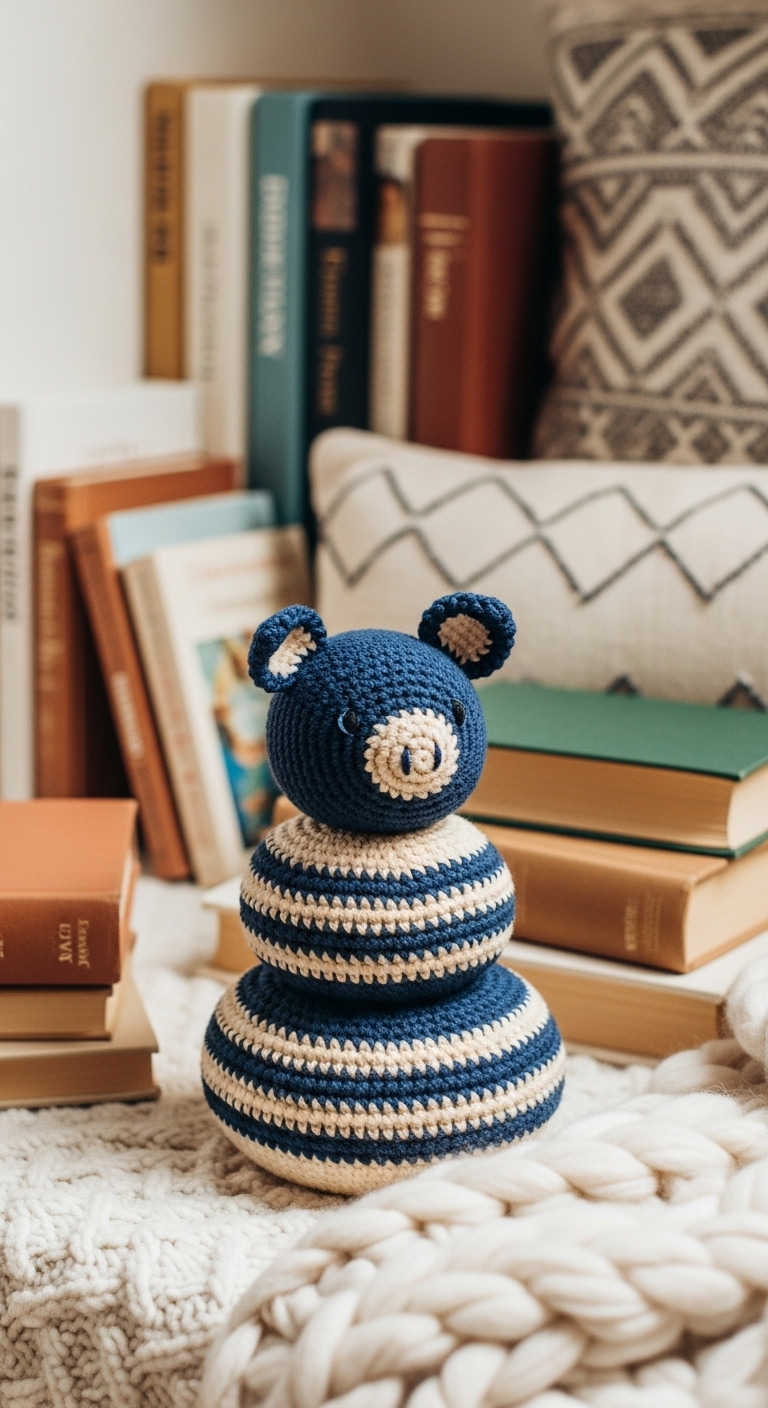
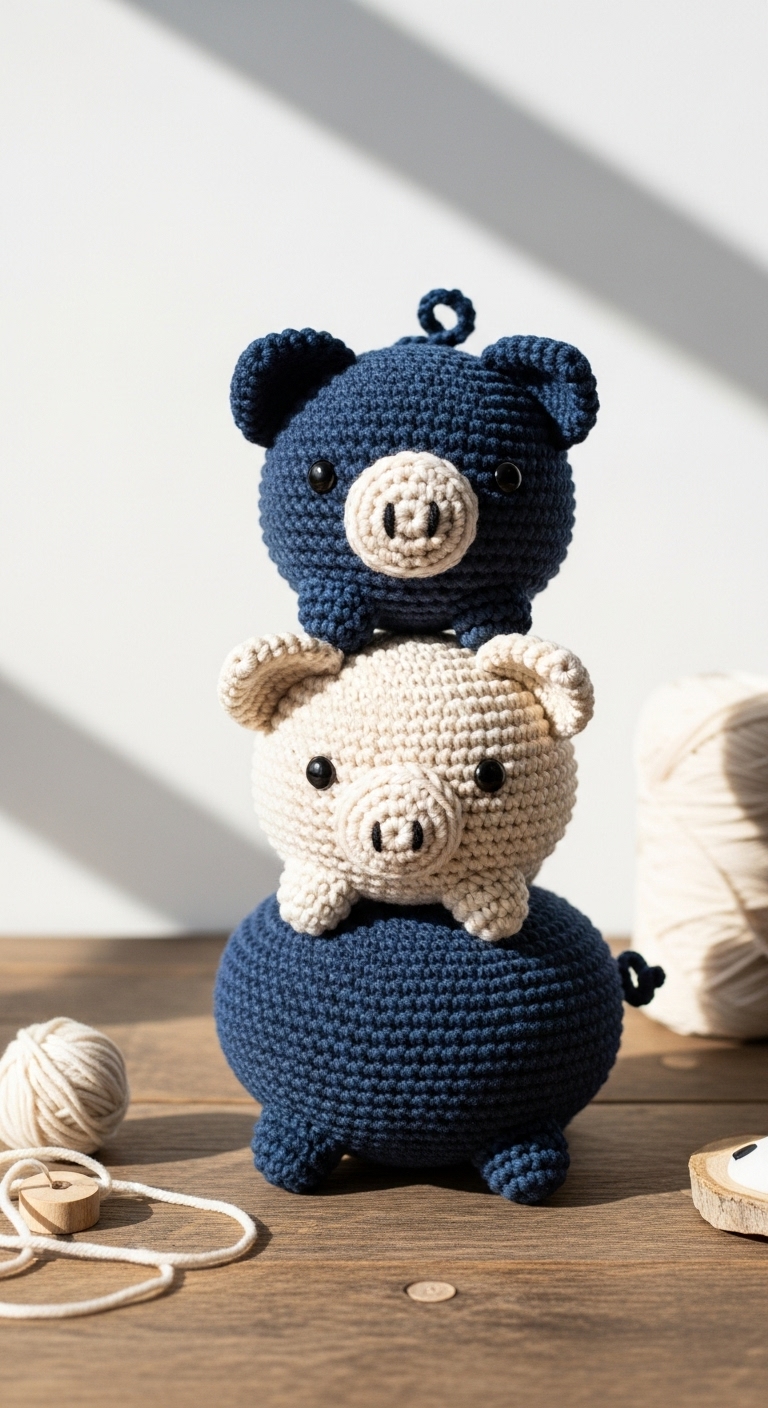
stacking pig toy free crochet pattern
2. Introduction
Welcome to the delightful world of crochet! Today, I’m excited to share with you a free crochet pattern for an adorable stacking pig toy. Standing at approximately 10 inches tall when fully stacked, this charming plushie consists of three tiers of cheerful piglets, each one cuter than the last. Crafted in soft, squishy yarn, this project is not only visually appealing but also a joy to handle.
For this project, I recommend using a medium-weight yarn in a palette of soft pink, creamy beige, and gentle brown. These adult-friendly colors create a sophisticated look that’s perfect for both children and adults alike. The stacking pig toy is quick to make, which means you can whip up a few of them in no time—ideal for gifts or a cozy addition to your home decor! This pattern is beginner-friendly, making it a perfect choice for those new to crochet or anyone looking for a satisfying project. It’s a great gift for baby showers, birthdays, or simply to brighten someone’s day.
3. Materials Needed
– Yarn: Medium-weight (worsted) yarn in soft pink (approx. 300 yards), creamy beige (approx. 50 yards), and gentle brown (approx. 50 yards)
– Hook: 3.5mm or 4.0mm crochet hook
– Eyes: Safety eyes (12mm) OR black embroidery thread for stitching eyes
– Stuffing: Polyester fiberfill stuffing
– Needle: Tapestry needle for sewing
– Marker: Stitch marker
– Optional extras: Pipe cleaners for added stability in the ears or tail, if desired
4. Designer Notes / Tips
When making the stacking pig toy, I recommend using a simple single crochet (sc) stitch to create a smooth texture. If you want to add a bit of fun, consider using the half double crochet (hdc) for the body of each pig to give it a little more depth.
For stuffing, I suggest using a light hand; a lightly stuffed pig will be more huggable and soft, while a firmer stuffing can provide more structure for stacking. When assembling the pieces, I recommend joining them securely to ensure they can withstand some playful stacking and unstacking.
If you’re using an alternative yarn, ensure that it maintains a similar weight to avoid discrepancies in size. A quick note on gauge—5 stitches per inch is ideal for this pattern, but don’t stress too much if you’re slightly off; the pigs are forgiving! Lastly, if you’re making this toy for young children, consider securing the eyes well or using embroidery to ensure they’re safe.
5. Pattern Instructions
Let’s get started with our adorable stacking pig toy!
For Plushies:
Head:
Body:
Arms/Legs (make 4):
Ears (make 2):
Tail:
Assembly:
1. Sew the ears to the top of the head.
2. Attach the safety eyes between Rounds 5 and 6 of the head.
3. Join the head to the body securely.
4. Attach the arms and legs to the body.
5. Finally, sew the tail to the back.
As you assemble the pieces, take your time to ensure everything is secure and well-placed. Feel free to adjust any features to give each pig its own personality!
6. Closing & Social Engagement
Congratulations on completing your stacking pig toy! I’d love to see your version of this pattern—leave a comment below sharing your experience! What color combination will you try for your pigs? Don’t forget to share your finished project on social media using your favorite crochet hashtags. Happy crocheting!