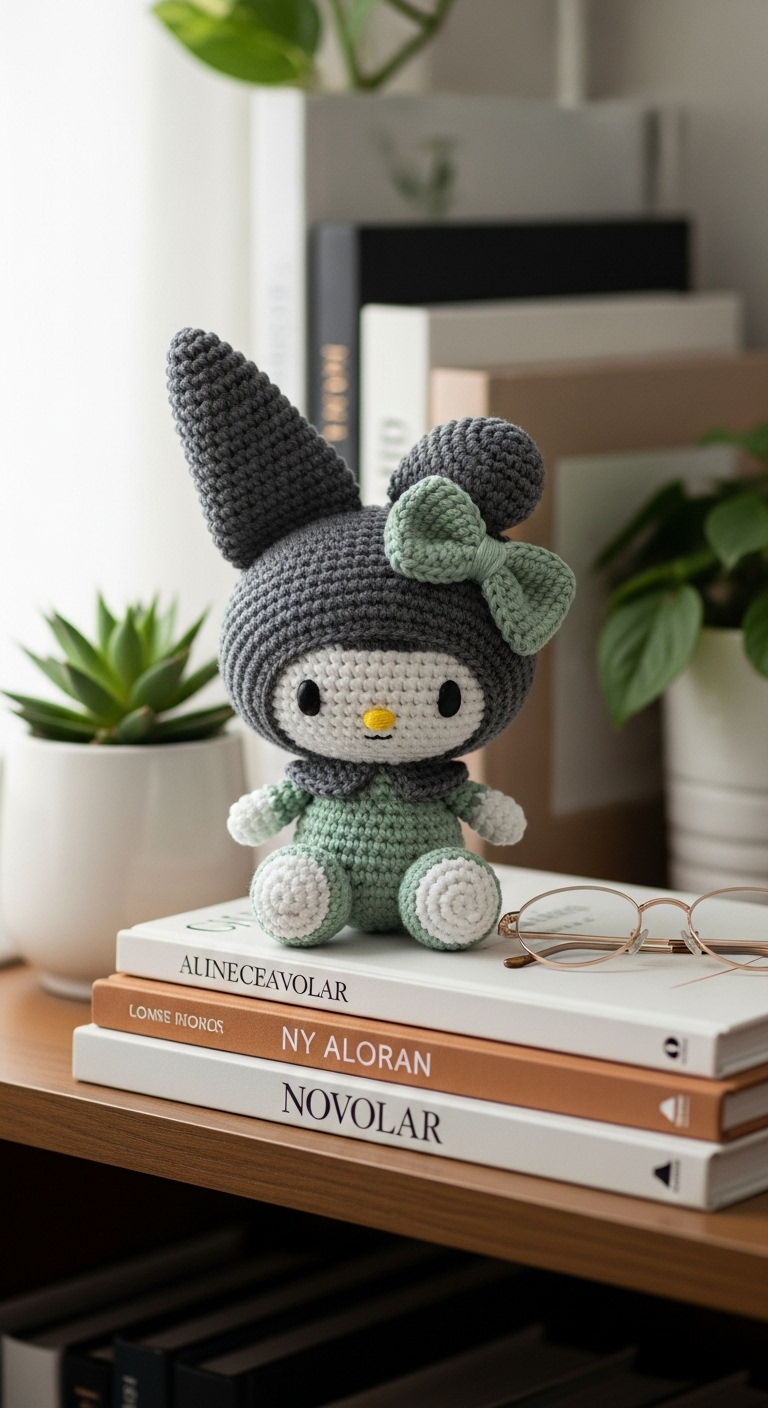
My Melody – Crochet Pattern
2. Introduction
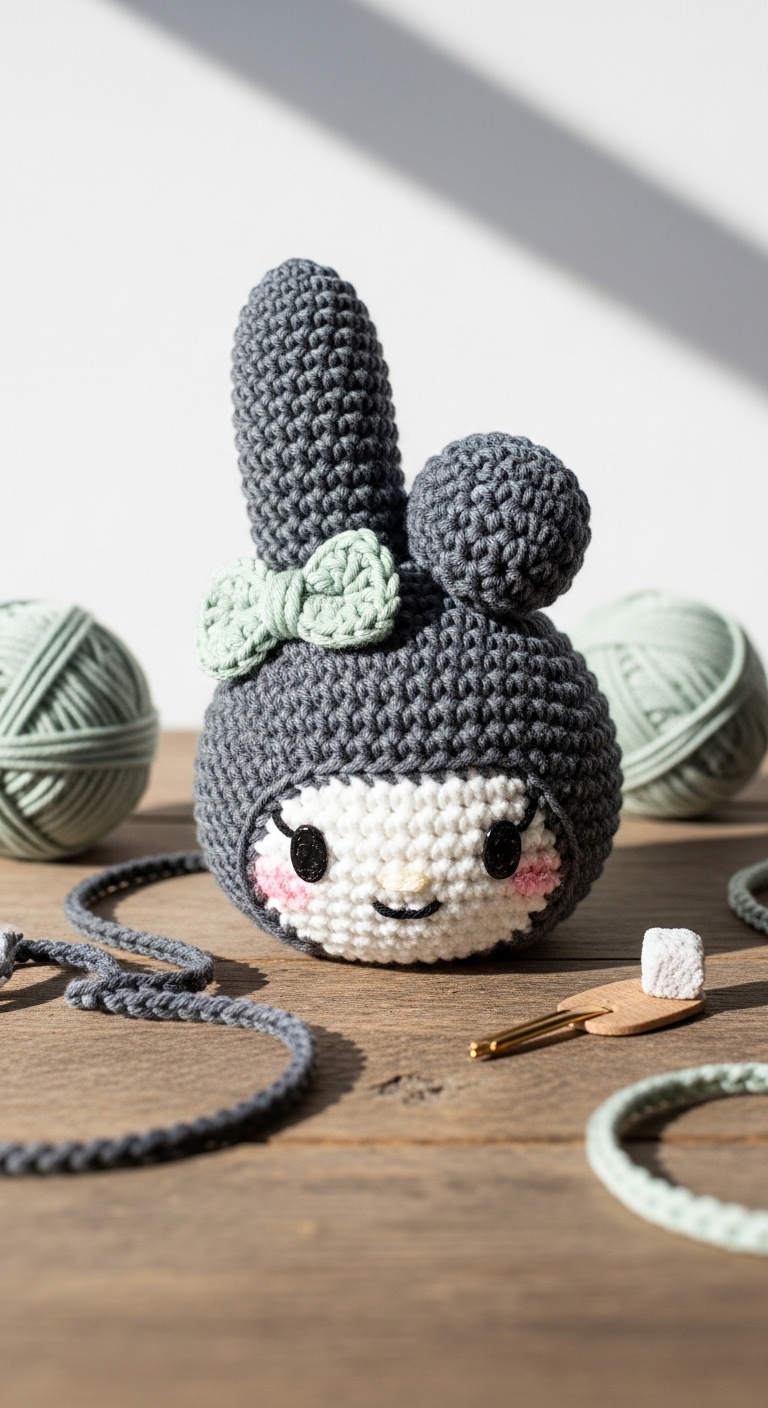
Welcome to the delightful world of crocheting your very own My Melody plushie! This charming creation stands at approximately 10 inches tall, making it the perfect size for cuddles, display, or as a thoughtful gift. Using a combination of soft yarns in pastel pink, cream, and a touch of lavender, this project will not only bring joy to the maker but also to anyone who receives it. The color palette is sophisticated yet playful, appealing to adult crocheters looking to create something unique.
Crocheting My Melody is not only a fun project but also a quick one! With straightforward rounds and minimal complex stitches, this pattern is designed to be beginner-friendly, allowing novice crafters to dive in with confidence. It’s an ideal gift for friends, family, or even as a special treat for yourself. Plus, with its cute and whimsical design, it makes for a perfect seasonal decoration or a delightful companion year-round.
3. Materials Needed
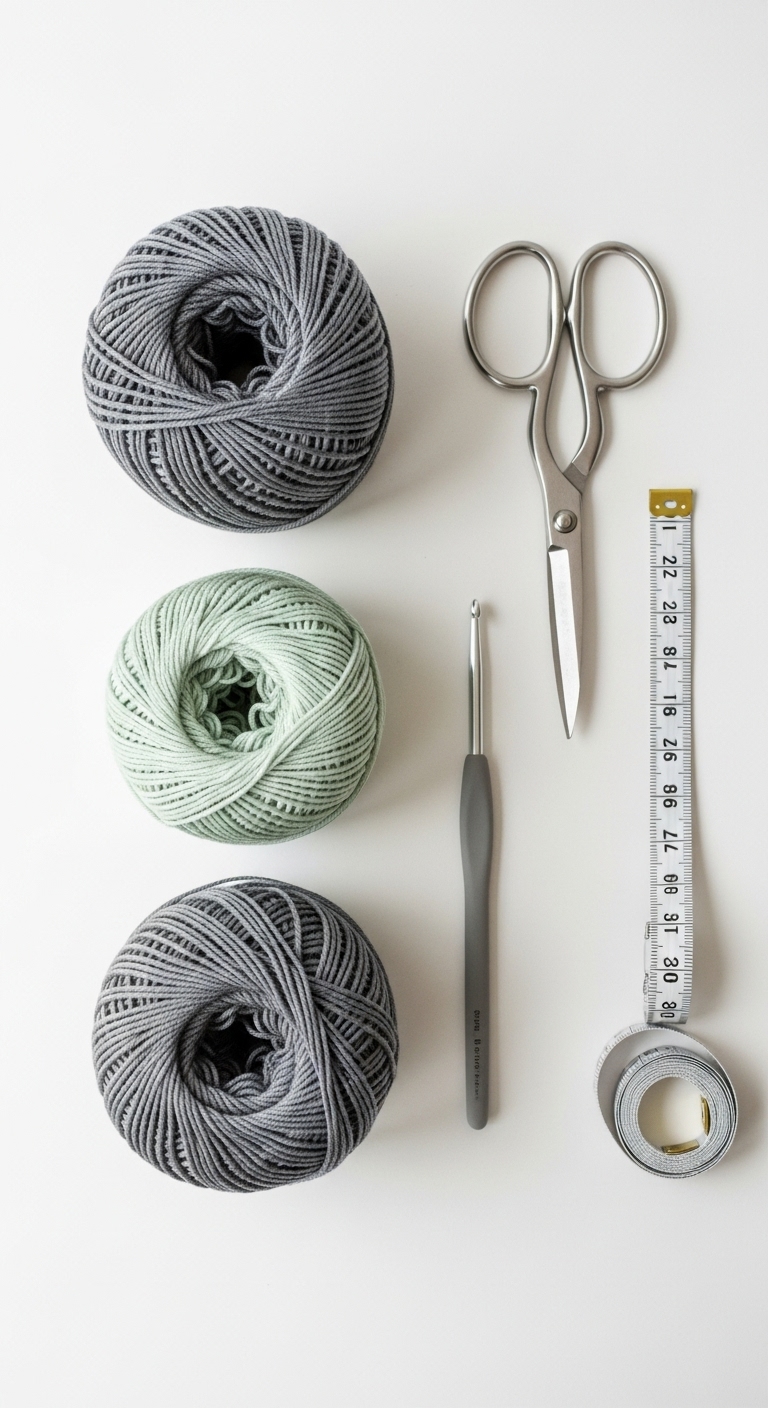
– Yarn: Worsted weight yarn in pastel pink (approximately 200 yards), cream (approximately 50 yards), and lavender (approximately 20 yards)
– Hook: 3.5mm or 4.0mm crochet hook
– Eyes: Safety eyes (10mm) OR black embroidery thread for embroidery
– Stuffing: Polyester fiberfill stuffing
– Needle: Tapestry needle for sewing
– Marker: Stitch marker
– Optional extras: Pipe cleaners (for ear structure), blush for cheeks
4. Designer Notes / Tips
When crocheting My Melody, you’ll primarily use single crochet stitches, which offer a lovely texture. Aim for a firm but not overly tight tension to ensure your plushie holds its shape while remaining cuddly. For stuffing, consider a medium density—enough to give your plushie a nice shape without it being too stiff.
When assembling the plushie, make sure to join pieces securely, using a whip stitch or slip stitch for a seamless look. If you’re new to stuffing, try placing the stuffing in gradually, ensuring each part is evenly filled. For yarn substitutions, any worsted weight yarn will work, but it’s best to stick with softer fibers for a plushie.
Gauge isn’t critical for this project, but if you wish to maintain size consistency, a tension swatch is a good idea. For safety considerations, particularly if gifting to young children, ensure that all embellishments are securely attached and consider using embroidery instead of safety eyes.
5. Pattern Instructions
For Plushies:
Head:
Body:
Arms:
Legs:
Ears:
– Make 2:
Assembly:
– Position the safety eyes on the head between rounds 5 and 6, approximately 5 stitches apart.
– Sew the head to the body using the long tail.
– Attach the arms and legs securely to the body, then add the ears at the top of the head.
– Add a little blush for rosy cheeks if desired, and weave in any loose ends.
6. Closing & Social Engagement
I hope you enjoy crafting your My Melody plushie as much as I enjoyed designing this pattern! Don’t forget to share your version in the comments below—I’m excited to see your unique color combinations and styles. What colors will you choose for your My Melody? Share your finished plushie on social media and tag me so I can celebrate your beautiful work!